
In the middle of a hectic morning, I often find myself craving something sweet and grounding, but time is never on my side. These no-bake oat squares are my quick fix—a little morsel that satisfies that urge without the fuss of baking. They come together in no time, and the comforting aroma of oats mixed with honey and peanut butter makes the kitchen smell like a cozy hug.
What I love most is how adaptable and forgiving they are. No fancy ingredients, no oven needed—just good, honest stuff that you probably already have lurking in your pantry. On those mornings when everything feels chaotic, these squares are a small, sweet victory, a reminder that sometimes, simplicity is the best kind of comfort.
Focusing on how this no-bake oat squares recipe offers a quick, satisfying fix for busy mornings or unexpected sweet tooth moments, emphasizing its simplicity and the comforting nostalgia it brings during hectic days.
The story behind this recipe
- This recipe was born out of late-night cravings and a need for something quick, honest, and satisfying. I was tired of the usual cookie baking mess, and one night, I threw together what I had—oats, honey, peanut butter—and it just clicked. Those first bites brought back childhood memories of simple snacks, but with a grown-up twist of richness and chewiness.
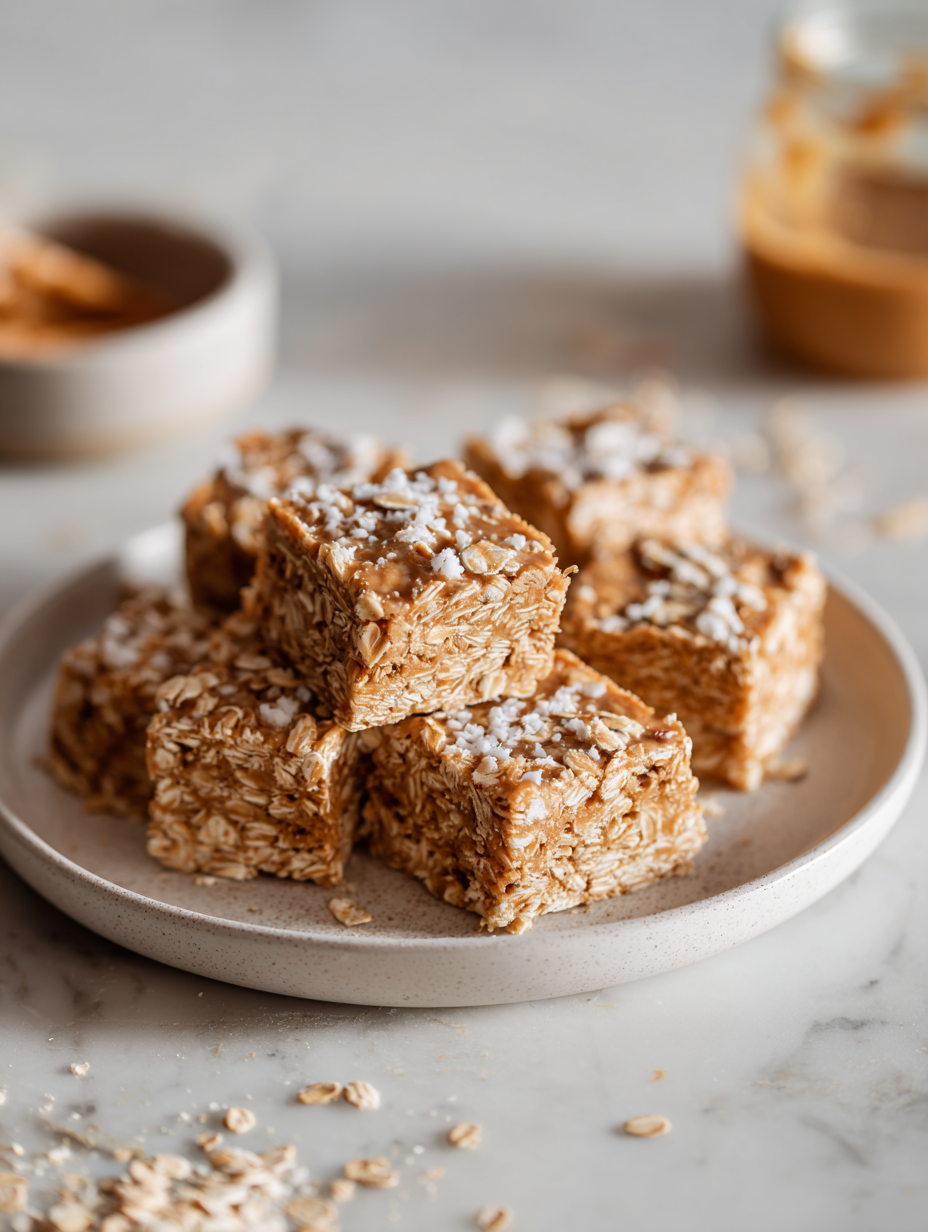
- Over time, it became my go-to for mornings when I run out of time but still want something wholesome. I love how forgiving and flexible it is—add nuts, dried fruit, or even a sprinkle of sea salt. It’s one of those recipes that feels like a warm hug from the pantry, especially on busy or stressful days.
- heading
- The story behind this recipe
Ingredient breakdown: key components
- Old-fashioned rolled oats: I love how they add that hearty chew and nutty aroma, but if you prefer a softer bite, try quick oats—they’ll still hold the shape but feel a bit more tender.
- Honey: It gives these squares their sticky, glossy sheen and a natural sweetness that’s not cloying. For a deeper caramel flavor, a drizzle of maple syrup works beautifully, though it shifts the flavor slightly.
- Peanut butter: I use creamy, but crunchy adds nice texture if you’re into that. If you want a hint of smoky depth, try almond butter or add a touch of smoked paprika—just a pinch.
- Sweetener options: I stick with honey because it’s reliable and sticky, but agave syrup or brown rice syrup can be subtler swaps. If you prefer less sweetness, reduce the honey slightly.
- Add-ins: Nuts, dried fruits, or chocolate chips are my go-tos. Toasted nuts bring out a richer flavor and crunch, while dried cranberries add tartness—play around based on what you have!
- Binding agent: I find that a little coconut oil helps everything come together and adds a subtle richness—skip if you want to keep it oil-free, but expect a slightly drier texture.
- Optional toppings: A sprinkle of sea salt or a drizzle of dark chocolate on top can elevate the flavor. Use sparingly—these small touches make a big difference.
Spotlight on key ingredients
Old-fashioned rolled oats:
- I love how they add that hearty chew and nutty aroma, but if you prefer a softer bite, try quick oats—they’ll still hold the shape but feel a bit more tender.
- Honey: It gives these squares their sticky, glossy sheen and a natural sweetness that’s not cloying. For a deeper caramel flavor, a drizzle of maple syrup works beautifully, though it shifts the flavor slightly.
Peanut butter:
- I use creamy, but crunchy adds nice texture if you’re into that. If you want a hint of smoky depth, try almond butter or add a touch of smoked paprika—just a pinch.
- Sweetener options: I stick with honey because it’s reliable and sticky, but agave syrup or brown rice syrup can be subtler swaps. If you prefer less sweetness, reduce the honey slightly.
Notes for ingredient swaps
- Sweeteners: Maple syrup or agave nectar can replace honey for a different flavor, but may alter the sticky texture slightly.
- Nut Butters: Almond or cashew butter work well if peanut butter isn’t available, though they bring their own distinct flavor notes.
- Oats: Quick oats can be used instead of rolled oats for a softer, more tender bite; just reduce the mixing time slightly.
- Add-ins: Dried fruit like cranberries or chopped dried apricots add tartness or sweetness; nuts like walnuts or pecans add crunch.
- Oil: Coconut oil can substitute for butter or margarine, adding richness and a subtle coconut aroma; skip if you want less fat.
- Chocolate: Chocolate chips or chunks can be swapped with cacao nibs or white chocolate for a different treat profile, but keep an eye on sweetness balance.
- Flavor Enhancers: A pinch of sea salt or vanilla extract can elevate the overall flavor—use sparingly to avoid overpowering.
Equipment & Tools
- 20cm (8-inch) square baking dish: Holds the mixture while setting and makes slicing easy.
- Mixing bowls: Combine ingredients evenly.
- Spatula: Mix and press the mixture into the dish.
- Parchment paper: Prevent sticking and for easy removal.
- Sharp knife: Cutting into squares cleanly.
Step-by-step guide to no-bake oats
- Gather your equipment: 20cm (8-inch) square baking dish, mixing bowls, spatula, and parchment paper.
- Line the baking dish with parchment, leaving overhang for easy removal. Set aside.
- In a large mixing bowl, combine 2 cups rolled oats, ½ cup chopped nuts (if using), and a pinch of salt.
- In a small saucepan, gently heat ½ cup honey and ¼ cup creamy peanut butter over low heat (about 30°C/86°F). Stir until smooth and runny, about 2 minutes.
- Pour the warm honey-peanut mixture over the oats. Mix well with a spatula until all oats are coated and sticky, about 3 minutes.
- Transfer the mixture into the prepared dish. Press firmly with the back of a spatula or clean hands to flatten evenly.
- Smooth the surface, ensuring all mixture is compacted. If the mixture feels loose, add a touch more honey and press again.
- Place in the fridge to chill. Rest for at least 2 hours, or ideally overnight, until firm and set.
- Once set, lift out using the parchment overhang. Cut into 12 even squares with a sharp knife.
- Serve directly or store in an airtight container. For crispness, keep at room temperature for a day, or refrigerate for longer shelf life.
Chill the squares in the fridge for at least 2 hours or overnight. Once firm, lift out with parchment, cut into squares, and serve. Store in an airtight container at room temperature for up to 2 days, or refrigerated for longer freshness.
How to Know It’s Done
- The mixture should be sticky and hold together when pressed.
- The edges should be firm and slightly golden when chilled.
- The squares should be firm and not crumbly when cut.
No-Bake Oat Squares
Ingredients
Equipment
Method
- Line your baking dish with parchment paper, leaving overhang on the sides for easy lifting later.
- In a large mixing bowl, combine the oats and chopped nuts, stirring to distribute evenly.
- In a small saucepan, gently heat the honey and peanut butter over low heat, stirring constantly until smooth and slightly runny, about 2 minutes. The mixture should be glossy and fragrant.
- Pour the warm honey-peanut mixture over the oats and nuts, using a spatula to fold and coat everything thoroughly. The mixture should become sticky and glossy, with oats starting to clump together.
- Transfer the mixture into your prepared baking dish, pressing it firmly with the back of a spatula or your hands to create an even, compact layer. This helps the squares hold together nicely.
- Once evenly pressed, smooth out the top surface. Place the dish in the fridge and chill for at least 2 hours or overnight until the mixture is firm and set.
- After chilling, lift the set mixture out of the dish using the parchment overhang, then place on a cutting board.
- Using a sharp knife, cut into 12 even squares. Wipe the knife between cuts for clean edges.
- Serve the squares immediately or store in an airtight container at room temperature for up to 2 days, or refrigerated for longer freshness.
Pro tips for perfect oat squares
- Bolded mini-head: Use a light hand → Too much pressure can crush the oats, so press firmly but gently to keep the texture intact.
- Bolded mini-head: Chill for flavor → Rest in the fridge for at least 2 hours to let flavors meld and squares set perfectly.
- Bolded mini-head: Mix until glossy → Stir the honey and peanut butter until smooth and shiny before combining with oats for even coating.
- Bolded mini-head: Watch the heat → When melting honey and nut butter, keep the heat low to prevent burning and smoky flavors.
- Bolded mini-head: Add extras last → Fold in nuts or dried fruits after initial mixing to keep their texture vibrant and prevent sogginess.
- Bolded mini-head: Use parchment overhang → Helps lift the set squares easily without sticking or crumbling, saving time and mess.
- Bolded mini-head: Cut with a sharp knife → For clean, neat squares, wipe the blade between cuts, especially if chocolate chips are involved.
Common mistakes and how to fix them
- FORGOT to measure ingredients precisely? Use standard cups and spoons for consistency.
- DUMPED too much honey? Reduce or balance with extra oats to prevent stickiness.
- OVER-TORCHED the mixture? Lower heat and stir constantly to avoid burning and bitterness.
- MISSED the chilling step? Ensure squares are fully set before cutting to prevent crumbling.
Quick fixes and pantry swaps
- If the mixture is too dry, splash in a teaspoon of warm water and stir until cohesive.
- When the squares crumble, patch with a little extra honey and press firmly to reassemble.
- Splash a tiny bit of milk if the squares are too hard straight from fridge—will soften as they sit.
- When mixture is sticky and hard to spread, lightly dampen your spatula or hands for easier pressing.
- If the oats feel undercooked or chewy, microwave the mixture for 10 seconds to soften before pressing.
Prep, store, and reheat tips
- Prepare the mixture ahead: Combine oats, nut butter, and honey the night before for a quicker assembly.
- Store the assembled squares in an airtight container at room temperature for up to 2 days; refrigerate for up to a week, which helps firm them up and enhances flavor melding.
- The squares develop a richer, more cohesive taste after a day or two in the fridge, with the oats soaking up the sweetness and nutty aroma.
- Reheat slightly in the microwave for 10-15 seconds if you prefer a warmer, softer bite—listen for a slight crackle and smell warm oats and honey.
Top questions about no bake oat squares
1. Can I substitute honey in this recipe?
Yes, you can swap honey for maple syrup or agave nectar. The texture stays sticky, but the flavor shifts slightly towards a more caramel or neutral sweetness.
2. Can I use different nut butters?
Absolutely. Using crunchy peanut butter adds texture, while almond or cashew butters offer different flavor nuances. Just watch the consistency, as thicker nut butters might need a touch of warm water or oil.
3. Can I replace rolled oats with quick oats?
Yes, quick oats work fine and make the squares softer. Just reduce mixing time slightly to avoid breaking the oats apart too much.
4. What if the mixture is too sticky or dry?
If your mixture feels too sticky, add a few more oats. If it’s too dry, splash in a tiny bit of warm water or honey to loosen it up.
5. How long should I chill the squares?
Chill the squares in the fridge for at least 2 hours or overnight. They become firmer and flavors meld, making slicing easier and cleaner.
6. Can I customize the add-ins?
Yes, you can add dried fruits, chocolate chips, or chopped nuts for extra flavor and texture. Just fold them in after initial mixing to keep their bite.
7. How should I store leftovers?
Store the squares in an airtight container at room temperature for up to 2 days, or refrigerate for a week. Reheat briefly in the microwave if you prefer them softer.
8. How do I cut the squares cleanly?
If the squares are sticking to the knife, wipe the blade between cuts or lightly oil it for clean slices. For crumbling, gently press the mixture back together.
9. How do I know when they’re done?
When the mixture smells nutty and slightly caramelized and the edges are golden after chilling, it’s ready to cut and serve.
10. What if the mixture is too dry or wet?
If the mixture feels too dry before pressing, splash a teaspoon of warm water or honey. If too wet, add more oats to balance.
These no-bake oat squares are a quiet staple in my kitchen, especially on mornings when time slips away too fast. There’s something about that chewy, nutty bite that feels like a small victory amid chaos. They remind me that simple, honest ingredients can come together to create comfort, even in a rush.
Whenever I need a quick sweet fix or want to share a homemade treat without much fuss, these squares are my go-to. They’re imperfect, adaptable, and always satisfying—proof that sometimes, the simplest recipes are the ones that stick around the longest.

I’m Emily Richardson, the heart and soul behind Playing with Flavors. Cooking isn’t just a hobby for me – it’s a passion that I’ve cultivated for years, and it’s become the driving force of my life.
From the kitchen of my cozy café to the pages of this blog, every dish I create is a reflection of my love for food and the joy it brings to people.


