
This no-bake chocolate crunch bars recipe is my go-to when I need something sweet and quick, especially on days when the oven feels like too much effort. It’s a messy, honest kind of recipe—no fancy ingredients, just what’s usually lurking in my pantry and fridge. I love how it turns simple staples into a treat that’s almost too easy to make, but always satisfying.
There’s a certain charm in these bars—they’re rough around the edges, a bit chewy, with that irresistible crunch from cereal and a glossy, rich chocolate coating. It’s a recipe born from chaos in the kitchen, a way to tame leftover chocolate and cereal in one fell swoop. Plus, they’re great for when you want a quick fix that doesn’t involve turning on the oven or waiting for dough to chill.
This recipe is my secret weapon for when I need a quick, satisfying treat that doesn’t demand turning on the oven or fussing with complicated ingredients. It’s also a perfect way to use up leftover cereal and chocolate bits without waste, turning chaos into something deliciously manageable.
The story behind this recipe
- This recipe was born out of a lazy afternoon when I rummaged through my pantry and found a forgotten bag of cereal and a bar of half-melted chocolate. It reminded me of childhood afternoons spent sneaking bits of candy and creating simple, messy treats. I wanted something that didn’t require heating up the kitchen but still felt indulgent.
- One day, I decided to just wing it—mixing crunchy cereal with melted chocolate, pressing it into a pan, and letting it set. The result was a crispy, chewy bar that’s oddly satisfying and easy to whip up at a moment’s notice. It’s become my fallback when I need a quick sweet fix without fuss or oven time.
- heading: ‘The story behind this recipe’
Ingredient breakdown: key components
- Chocolate: I prefer a good quality semi-sweet or dark chocolate that melts smoothly and offers depth. Skip the cheap stuff—your bars will thank you with a richer flavor.
- Cereal: I use crispy rice cereal for that perfect crunch, but you can swap in cornflakes or even crushed graham crackers if you want a different texture or flavor punch.
- Butter: I melt it gently to avoid browning, giving the chocolate a silky sheen. If you’re dairy-free, try coconut oil—just note it adds a subtle coconut aroma.
- Sweetener: I find a touch of honey or maple syrup helps the mixture stick together better and balances the chocolate’s bitterness. Skip sugar if you prefer a less sweet treat.
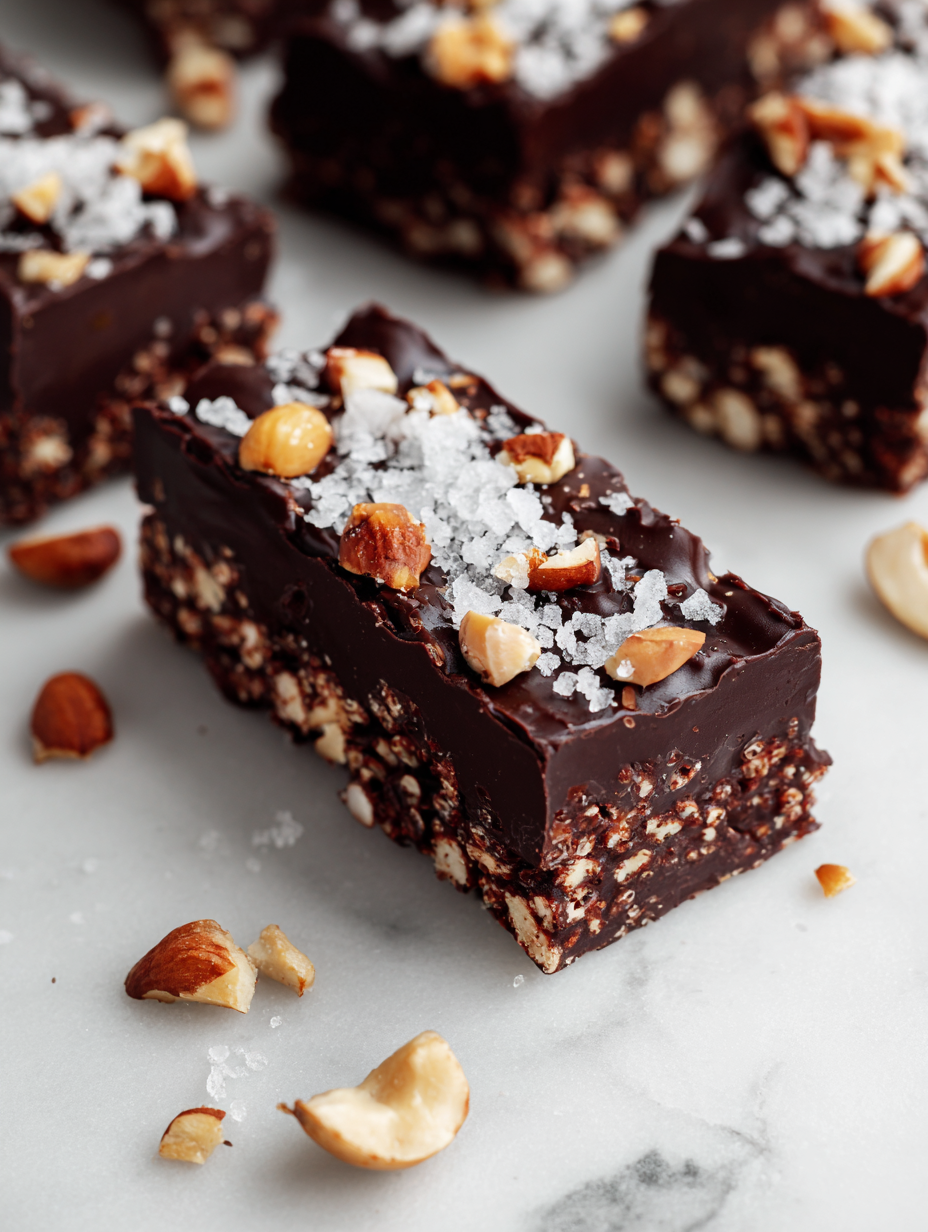
- Add-ins: Nuts, dried fruit, or even a sprinkle of sea salt can personalize your bars. I love the contrast of salty with the sweet crunch, especially with toasted nuts.
- Optional flavorings: A splash of vanilla or a pinch of cinnamon can add warmth. Keep it light—these are meant to be simple, after all.
- Optional toppings: Drizzle extra chocolate or sprinkle crushed candies on top before setting. It’s a visual payoff and adds that extra layer of indulgence.
Spotlight on key ingredients
Chocolate:
- I prefer a good quality semi-sweet or dark chocolate that melts smoothly and offers depth. Skip the cheap stuff—your bars will thank you with a richer flavor.
- Cereal: I use crispy rice cereal for that perfect crunch, but you can swap in cornflakes or even crushed graham crackers if you want a different texture or flavor punch.
- Butter: I melt it gently to avoid browning, giving the chocolate a silky sheen. If you’re dairy-free, try coconut oil—just note it adds a subtle coconut aroma.
Cereal:
- The crispness is key—stays crunchy if you don’t overmix or leave it sitting too long. Try different cereals for varied texture and flavor.
- Butter: Melts smoothly and helps everything bind together. Too much can make the bars greasy, so stick to the recommended amount.
- Optional add-ins: Nuts or dried fruit add texture and flavor, but keep them in moderation to avoid overwhelming the crunch.
Notes for ingredient swaps
- Dairy-Free: Coconut oil or vegan butter can replace regular butter for a rich, slightly coconutty flavor and smooth melt.
- Chocolate: Dark chocolate or even a good quality cacao nibs melted in can swap in, adding depth or a more bitter edge.
- Sweetener: Honey, maple syrup, or agave nectar work instead of sugar, bringing varying degrees of floral or smoky notes.
- Cereal: Cornflakes, bran flakes, or crushed graham crackers can stand in for rice cereal, changing crunch and flavor profiles.
- Add-ins: Nuts or dried fruit can be omitted or swapped—try toasted almonds or dried cranberries for different bites.
- Flavorings: Vanilla extract or a pinch of cinnamon can enhance the chocolate, or skip for a more straightforward taste.
- Toppings: Crushed candies or a drizzle of white chocolate can add visual interest and extra sweetness.
Equipment & Tools
- 20×20 cm (8×8 inch) pan: To set and shape the bars
- Silicone spatula: For folding and pressing the mixture
- Microwave-safe bowl: To melt the chocolate safely and evenly
- Sharp knife: To cut the bars cleanly
Step-by-step guide to no bake bars
- Equip yourself with a 20×20 cm (8×8 inch) square pan, a silicone spatula, and a microwave-safe bowl. The pan is for setting, spatula for mixing, bowl for melting.
- Break 200g (7 oz) of good-quality chocolate into small pieces. Microwave in 30-second bursts, stirring after each until smooth. About 1-2 minutes total.
- In a large bowl, pour 3 cups (about 100g) of crispy rice cereal. Set aside for now.
- Once chocolate is melted, add 2 tablespoons (30g) of butter or coconut oil. Stir until glossy and smooth. Smells rich and inviting.
- Pour the melted chocolate mixture over the cereal. Use the spatula to fold gently until evenly coated. Watch for a shiny, sticky appearance.
- Transfer the mixture into your prepared pan. Press down firmly with the back of the spatula or a piece of parchment paper to compact. Aim for an even layer, about 1.5 inches thick.
- Place the pan in the fridge. Let it chill for at least 2 hours or until firm. The chocolate should be set and the bars hold shape when pressed.
- Once set, remove from fridge. Use a sharp knife to cut into 12-16 bars, depending on your preferred size. The edges should be clean and crispy.
- Finish by melting a few squares of chocolate for drizzling if desired. Drizzle over the bars for a glossy finish. Let set for 10 minutes at room temp.
- Plate and enjoy. These bars are best eaten within 3 days if kept at room temp, or up to a week refrigerated.
Chill the bars in the fridge for at least 2 hours until firm. Cut into desired sizes and drizzle with extra melted chocolate if you like. Serve directly from the fridge or at room temperature for softer texture.
How to Know It’s Done
- Chocolate is fully melted, smooth, and glossy.
- Cereal is evenly coated and mixture is sticky but manageable.
- Bars are firm and hold shape when pressed after chilling.
No-Bake Chocolate Crunch Bars
Ingredients
Equipment
Method
- Place the chocolate pieces into a microwave-safe bowl. Microwave in 30-second bursts, stirring each time, until the chocolate is smooth and glossy, about 1-2 minutes total. The aroma should be rich and inviting.
- Add the butter or coconut oil to the melted chocolate. Stir until fully incorporated and the mixture is shiny. This creates a silky, smooth coating for the cereal.
- Pour the crispy rice cereal into a large mixing bowl. Gently fold the melted chocolate mixture into the cereal using a silicone spatula, taking care not to crush the cereal too much. The mixture should look evenly coated and sticky.
- Transfer the mixture into your prepared pan. Use the back of the spatula or a piece of parchment paper to press it down firmly, creating an even layer about 1.5 inches thick. This helps the bars hold together nicely.
- Place the pan in the refrigerator and chill for at least 2 hours, or until the mixture is fully set and firm. The chocolate should be glossy and hold its shape when pressed.
- Once chilled, remove the pan from the fridge. Use a sharp knife dipped in hot water to cut into 12-16 bars, depending on your preferred size. The edges should be clean and the bars crisp.
- Optionally, melt a few extra squares of chocolate and drizzle over the bars for a glossy, decorative finish. Let the drizzle set for about 10 minutes at room temperature.
- Enjoy these bars immediately or store them in an airtight container at room temperature for up to 3 days, or refrigerated for up to a week. They’re best served slightly soft or at room temperature for maximum crunch and flavor.
Notes
Tips and tricks for perfect bars
- Use high-quality chocolate for a glossy, smooth melt that coats evenly.
- Gently fold in cereal to keep the crunch intact and avoid crushing the flakes.
- Warm the butter or coconut oil just until melted to prevent grease and ensure a silky coating.
- Press the mixture firmly into the pan for even thickness and a clean cut afterward.
- Chill the bars thoroughly—at least 2 hours—until they’re firm and hold their shape.
- Use a sharp knife dipped in hot water to get clean, smooth cuts through the set bars.
- Drizzle melted chocolate on top before chilling for a shiny, professional finish.
Common mistakes and how to fix them
- FORGOT to check chocolate temperature → Use a gentle heat to prevent burning.
- DUMPED in too much cereal → Mix gradually to avoid overly dry bars.
- OVER-TORCHED chocolate → Remove from heat immediately if it starts to smell burnt.
- MISSED chilling time → Let the bars set fully in the fridge for clean cuts.
Quick fixes and pantry swaps
- When chocolate seizes, splash in a teaspoon of hot water and stir gently.
- If mixture is too dry, add a few drops of melted butter or honey.
- DUMPED in too much cereal? Press firmly and add a tiny bit more melted chocolate.
- Over-torched chocolate? Remove from heat immediately and start with fresh chocolate if burnt smell persists.
- Splash a little extra melted chocolate on top for a quick fix if bars look dull or uneven.
Prep, store, and reheat tips
- You can prepare the mixture a day in advance; just keep it covered in the fridge to prevent drying out. The chocolate will develop a richer aroma overnight.
- Store the completed bars in an airtight container at room temperature for up to 3 days, or refrigerate for up to a week. The cold keeps them firm and the chocolate glossy.
- Reheating isn’t necessary; if you prefer softer bars, let refrigerated ones sit at room temp for 10-15 minutes until slightly pliable. Expect a crisp crunch when cold, a softer bite when warm.
- For best texture, avoid freezing unless wrapped tightly; the chocolate can develop a dull sheen upon thawing. If frozen, consume within a month and thaw slowly in the fridge.
Top questions about no bake bars
1. How do I melt chocolate without burning it?
You can melt chocolate in short bursts in the microwave, stirring in between, until smooth and shiny.
2. What’s the best way to press the mixture into the pan?
Use a sturdy pan and press the mixture firmly to get clean, even bars after chilling.
3. How long should I chill the bars before cutting?
Refrigerate for at least 2 hours until firm, then cut with a sharp knife dipped in hot water.
4. How should I store these bars?
Store in an airtight container at room temperature for up to 3 days, or refrigerate for a week.
5. What do I do if my mixture is too dry or crumbly?
If the mixture is too dry, add a small splash of melted butter or honey to loosen it up.
6. Can I use different cereals or add-ins?
You can swap in different cereals like cornflakes or crushed graham crackers for varied crunch and flavor.
7. What kind of chocolate works best?
Use high-quality, semi-sweet or dark chocolate for a richer, smoother coating and better flavor.
8. How do I prevent my chocolate from seizing?
To prevent the chocolate from seizing, melt it gently and avoid overheating or getting water in it.
9. How can I get clean, smooth cuts?
For a glossy finish and easier cutting, dip your knife in hot water before slicing.
10. How long do these bars stay fresh?
These bars are best enjoyed fresh but can be kept in the fridge for up to a week for optimal texture.
These no-bake chocolate crunch bars are a reminder that sometimes, the simplest ingredients come together to create something truly satisfying. They’re perfect for those busy days or when you need a quick, no-fuss treat that still feels indulgent.
Sharing these bars with friends or family feels like passing along a little piece of comfort—crunchy, rich, and just a bit chaotic in the best way. They’re a small, sweet moment that’s easy to whip up and hard to forget.

I’m Emily Richardson, the heart and soul behind Playing with Flavors. Cooking isn’t just a hobby for me – it’s a passion that I’ve cultivated for years, and it’s become the driving force of my life.
From the kitchen of my cozy café to the pages of this blog, every dish I create is a reflection of my love for food and the joy it brings to people.


