
Sometimes, I just need a treat that I can throw together without heating up the kitchen. This no-bake chocolate oat slice fits that bill perfectly—it’s messy, honest, and always satisfying. I love how it becomes a little ritual, a moment to pause and make something that feels like a small victory.
There’s no fancy equipment needed, just a bowl and a fridge. It’s the kind of recipe that doesn’t ask for perfection, just honest, simple ingredients and a bit of patience. Sometimes, that’s exactly what I need after a long day—something sweet, quick, and a little chaotic to pull together.
This recipe is my go-to for those moments when I need something sweet, quick, and satisfying without turning on the oven. It’s a messy, honest process—things don’t always go perfectly, but that’s part of the charm. I love how it’s become my kind of therapy, a little chaotic and a lot comforting.
The story behind this recipe
This recipe was born out of a lazy afternoon in the kitchen, where I was craving something sweet but didn’t want to turn on the oven. I remember the smell of melting chocolate mingling with the toasted oats—simple, honest ingredients coming together in a way that felt almost instinctive. It’s become a bit of a ritual for me, a little messy but always comforting, especially when I need a quick fix that’s honest and satisfying. Sometimes, the best ideas come from just messing around in the kitchen and seeing what sticks.
Key Ingredient Insights
- Rolled oats: I love the chewy texture they bring—toast them lightly to deepen their nutty flavor, or keep them raw for more bite.
- Dark chocolate: It’s the rich, bitter-sweet core; try a bar with a high cocoa content for that intense, glossy finish that melts smoothly in your mouth.
- Butter: Adds that creamy, glossy sheen—use good-quality butter for flavor; if you’re dairy-free, coconut oil works but with a slightly different richness.
- Honey or golden syrup: This binds everything together—go for a runny honey if you want a thicker, more floral aroma, or swap with maple syrup for a smoky hint.
- Vanilla extract: A splash lifts the whole thing—use real vanilla for depth, or almond extract for a more pronounced, aromatic note.
- Coconut flakes (optional): For a tropical crunch—toast them until golden to add smoky sweetness, or skip if you prefer a smoother slice.
- Salt: Just a pinch—brings out the chocolate’s richness and balances the sweetness, don’t skip it unless you’re going fully vegan.
Spotlight on key ingredients
Dark chocolate:
- I love how it melts into a glossy, oozy pool—try a high cocoa content for that deep, bittersweet punch.
- Chocolate: It’s the rich, bitter-sweet core; try a bar with a high cocoa content for that intense, glossy finish that melts smoothly in your mouth.
Rolled oats:
- I toast mine lightly for a nutty aroma and crunch, but raw oats give a chewier bite—your call.
- Oats: Toast them lightly to deepen their nutty flavor, or keep them raw for more bite.
Ingredient Swap Ideas
- Dairy-Free: Swap butter for coconut oil—adds a subtle coconut aroma and slightly softer texture.
- Sweetener: Use agave syrup instead of honey—smooth and neutral, with a touch of caramel flavor.
- Chocolate: Choose dairy-free dark chocolate—rich, intense, and melts just as smoothly.
- Oats: Try rolled spelt or barley flakes—different grains, but still chewy and hearty.
- Add-ins: Incorporate chopped nuts or dried fruits—extra crunch and bursts of flavor, customize freely.
Equipment & Tools
- medium mixing bowl: To combine ingredients if needed for mixing or cooling.
- saucepan: To melt butter and chocolate gently without scorching.
- spatula: To stir ingredients and press the mixture into the pan.
- parchment paper: To line the pan for easy removal and clean slicing.
- sharp knife: To cut the set slice into neat squares.
Step-by-step guide to no bake slice
- Gather your equipment: a medium mixing bowl, a saucepan, a spatula, a 20cm/8-inch square baking pan, and parchment paper for lining.
- Line the pan with parchment paper, leaving some overhang for easy slicing.
- In the saucepan over low heat (about 60°C/140°F), melt the butter and dark chocolate together, stirring gently until smooth. This takes about 3-5 minutes.
- While melting, toast the oats lightly in a dry pan over medium heat for about 2-3 minutes until fragrant and slightly golden. Stir often and keep a close eye so they don’t burn.
- Remove the melted chocolate mixture from heat. Stir in honey (or golden syrup), vanilla extract, and a pinch of salt. Combine well, until glossy and uniform.
- Add the toasted oats (or raw if you prefer a chewier texture) to the chocolate mixture. Mix thoroughly until all oats are well coated and sticky.
- Pour the mixture into your prepared pan. Use the back of a spatula or a piece of parchment to press it down evenly, about 1.5-2cm thick. Press firmly to compact.
- Refrigerate uncovered for at least 2 hours. The slice should firm up and set completely. If in a rush, freeze for 1 hour but avoid overfreezing to prevent cracking.
- Once set, lift out of the pan using the parchment overhang. Slice into squares or rectangles with a sharp knife. Wipe the knife clean between cuts for neat edges.
- Serve immediately or store in an airtight container. For best texture, enjoy within 3-4 days if refrigerated, or freeze for up to a month.
Refrigerate uncovered for at least 2 hours until firm. Slice with a sharp knife, wipe clean between cuts. Serve directly from the fridge or at room temperature for softer bites.
How to Know It’s Done
- Chocolate is glossy and fully melted without lumps.
- Oats are toasted and fragrant, not burnt.
- The mixture is firm enough to hold together when pressed.
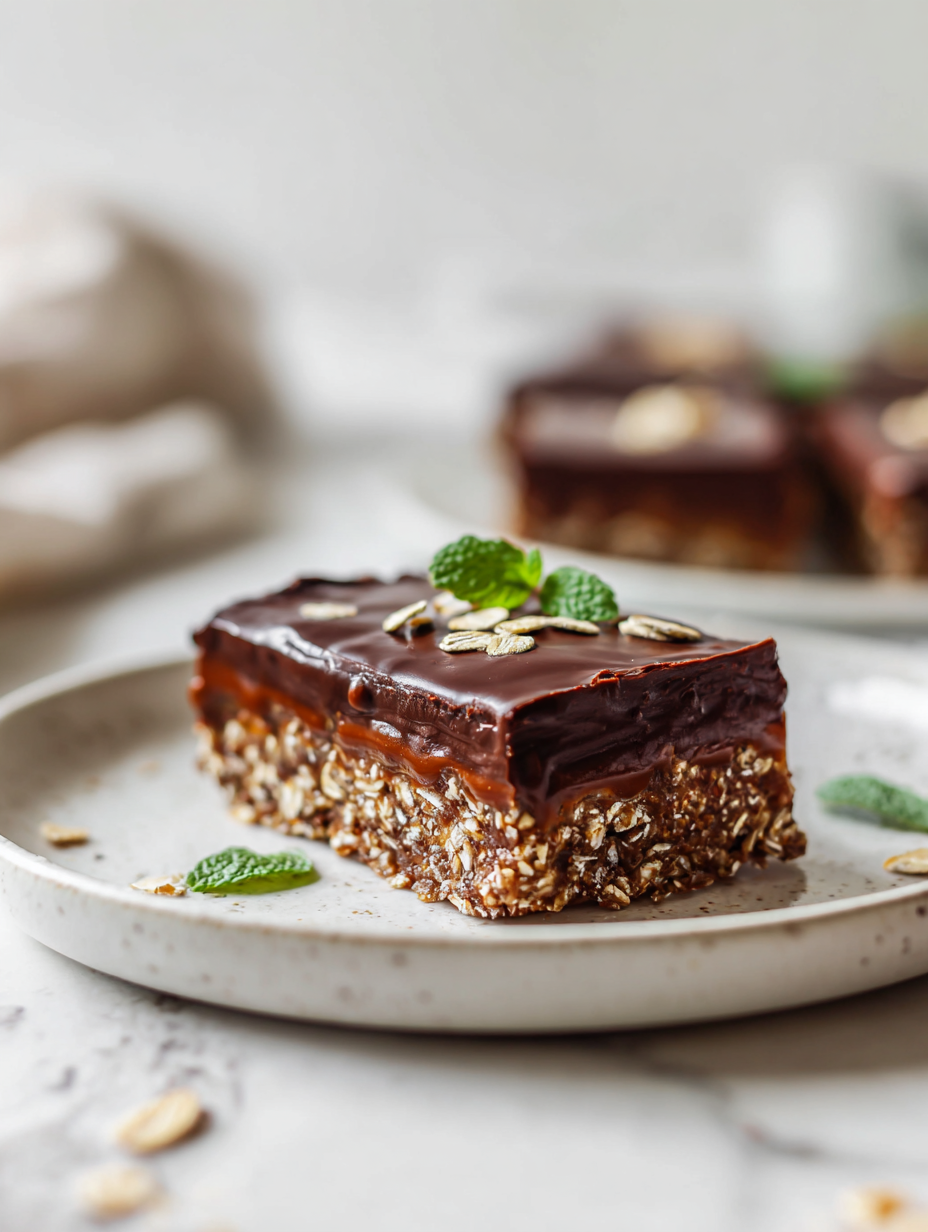
No-Bake Chocolate Oat Slice
Ingredients
Equipment
Method
- Line an 8-inch square baking pan with parchment paper, letting the edges overhang for easy removal.
- In a saucepan over low heat, melt the butter and dark chocolate together, stirring gently until smooth and glossy, about 3-5 minutes. The mixture should be bubbling gently and smell rich.
- While the chocolate mixture melts, toast the oats in a dry pan over medium heat for 2-3 minutes until they emit a nutty aroma and turn lightly golden, stirring often. This enhances their flavor and crunch.
- Remove the melted chocolate from heat and stir in the honey, vanilla extract, and a pinch of salt until the mixture is smooth and evenly combined.
- Pour the toasted oats into the chocolate mixture. Use a spatula to fold and stir until all the oats are thoroughly coated and sticky with the chocolate mixture.
- Transfer the mixture into the prepared pan. Press it down firmly with the back of a spatula or your hands, smoothing the top and compacting the mixture to about 1.5-2cm thickness.
- Refrigerate the pan uncovered for at least 2 hours, or until the slice is firm and set. For quicker results, you can freeze it for about an hour.
- Once set, lift the slice out of the pan using the parchment overhang. Place on a cutting board and cut into squares or rectangles with a sharp knife, wiping the blade clean between cuts for neat edges.
- Serve immediately or store in an airtight container in the fridge for up to 4 days. For longer storage, wrap tightly and freeze for up to a month. Enjoy the rich, chewy, and glossy treat!
Essential Tips for Best Results
- Bolded mini-head: Use cold, sharp knives — they slice cleanly through the slice without crushing it.
- Bolded mini-head: Chill your mixing tools — cold bowls and spatulas help keep the chocolate firm and prevent melting too quickly.
- Bolded mini-head: Toast oats lightly — bring out their nutty aroma and enhance texture, but don’t overdo it or they’ll burn.
- Bolded mini-head: Melt chocolate gently — low heat or double boiler keeps it glossy and prevents seizing.
- Bolded mini-head: Press firmly into the pan — use the back of a spoon or spatula to compact for a tidy, sliceable result.
- Bolded mini-head: Chill thoroughly — at least 2 hours in the fridge until set, for clean cuts and perfect texture.
- Bolded mini-head: Wipe your knife — clean between cuts to keep edges sharp and avoid smudging.
Common Mistakes and How to Fix Them
- FORGOT to measure ingredients accurately → Use a scale for consistent results.
- DUMPED hot chocolate into oats immediately → Let melted chocolate cool slightly before mixing.
- OVER-TORCHED the chocolate → Remove from heat as soon as it’s glossy to avoid bitterness.
- MISSED pressing the mixture firmly → Use the back of a spatula for even, compact pressing.
Quick Fixes and Pantry Swaps
- If chocolate seizes, splash in a tiny bit of warm milk to loosen it up.
- When oats are sticky, add a sprinkle of extra oats or a dash of coconut flour.
- DUMPED in too much honey? Fix with a few more oats and a pinch of salt.
- Over-torched chocolate? Patch it with a fresh batch, or try melting in a double boiler.
- Shield cracks in the slice by warming slightly before cutting, makes for cleaner edges.
Prep, store, and reheat tips
- Prepare the mixture and press it into the pan a day ahead for quicker assembly later. The flavors meld overnight, intensifying the chocolate aroma.
- Store the sliced slices in an airtight container in the fridge for up to 4 days. The cool temperature keeps them firm and preserves the glossy chocolate layer.
- Freeze for up to a month by wrapping slices tightly in plastic wrap and then in foil. Thaw in the fridge for a soft, chewy texture, or serve directly from frozen for a firmer bite.
- Reheat briefly in the microwave—10 seconds at a time—until just softens and the chocolate glistens again. Beware of overheating; it could turn grainy or crackle.
Top questions about no bake slices
1. Can I use milk chocolate instead of dark?
Use high-quality dark chocolate for a glossy, smooth melt and rich flavor that balances sweetness.
2. Is it okay to use milk chocolate?
Yes, but expect a sweeter, creamier slice with less intense chocolate flavor. Adjust sugar if needed.
3. What about vegan or dairy-free options?
Absolutely, coconut oil melts just like butter and gives a slightly different, tropical aroma and softer texture.
4. Can I make this gluten-free?
Use gluten-free oats if needed, and check other ingredients for gluten contamination if you’re sensitive.
5. How long does it need to set?
Chill the slice in the fridge for at least 2 hours until firm and glossy. If in a hurry, freeze for 1 hour.
6. Can I customize the ingredients?
Yes, you can add chopped nuts, dried fruits, or coconut flakes for extra texture and flavor variations.
7. How should I store leftovers?
Store in an airtight container in the fridge for up to 4 days, or freeze for up to a month.
8. What if the chocolate hardens or seizes?
If the chocolate seizes, splash in a little warm milk or coconut oil and stir until smooth.
9. How do I get clean slices?
Use a sharp knife, wipe it clean between cuts, and chill the slice beforehand for neat edges.
10. How can I make it softer or chewier?
For softer bites, let the slice sit at room temperature for 10-15 minutes before serving.
This no-bake chocolate oat slice is a reminder that simple ingredients can create something deeply satisfying. It’s perfect for those moments when I need a quick treat that’s honest and a little messy. Sometimes, the best recipes are the ones I stumble into, and this one always brings a little comfort to my day.
Sharing it with friends or just keeping a few squares in the fridge feels like a small act of kindness. It’s a bit chaotic, a bit imperfect, but always hits the right note—rich, chewy, and just sweet enough. That’s what makes it a regular in my kitchen, especially when I need something honest and easy.

I’m Emily Richardson, the heart and soul behind Playing with Flavors. Cooking isn’t just a hobby for me – it’s a passion that I’ve cultivated for years, and it’s become the driving force of my life.
From the kitchen of my cozy café to the pages of this blog, every dish I create is a reflection of my love for food and the joy it brings to people.


