
Searing scallops might seem straightforward, but getting that perfect balance of tender inside and golden crust takes a bit of finesse. It’s not just about high heat; it’s about timing and temperature control, which unlocks their sweetest, most delicate flavor. Once you master that rhythm, every scallop becomes a little celebration of texture and taste.
I’ve learned that the secret lies in patience—letting the pan heat up just right and watching for that moment when the crust is beautifully caramelized, but the inside still melts with each bite. It’s a quick process, but when done right, it’s almost meditative, the way the aroma of seared scallops fills the kitchen and promises something special.
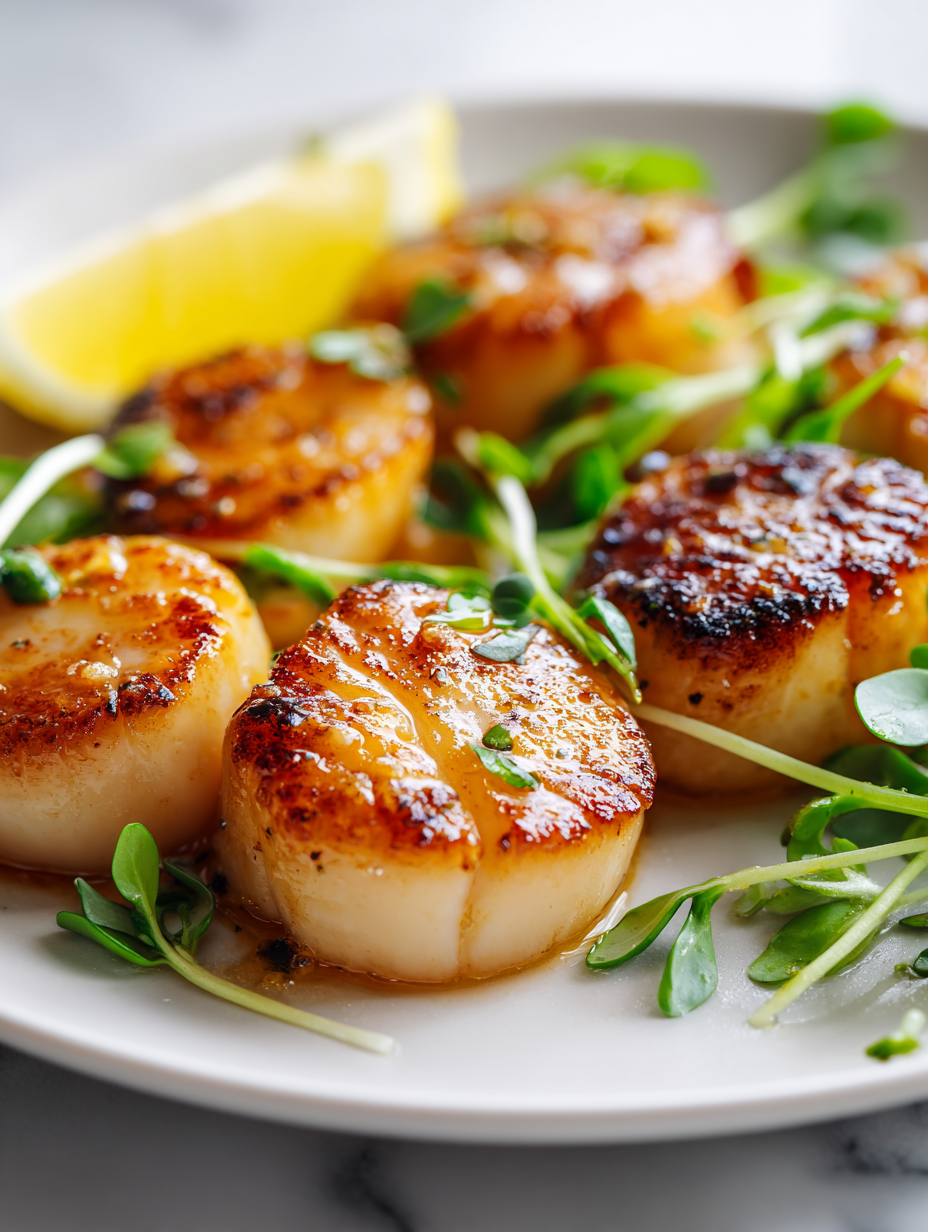
Focusing on how the timing and temperature control during pan searing unlock the scallops’ sweetest, most tender interior while achieving a perfectly crisp, caramelized crust.
Balancing heat and timing
- Watching the scallops sizzle in the pan always sparks a little joy—like catching a tiny, perfect moment of cooking magic.
- There’s a strange pride in getting that crust just right, especially after a few tries, when everything clicks into place.
- That first bite, with its crispy exterior and melt-in-your-mouth center, reminds me why I love cooking for myself.
- Sometimes, I feel a rush of relief when I finally master that delicate balance of heat and timing.
- Cooking scallops feels like a small victory—simple, quick, but deeply satisfying every time.
The inspiration behind this dish
- I remember the first time I tried searing scallops at home. I was so fixated on getting that golden crust, I ignored how quickly they cook through. The moment I finally nailed that perfect caramelization, I felt a quiet thrill—like I’d cracked a little secret of the kitchen.
- This dish is about more than just technique; it’s about capturing a fleeting moment of precision. It reminds me of summer evenings by the coast, where fresh scallops are a staple and the air smells like salt and seaweed. That memory fuels my patience when I get to the stove, waiting for just the right moment to flip them.
- heading
- story_type
Historical and Cultural Trivia
- Pan searing scallops became popular in French cuisine, especially in coastal regions where fresh seafood is abundant.
- The technique of searing seafood to develop flavor and texture dates back centuries, utilizing simple heat and timing.
- Scallops have been a delicacy since ancient times, with evidence of their consumption in Roman and Mediterranean diets.
- In the 20th century, searing became a hallmark of modern cooking, emphasizing caramelization and flavor layering.
- The term ‘scallop’ also refers to a shell shape, which inspired the classic presentation of seared scallops on plate.
Ingredient breakdown: key components
- Fresh scallops: I look for dry-packed, firm scallops with a slightly translucent hue—less moisture means better sear and less steam. Swap with bay scallops if you want a smaller, sweeter bite.
- Salt: I prefer sea salt for a clean, mineral flavor that enhances sweetness. Use kosher salt for better control; table salt can be too salty and fine-grained.
- Black pepper: Freshly ground pepper adds a subtle heat and depth. Skip if you want a milder profile, or substitute with white pepper for a softer spice note.
- Oil: I reach for clarified butter or neutral oil with a high smoke point—like grapeseed—to get that crispy exterior without burning. Coconut oil works, but it adds sweetness you might not want.
- Lemon juice: Brightens the dish with a zing—squeeze fresh lemon just before serving. Lime or white wine vinegar can be interesting swaps, but lemon keeps it classic.
- Optional garnish: Chopped parsley or microgreens add freshness and color. Basil or chives bring a different herbal note if you prefer a twist.
Spotlight on key ingredients
Scallops:
- Fresh scallops: I look for dry-packed, firm scallops with a slightly translucent hue—less moisture means better sear and less steam. Swap with bay scallops if you want a smaller, sweeter bite.
- Salt: I prefer sea salt for a clean, mineral flavor that enhances sweetness. Use kosher salt for better control; table salt can be too salty and fine-grained.
- Black pepper: Freshly ground pepper adds a subtle heat and depth. Skip if you want a milder profile, or substitute with white pepper for a softer spice note.
Lemon:
- Oil: I reach for clarified butter or neutral oil with a high smoke point—like grapeseed—to get that crispy exterior without burning. Coconut oil works, but it adds sweetness you might not want.
- Lemon juice: Brightens the dish with a zing—squeeze fresh lemon just before serving. Lime or white wine vinegar can be interesting swaps, but lemon keeps it classic.
Notes for ingredient swaps
- Dry-packed scallops: I prefer these for a better sear and less moisture. If frozen, thaw thoroughly and pat dry—moisture is the enemy of crispness.
- Butter: Clarified butter or ghee adds richness without burning. Regular butter is fine but watch the heat—burnt butter can turn bitter.
- Oil: Neutral oils like grapeseed or canola work best. For a nuttier flavor, try sesame oil, but it’s stronger—use sparingly.
- Lemon juice: Freshly squeezed is brightest. You can swap with lime or a splash of white wine vinegar for a different zing.
- Herbs: Parsley and chives are classic. Basil or tarragon can add a fresh twist, just add after cooking to keep their bright flavors.
- Salt: Fine sea salt or kosher salt. Table salt can be too salty and overpower the delicate scallops—use sparingly.
- Pepper: Freshly ground black or white pepper. Skip if you want a milder flavor, or try a pinch of red pepper flakes for heat.
Equipment & Tools
- Heavy skillet: Provides even heat for a crisp sear
- Tongs or spatula: Turns the scallops gently without breaking them
- Paper towels: Drying the scallops thoroughly for better browning
Step-by-step guide to pan searing
- Gather your equipment: a heavy-bottomed skillet (preferably cast iron or stainless steel), tongs or a fish spatula, and paper towels for drying.
- Pat the scallops dry thoroughly with paper towels—moisture is the enemy of a good sear. Let them sit out for 10 minutes if they’ve been refrigerated.
- Season the scallops generously with salt and a touch of black pepper. Keep it simple; let the crust shine.
- Heat your skillet over medium-high heat until it’s just about to smoke—around 200°C (390°F). Add a splash of neutral oil or clarified butter, swirl to coat.
- Carefully place the scallops in the hot pan, leaving space between each. Don’t overcrowd; cook in batches if needed.
- Sear the first side for about 2 minutes, until the edges are golden brown and the surface is caramelized. You should hear a steady crackle.
- Flip the scallops gently with tongs or a spatula, and sear the other side for 1-2 minutes. Check for a deep golden crust and a firm, slightly jiggly center.
- (Optional) For extra flavor, add a knob of butter or a splash of lemon juice during the last 30 seconds of cooking, basting or drizzling over the scallops.
- Remove the scallops from the pan promptly to prevent overcooking. Transfer to a plate or a warm dish and let rest for a minute or so.
- Plate immediately, drizzle with lemon or herbs if desired, and serve while still sizzling and crisp.
Rest the scallops briefly on a warm plate for about 1 minute. Finish with a squeeze of lemon or herbs, then serve immediately to enjoy that perfect contrast of crispy outside and tender inside.
How to Know It’s Done
- Crust: Deep golden and caramelized surface with a slight sheen.
- Texture: Center should be tender, slightly jiggly but not raw or mushy.
- Appearance: Juices should be mostly sealed in, with no excessive moisture or sticking.
Perfect Pan-Seared Scallops
Ingredients
Equipment
Method
- Pat the scallops thoroughly dry with paper towels to remove excess moisture, which helps them sear beautifully.
- Season both sides of the scallops generously with sea salt and a little black pepper, ensuring an even coating for flavor.
- Heat your heavy skillet over medium-high heat until just about to smoke—this ensures a hot surface for searing.
- Add the neutral oil to the hot pan, swirling it around to coat evenly. Wait until it shimmers and starts to smoke slightly.
- Gently place the scallops into the pan, spacing them out to avoid overcrowding. You should hear a steady sizzle.
- Sear the first side for about 2 minutes, watching for a deep golden-brown crust to form and a slight caramelized aroma to fill the kitchen.
- Use tongs or a spatula to flip the scallops carefully, then sear the other side for 1 to 2 minutes until that side is also golden and crispy.
- If you like, add a tablespoon of clarified butter during the last 30 seconds and baste the scallops for extra richness and flavor.
- Remove the scallops from the pan promptly and transfer them to a plate. Squeeze fresh lemon juice over the top for brightness.
- Let the scallops rest for a minute to reabsorb juices, then serve immediately to enjoy their crispy exterior and tender interior.
Pro tips for perfect scallops
- Preheat properly: Ensure your pan is hot enough—just about to smoke—before adding scallops for that perfect sear.
- Dry scallops: Pat them thoroughly with paper towels; moisture is the enemy of caramelization and will cause steaming.
- Don’t overcrowd: Cook in batches if necessary; too many scallops in the pan cool the surface and prevent crisping.
- Use the right fat: Opt for clarified butter or high smoke point oil like grapeseed—regular butter can burn too quickly.
- Timing is key: Sear each side for 1-2 minutes until golden; overcooking makes them rubbery, undercooking leaves them raw.
- Baste for flavor: During the last seconds, add a knob of butter and lemon juice, then baste for extra richness and brightness.
- Rest briefly: Let scallops sit for a minute after searing; this helps them reabsorb juices and finish cooking evenly.
Common mistakes and how to fix them
- FORGOT to dry scallops thoroughly—fix by patting dry with paper towels before searing.
- DUMPED oil into a hot pan—wait until oil shimmers and just starts to smoke before adding scallops.
- OVER-TORCHED the scallops—reduce heat immediately if you see smoke or darkening too quickly.
- USED cold scallops from fridge—let them sit at room temperature for 10 minutes before cooking for even searing.
Quick fixes for perfect scallops
- If scallops are wet, splash them with a little more oil to help sear better.
- When scallops stick, gently lift and adjust to prevent tearing the crust.
- Dumped oil into a cold pan? Patch by heating the pan until just shimmering.
- Over-torched the scallops? Shield with a quick splash of water to cool and prevent burning.
- When in doubt, pantry swap: use bacon fat for a smoky twist and extra richness.
Prep, store, and reheat tips
- Prep the scallops: thoroughly pat dry and season ahead of time for a quicker, more even sear.
- Store raw scallops in an airtight container in the coldest part of the fridge; they keep good for 1-2 days.
- For longer storage, freeze scallops in a single layer on a baking sheet, then transfer to a bag; best used within 3 months.
- Reheat cooked scallops gently in a warm skillet with a splash of butter or oil—avoid overheating to prevent rubberiness.
- Freshly seared scallops are best enjoyed immediately, but leftovers can be stored for up to 24 hours; sensory notes include slight firmness and a mild seafood aroma.
Top questions about pan seared scallops
1. Why won’t my scallops get a crust?
Use dry scallops and pat them thoroughly dry before searing. Excess moisture causes steaming, not browning, which prevents that crispy crust.
2. How hot should the pan be?
Ensure your pan is hot enough—just about to smoke—before adding scallops. This quick sear creates the caramelized exterior.
3. How long do I cook scallops?
Cook the scallops for about 1.5 to 2 minutes on each side until golden brown. Overcooking makes them rubbery and loses tenderness.
4. What oil should I use?
Add a small amount of oil with a high smoke point, like grapeseed or clarified butter. Regular butter burns too quickly and can cause bitterness.
5. Can I make scallops ahead?
Seared scallops are best enjoyed immediately while still warm and crisp. If storing, refrigerate in an airtight container for up to 24 hours and reheat gently.
6. How do I choose good scallops?
Look for scallops that are firm, dry-packed, and slightly translucent. Freshness is key for flavor and sear quality.
7. Can I substitute lemon juice?
Use fresh lemon juice or a splash of white wine vinegar for brightness. Lime can add a different citrus note if you prefer.
8. What if my scallops stick to the pan?
If scallops stick, lift and adjust gently. Dipping the pan in water briefly can help if they start to burn or stick too much.
9. Should scallops be uniform in size?
Ensure scallops are evenly sized for uniform cooking. Smaller ones cook faster, so adjust searing time accordingly.
10. How do I flip scallops properly?
Use tongs or a fish spatula to flip gently. Avoid pressing down; this releases juices and makes them less tender.
Searing scallops might seem simple, but mastering that perfect crust and tender interior is a small triumph that sticks with you. It’s a dish that demands attention but rewards with a burst of rich, caramelized flavor in every bite.
When I get it right, I feel a quiet pride, like I’ve caught a rare moment of balance—crispy on the outside, melt-in-your-mouth inside. It’s a reminder that sometimes, simplicity done well is the most satisfying thing in the kitchen.

I’m Emily Richardson, the heart and soul behind Playing with Flavors. Cooking isn’t just a hobby for me – it’s a passion that I’ve cultivated for years, and it’s become the driving force of my life.
From the kitchen of my cozy café to the pages of this blog, every dish I create is a reflection of my love for food and the joy it brings to people.


