
This no-bake cheesecake is my go-to whenever the weather warms up and I want something sweet without heating up the kitchen. It’s a simple fix, really—just a handful of ingredients and a few minutes of assembly, and you’re done. What I love most is how it feels fancy but is honestly just a few pantry staples pushed together.
Sometimes I forget how satisfying a dessert can be when it’s cool, creamy, and requires zero oven time. It’s perfect for last-minute guests or when you’re craving something rich but don’t want to fuss. Plus, it’s a reminder that you don’t need complicated techniques or special equipment to make a memorable treat.
This recipe is inspired by those nights when I crave something sweet but want to avoid turning on the oven in the summer heat. It’s about creating a dessert that’s effortless, cool, and satisfying without the fuss of baking—perfect for spontaneous gatherings or lazy weekends. I love how it’s a reminder that sometimes, the simplest ingredients can come together into something unexpectedly elegant.
Sweet Escape in Summer
- Baking isn’t always my friend, so this no-bake version feels like a relief on hot days.
- I remember the first time I made this for friends—everyone was surprised how easy and rich it was.
- There’s a quiet pride in pulling together something so luscious with just a few ingredients from the fridge.
- This cheesecake is my comfort—creamy, cool, and a little nostalgic for family gatherings.
- Sometimes I crave the simplicity of it—no oven, no fuss, just pure, honest flavor.
The story behind this recipe
- This recipe was born out of a moment of kitchen chaos—no time to wait for a baked crust to cool, but still craving something rich and creamy. I wanted a dessert that felt indulgent but didn’t demand much effort or heat. It’s become my go-to when I need comfort fast, especially in summer when turning on the oven feels wrong.
- I remember experimenting with different bases—graham crackers, cookies, even toasted nuts—before settling on what feels just right. The creamy filling, simple yet luxurious, is a reminder that sometimes the best desserts are the easiest ones to throw together after a long day. It’s a recipe born from both necessity and love for straightforward, honest flavors.
- heading: The story behind this recipe
Historical & Cultural Tidbits
- This no-bake cheesecake idea originated in the 1950s, when convenience foods took over American kitchens and refrigeration technology improved, making chilled desserts more accessible.
- The classic graham cracker crust was originally popularized in the early 20th century, inspired by the American frontier’s simple, hearty ingredients, and has since become a staple in many chilled desserts.
- During the ’70s, no-bake desserts surged in popularity, partly because more households gained access to electric refrigerators and pre-made ingredients, making quick, impressive treats easier to whip up.
- The creamy filling’s foundation is rooted in European cheesecakes, but the no-bake version became wildly popular in the U.S. because it bypassed the need for oven baking, especially in summer.
Key ingredients at a glance
- Cream cheese: I like mine at room temp—easier to blend into that silky, oozy texture. You can chill it first if you forget, but it’ll take longer to smooth out.
- Graham cracker crust: I crush my crackers finely, so the crust holds together without crumbling apart. Using slightly toasted graham crackers adds a smoky depth you didn’t know you needed.
- Sweetened condensed milk: I rely on the richness it brings—sweet and thick, like a hug. If you want less sweetness, try mixing in a splash of lemon juice to brighten things up.
- Lemon juice: Brightens everything with that zingy punch. If you don’t have fresh, bottled works, but fresh lemon zest can add an extra pop of aroma.
- Heavy cream: Whipping it until soft peaks gives the filling a light, airy feel. If you’re short on time, a splash of milk can help loosen the mixture, but it won’t be as fluffy.
- Vanilla extract: Adds that warm, cozy aroma—don’t skip it. A splash of vanilla bean paste can give a more intense, fragrant note if you want to go fancy.
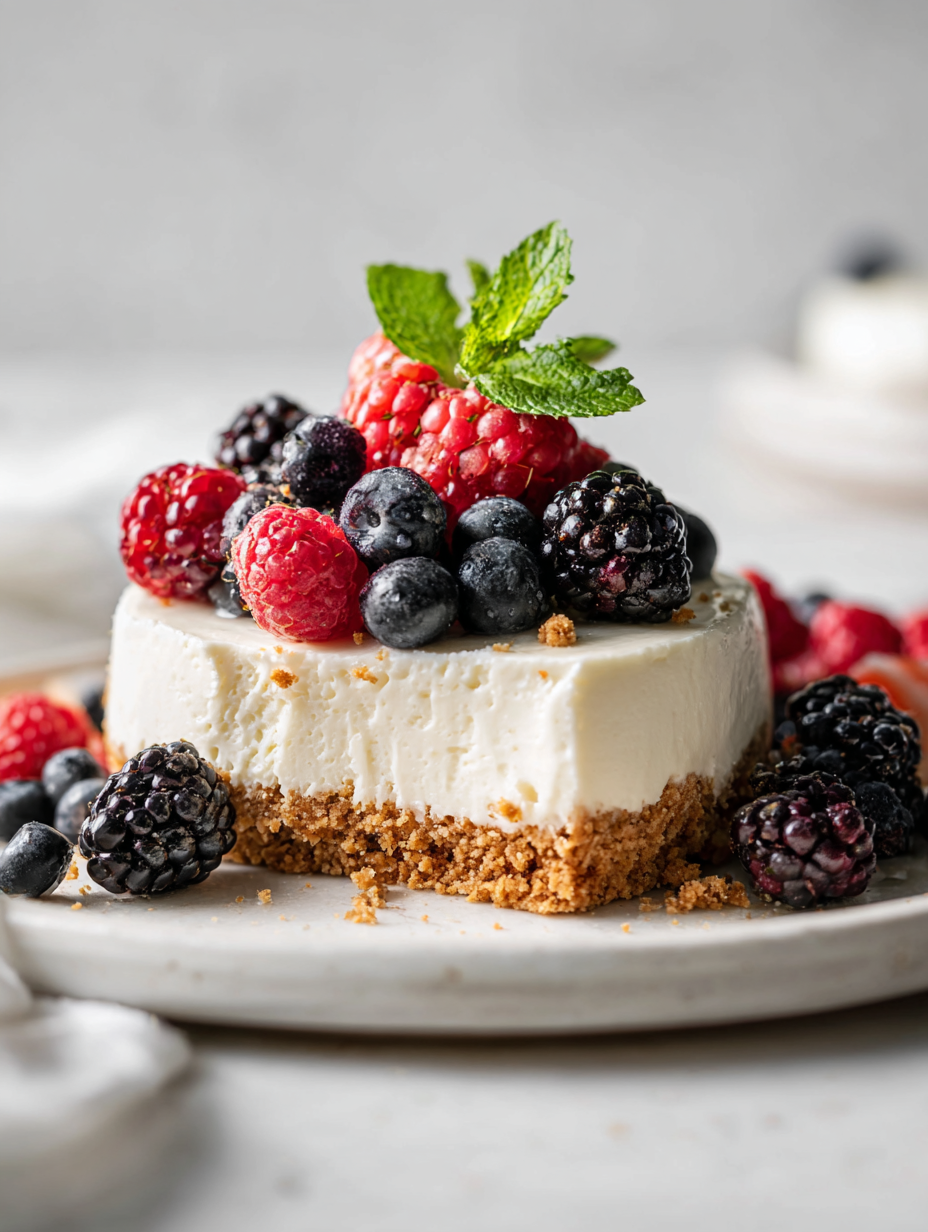
- Optional toppings: Fresh berries or a drizzle of fruit preserves make the best contrast—think sweet, tangy, and juicy, with a little crunch from the crust.
Spotlight on key ingredients
Cream cheese:
- I like mine at room temp—easier to blend into that silky, oozy texture. You can chill it first if you forget, but it’ll take longer to smooth out.
- Graham cracker crust: I crush my crackers finely, so the crust holds together without crumbling apart. Using slightly toasted graham crackers adds a smoky depth you didn’t know you needed.
Lemon juice:
- Sweetened condensed milk: I rely on the richness it brings—sweet and thick, like a hug. If you want less sweetness, try mixing in a splash of lemon juice to brighten things up.
- Brightens everything with that zingy punch. If you don’t have fresh, bottled works, but fresh lemon zest can add an extra pop of aroma.
Notes for ingredient swaps
- Dairy-Free: Swap cream cheese for a plant-based cream cheese alternative. It may be a bit softer and less tangy, but still creamy and satisfying.
- Sugar-Free: Use a sugar substitute like erythritol or monk fruit sweetener. Keep in mind, the sweetness level may vary, so taste as you go.
- Gluten-Free: Replace graham crackers with gluten-free cookies or crushed digestive biscuits. They offer a similar crunch and buttery flavor.
- Vegan: Use vegan cream cheese and coconut condensed milk. The flavor will shift slightly, adding a hint of coconut aroma.
- Lemon Juice: Fresh lemon juice brightens the filling with a zesty punch. Bottled lemon juice works in a pinch, but fresh really elevates the flavor.
- Heavy Cream: Chill and whip coconut cream or aquafaba for a dairy-free, fluffy alternative. The texture might be slightly less rich but still delightful.
- Crust Base: Swap graham crackers for crushed cookies like Oreos (without filling) or toasted nuts for a different texture and flavor profile.
Equipment & Tools
- Springform pan: To hold the crust and filling, and facilitate easy removal.
- Mixing bowl: For mixing and folding ingredients.
- Whisk: To beat cream cheese and whip cream smoothly.
- Food processor or rolling pin: To crush graham crackers into fine crumbs.
- Spatula: To smooth the filling and transfer ingredients.
- Plastic wrap: To cover and chill the assembled cheesecake.
Step-by-step guide to cheesecake
- Gather your equipment: a 9-inch springform pan, a mixing bowl, a whisk, a spatula, and a food processor or zip-top bag and rolling pin for crust. Chill the pan and bowl if possible.
- Make the crust: crush about 200g of graham crackers until fine. Mix with 100g melted butter and a pinch of salt. Press evenly into the bottom of the pan. Chill for 15 minutes to set.
- Prepare the filling: in a large bowl, beat 300g softened cream cheese with a whisk until smooth and slightly fluffy, about 2 minutes. Add 1 can (397g) sweetened condensed milk and 1 teaspoon vanilla extract. Mix until well combined, scraping sides.
- Add lemon juice: pour in 2-3 tablespoons of fresh lemon juice, mixing gently until incorporated. The mixture will thicken slightly and become silky. If it’s too loose, refrigerate for 10 minutes.
- Whip the cream: in a chilled bowl, beat 240ml heavy cream until soft peaks form—about 3-4 minutes. Gently fold the whipped cream into the cream cheese mixture in thirds, maintaining fluffiness.
- Assemble the cheesecake: pour the filling over the chilled crust. Smooth the top with a spatula. Cover loosely with plastic wrap and refrigerate for at least 4 hours, preferably overnight, until firm and set.
- Final touches: before serving, run a thin knife around the edge of the pan to loosen. Remove the springform ring carefully. Decorate with fresh berries, fruit compote, or a drizzle of caramel if desired.
- Serve chilled: slice with a warm, damp knife for clean cuts. The filling should be creamy, with a slight jiggle in the center. The crust should be crisp and buttery. Enjoy the contrast of textures and bright, tangy flavor.
Refrigerate the cheesecake at least 4 hours, ideally overnight, to set properly. Before serving, run a knife around the edge, then remove the springform ring. Decorate as desired and serve cold for best texture and flavor.
How to Know It’s Done
- Crust is firm and holds together when pressed.
- Filling is smooth, silky, and slightly thickened.
- Cheesecake jiggles slightly in the center but doesn’t wobble excessively.
No-Bake Cheesecake
Ingredients
Equipment
Method
- Place the graham crackers in a food processor or put them in a zip-top bag and crush with a rolling pin until fine crumbs form.
- Mix the crushed crackers with melted butter and a pinch of salt until the mixture resembles wet sand.
- Press the mixture evenly into the bottom of a chilled springform pan, using the back of a spoon or spatula to compact it tightly.
- Chill the crust in the fridge for about 15 minutes while you prepare the filling.
- In a large bowl, beat the softened cream cheese with a whisk until smooth and slightly fluffy, about 2 minutes.
- Add the sweetened condensed milk and vanilla extract to the cream cheese, mixing until fully combined and silky.
- Pour in the lemon juice and gently stir until the mixture thickens slightly and becomes smooth—this brightens the flavor.
- In a chilled bowl, whip the heavy cream until soft peaks form, listening for the gentle swish of peaks that hold their shape.
- Gently fold the whipped cream into the cream cheese mixture in thirds, maintaining the airy texture without deflating the mixture.
- Pour the filling over the chilled crust, smoothing the top with a spatula for an even surface.
- Cover the pan loosely with plastic wrap and refrigerate for at least 4 hours or overnight until fully set and firm.
- Before serving, run a warm knife around the edge of the pan to loosen the cheesecake, then carefully remove the springform ring.
- Decorate with fresh berries or a drizzle of fruit preserves if desired, then slice with a warm knife and enjoy this cool, creamy treat.
Notes
Tips for perfect no-bake cheesecake
- Bolded mini-head: Chill the crust before filling for extra crunch and to prevent sogginess.
- Bolded mini-head: Use room temperature cream cheese for a silky, smooth mixture that blends easily.
- Bolded mini-head: Gently fold whipped cream into the filling to keep it airy and light.
- Bolded mini-head: Add lemon juice gradually, tasting to balance brightness without curdling the cream.
- Bolded mini-head: Run a warm knife around the edge before removing the springform ring for clean slices.
- Bolded mini-head: Don’t skip the overnight chill—dessert firms up and flavors meld for perfect texture.
- Bolded mini-head: Use fresh berries or a fruit compote for contrasting tang and juicy freshness.
Common mistakes and how to fix them
- FORGOT to chill the crust before filling? Chill it for 15 minutes to prevent sogginess.
- DUMPED too much lemon juice? Add more cream cheese to balance acidity and texture.
- OVER-TORCHED the crust? Use a lower oven temperature or cover with foil halfway through.
- MISSED the final chill? Keep it in the fridge for at least 4 hours to set properly.
Quick fixes and pantry swaps
- When the filling is runny, splash in a bit more cream cheese to firm it up.
- If the crust crumbles, patch it with a thin layer of melted butter and press again.
- Splash cold water on the pan’s sides if the springform ring sticks when removing.
- Patch cracks with a smear of leftover filling—no one will notice after topping with berries.
- Shield the crust edges with foil if they brown too quickly during chilling.
Make-Ahead & Storage Tips
- Prepare the crust and press it into the pan at least 1 hour before serving; it firms up and makes assembly easier.
- The assembled cheesecake can be refrigerated, covered, for up to 2 days—flavors deepen, and it firms nicely.
- For best texture, let it sit at room temperature for 10-15 minutes before slicing; the filling softens slightly and enhances flavor.
- Avoid freezing; the texture may become grainy, but if needed, wrap tightly and freeze for up to 1 month. Thaw in the fridge and serve chilled.
Top questions about no bake cheesecake
1. Can I use cold cream cheese?
Use room temperature cream cheese for a smooth, silky filling. Cold cheese may cause lumps.
2. Can I substitute the crust ingredients?
Yes, you can swap graham crackers for digestive biscuits or gluten-free cookies, but expect a slight change in texture.
3. Is bottled lemon juice okay to use?
Adding fresh lemon juice brightens the flavor with a zesty punch. Bottled lemon juice works, but fresh is best for aroma.
4. How long should I chill the cheesecake?
Chill the assembled cheesecake for at least 4 hours or overnight. It firms up and flavors meld better when cold.
5. My filling is too runny, what can I do?
If the filling is too runny, fold in more whipped cream or add a touch more cream cheese to thicken.
6. How do I get clean slices?
Use a sharp knife dipped in warm water before slicing for clean, neat cuts without cracks.
7. How do I ensure the crust doesn’t fall apart?
Make sure to press the crust firmly into the pan to prevent crumbling or shifting when serving.
8. Can I prepare the crust ahead of time?
You can make the crust a day ahead and keep it chilled, then fill and chill the next day for convenience.
9. Are there dairy-free options?
For a dairy-free version, substitute cream cheese with plant-based cream cheese, but expect a slightly softer texture.
10. The crust is too dry, what can I do?
If the crust is too dry, mix in a tiny bit more melted butter until it holds together better.
This no-bake cheesecake is more than just a quick fix; it’s a reminder that sometimes the simplest ingredients create the most memorable desserts. It’s perfect for hot days, last-minute gatherings, or whenever you need a little sweet comfort that doesn’t demand oven time.
Whenever I serve it, I’m struck by how effortlessly it comes together and how satisfying that cool, creamy bite is—especially with a tangy topping or fresh berries. It’s not flashy, but it’s honest, and honestly, that’s what keeps me coming back to it again and again.

I’m Emily Richardson, the heart and soul behind Playing with Flavors. Cooking isn’t just a hobby for me – it’s a passion that I’ve cultivated for years, and it’s become the driving force of my life.
From the kitchen of my cozy café to the pages of this blog, every dish I create is a reflection of my love for food and the joy it brings to people.


