
This no bake chocolate cheesecake is my go-to when I want something impressive without the fuss. It’s the kind of dessert that feels fancy but is honestly just a quick mix and chill. Perfect for those moments when you realize you forgot to prepare anything fancy for dessert, but still want to impress a crowd or just treat yourself after a long day.
What I love most is how it combines that rich, velvety chocolate with a creamy tang from the cheese, all without turning on the oven. It’s a lazy Sunday favorite or a last-minute dinner party hero. Plus, the smell of melting chocolate and buttery crust filling the kitchen is enough to make anyone smile.
This recipe is a secret weapon for those last-minute dinner parties, where dessert feels like an afterthought. It’s a no-fuss, no-bake marvel that looks fancy but is practically foolproof. I love how it offers a rich, silky chocolate hit without turning the kitchen into a hot, messy chaos.
Unexpected Comfort in Every Bite
- This recipe is my secret escape from the oven heat, a cool, creamy delight that feels indulgent without the mess.
- I love how a simple biscuit base can hold such a rich, velvety chocolate layer—like a little piece of luxury on a busy weeknight.
- There’s a nostalgic joy in watching the chocolate set perfectly in the fridge, like a mini miracle happening behind closed doors.
- Sharing this dessert feels like giving a hug in every spoonful, especially when I want something satisfying but quick to make.
The story behind this recipe
This recipe came about on a rainy Saturday when I was craving something rich and satisfying, but honestly too lazy to turn on the oven. I remembered a simple no-bake cheesecake I’d made years ago, tweaked it with dark chocolate, and found it was just perfect for those moments when I want dessert that’s quick, creamy, and a little indulgent. It’s become my go-to for last-minute gatherings, especially because it usually gets finished before I even get a chance to clean up.
Historical & Cultural Tidbits
- This no bake chocolate cheesecake has roots in post-war Europe, where resourcefulness led to inventive desserts using minimal ingredients.
- It gained popularity in the 1960s when home cooks sought quick, elegant desserts that didn’t require turning on the oven during summer heatwaves.
- The combination of chocolate and cream in no-bake form echoes traditional European mousse recipes, simplified for everyday home kitchens.
Ingredient breakdown: key components
- Cream cheese: I prefer full-fat for that rich, velvety texture that melts smoothly in your mouth—skip the light stuff unless you want a less luscious bite.
- Dark chocolate: I love a deep, intense cocoa flavor, but if you’re after sweetness, add a touch more sugar or use semi-sweet instead—feel the silky melt as it blends.
- Graham cracker crumbs: I toast mine slightly for a nuttier aroma, but if you want a softer crust, just mix with melted butter and press into the pan, no toasting needed.
- Butter: I use unsalted, but salted works fine if you want a hint of savory contrast—just cut back slightly on the added salt in the crust.
- Heavy cream: Whipped to soft peaks, it gives the filling a light, airy feel—if you prefer a denser cheesecake, fold it in gently without over-whipping.
- Sugar: I stick with superfine for quick dissolving; if you only have regular granulated, just give it a minute to dissolve fully—no grainy bites.
- Vanilla extract: A splash amplifies the chocolate’s richness; skip it if you want a more straightforward cocoa punch, but I find it rounds out the flavor beautifully.
Spotlight on key ingredients
Cream cheese:
- I prefer full-fat for that rich, velvety texture that melts smoothly in your mouth—skip the light stuff unless you want a less luscious bite.
- Dark chocolate: I love a deep, intense cocoa flavor, but if you’re after sweetness, add a touch more sugar or use semi-sweet instead—feel the silky melt as it blends.
- Graham cracker crumbs: I toast mine slightly for a nuttier aroma, but if you want a softer crust, just mix with melted butter and press into the pan, no toasting needed.
Dark chocolate:
- It’s the star, rich and slightly bitter, with a melt that’s almost velvet—watch it smooth out in the heat, turning glossy and oozy.
- Heavy cream: Whipped to soft peaks, it folds in light and airy, giving the cheesecake that silky, melt-in-your-mouth texture—don’t overwhip or it’ll get grainy.
Notes for ingredient swaps
- Dairy-Free: Swap cream cheese for cashew-based cream cheese or coconut cream—both will add richness, but with a subtle nutty or coconut flavor.
- Vegan: Use dairy-free dark chocolate and vegan cream cheese—expect a slightly different melt and a less creamy mouthfeel.
- Lower Sugar: Replace semi-sweet chocolate with unsweetened and add a touch more sweetener or stevia—bitterness might come through if you dial down sugar too much.
- Gluten-Free: Opt for gluten-free biscuits or graham crackers—ensure they’re labeled gluten-free to keep the crust safe.
- Nutty: Incorporate crushed toasted almonds or hazelnuts into the crust for extra texture and flavor—watch for added oils or sugars in pre-packaged nuts.
- Lighter: Use reduced-fat cream cheese and omit some chocolate—your cheesecake will be less dense but still satisfy that chocolate craving.
- Extra Vivid: Add a splash of espresso or coffee extract to intensify the chocolate flavor—your nose will pick up that smoky, bitter aroma.
Equipment & Tools
- springform pan: To hold the crust and cheesecake, easy to remove without damaging the shape.
- mixing bowl: For combining the cream cheese and folding in whipped cream.
- saucepan: To melt the chocolate gently and evenly.
- spatula: For folding ingredients and smoothing the top.
- knife: To slice cleanly through the set cheesecake.
Step-by-step guide to no bake cheesecake
- Gather your equipment: a 20cm (8-inch) springform pan, a mixing bowl, a saucepan, and a spatula. The pan’s purpose is to hold the crust and cheesecake, while the bowl and saucepan are for melting and mixing.
- Start with the crust: crush 200g of digestive biscuits or graham crackers until fine. You can do this in a zip-lock with a rolling pin or blitz in a food processor. Mix in 100g melted butter and a pinch of salt. Press this mixture evenly into the base of your springform pan. Chill in the fridge for 15 minutes to firm up.
- While the crust chills, melt 200g dark chocolate in a heatproof bowl over simmering water, or use a microwave in 30-second bursts, stirring in between. The chocolate should be silky and oozy, not lumpy or grainy. If it overheats and seizes, add a teaspoon of vegetable oil or a splash of warm milk to loosen.
- In a separate bowl, beat 250g softened cream cheese with 50g superfine sugar until smooth and creamy, about 2 minutes. Add 1 teaspoon vanilla extract for a subtle aroma. Fold in the melted chocolate gently, just until combined, being careful not to deflate the mixture.
- Whip 250ml heavy cream to soft peaks. Gently fold the whipped cream into the chocolate and cream cheese mixture in three additions. Use a spatula, folding from the bottom up, to keep it light and airy. Stop mixing when no streaks remain.
- Pour the filling over the chilled crust. Smooth the top with the spatula. Tap the pan gently on the counter to remove air bubbles. Cover loosely with cling film and refrigerate for at least 4 hours, ideally overnight, until set and firm to the touch.
- Once the cheesecake is firm, run a sharp knife around the edge of the pan before unlocking the springform. Carefully remove the sides. For a cleaner finish, briefly warm the knife in hot water and wipe dry between cuts.
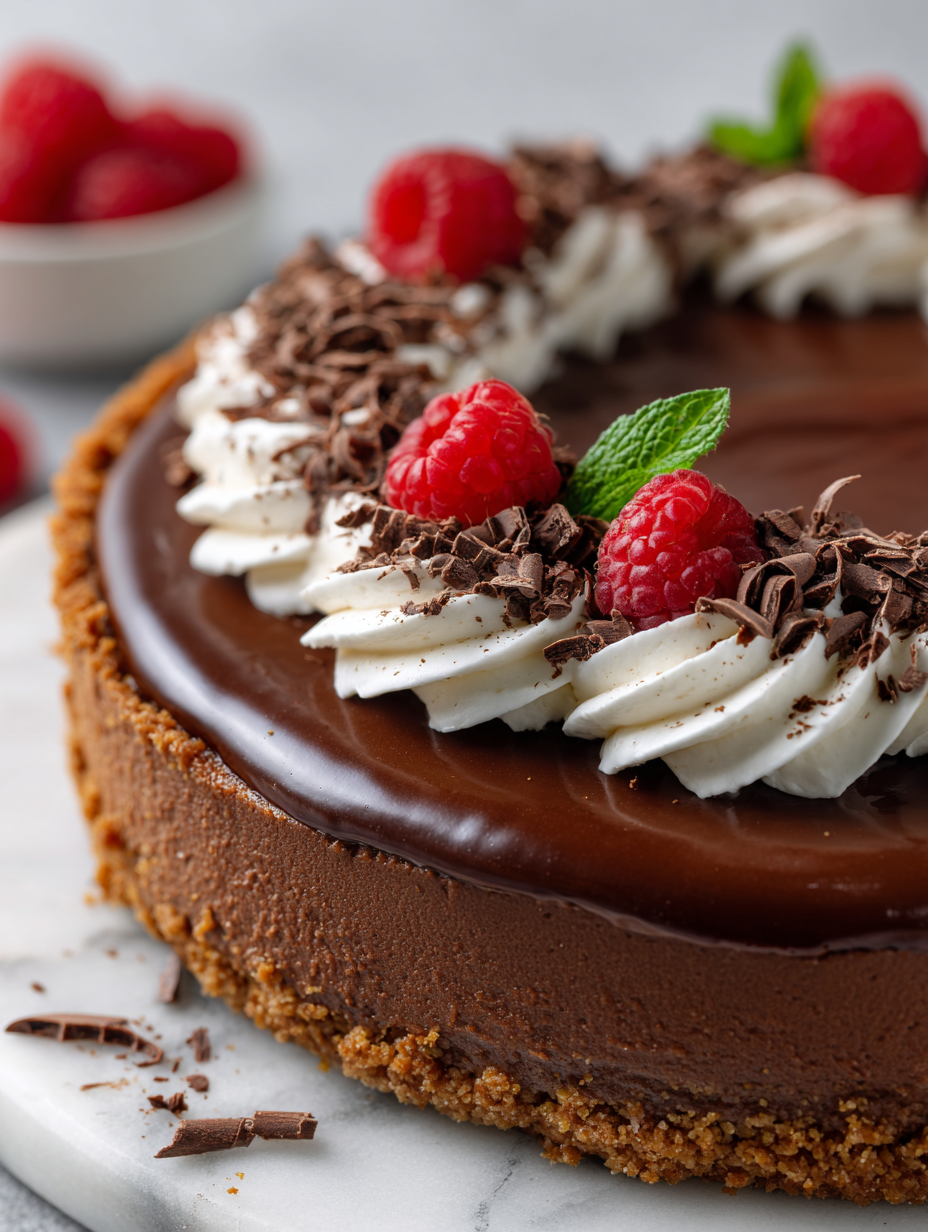
- Finish with a dusting of cocoa powder, a few shavings of dark chocolate, or fresh berries. Slice with a sharp, warm knife for clean, neat pieces. Serve chilled, preferably straight from the fridge, for that perfect silky texture.
Chill the cheesecake in the fridge for at least 4 hours or overnight. When ready, run a warm knife around the edges and release the springform. Decorate as desired and serve straight from the fridge for best texture.
How to Know It’s Done
- The cheesecake should be firm and slightly wobbly in the center when jiggled.
- The top should be matte and set, not shiny or sticky.
- The crust should hold together when pressed, not crumbly or soggy.
No-Bake Chocolate Cheesecake
Ingredients
Equipment
Method
- Start by crushing the digestive biscuits or graham crackers into fine crumbs—use a food processor or seal in a plastic bag and crush with a rolling pin. Mix the crumbs with melted butter until evenly coated. Press this mixture firmly into the base of a springform pan, creating an even layer. Chill in the fridge for about 15 minutes to set.
- While the crust chills, break the dark chocolate into small pieces and melt it gently in a heatproof bowl set over simmering water or microwave in 30-second bursts, stirring until smooth and glossy. Be careful not to overheat or seize the chocolate.
- In a mixing bowl, beat the softened cream cheese with superfine sugar until smooth and creamy—about 2 minutes. Add vanilla extract if using, mixing just to combine.
- Gently fold the melted chocolate into the cream cheese mixture, using a spatula, until fully incorporated and silky in appearance.
- Whip the chilled heavy cream to soft peaks—listen for a gentle swoosh and watch it hold a soft curl when you lift the whisk. Carefully fold the whipped cream into the chocolate and cream cheese mixture in three additions, using a spatula to keep the mixture light and airy.
- Pour the luscious filling over the chilled crust, smoothing the top with a spatula. Tap the pan gently on the counter to remove any air bubbles and ensure an even surface. Cover loosely with plastic wrap and refrigerate for at least 4 hours, or preferably overnight, until fully set and firm.
- Once set, run a warm knife around the edges of the cheesecake before unlocking and removing the springform sides. For clean slices, dip the knife in hot water and wipe dry between cuts.
- Decorate with cocoa powder, chocolate shavings, or fresh berries as you like. Slice with a sharp, warm knife and serve chilled for that silky, decadent experience.
Tips and tricks for best results
- Use room temperature ingredients for smoother melting and mixing, especially butter and cream cheese.
- Melt chocolate slowly over low heat or in short bursts in the microwave to avoid seizing and bitterness.
- Chill the crust base for at least 15 minutes before adding filling to prevent sogginess and help it set.
- Gently fold whipped cream into the chocolate mixture—avoid overmixing to keep it light and airy.
- Run a warm knife around the edges before releasing the springform for cleaner slices and a professional look.
- Use a spatula to smooth the top, tapping the pan to release air bubbles for an even surface.
- Allow the cheesecake to chill overnight—this deepens flavors and ensures it’s perfectly set for slicing.
Common mistakes and how to fix them
- FORGOT to chill crust; fix by refrigerating for 15 minutes before filling.
- DUMPED melted chocolate; add a splash of warm milk to loosen if seized.
- OVER-TORCHED chocolate; lower heat or reduce microwave time to prevent burning.
- MISSED to fold whipped cream gently; overmixing deflates the airy texture.
Quick Fixes for Common Problems
- When chocolate seizes, splash in warm milk to loosen smoothly.
- If crust crumbles, press it firmly again and chill for 10 minutes.
- Splash hot water on your knife for cleaner, neater slices.
- Dumped overcooked chocolate? Add a teaspoon of oil to restore gloss.
- Splash vanilla or coffee extract to boost flavor if cheesecake feels flat.
Prep, store, and reheat tips
- Prepare the crust and press into the pan a day ahead. Keep covered in the fridge for a fresh base.
- The cheesecake can be made up to 24 hours in advance. Keep it tightly covered in the fridge to prevent it from drying out.
- Chocolate flavor deepens overnight, so the longer it sits, the more intense the cocoa hit. Expect a richer taste after a day.
- Reheating isn’t necessary—serve chilled. If you want slightly softer slices, let it sit at room temperature for 10 minutes before slicing, and feel the contrast of cool, silky filling.
Top questions about no bake cheesecake
1. Can I use light cream cheese?
Use full-fat cream cheese for the best creamy texture. Light versions can make it less rich and slightly grainy.
2. How long should I chill the cheesecake?
Chill the cheesecake for at least 4 hours, but overnight is best. It firms up and the flavors meld beautifully.
3. What kind of chocolate should I use?
Use good quality dark chocolate; it melts smoothly and gives a rich, intense flavor. Cheaper chocolates can seize or taste waxy.
4. How do I know when the whipped cream is ready?
Make sure the whipped cream is softly peaked before folding. Over-whipping can make it grainy and difficult to fold in.
5. How do I get clean slices?
Use a warm knife to slice through the cheesecake for clean, neat pieces. Wipe it clean between cuts for best results.
6. Can I substitute the crust ingredients?
You can substitute digestive biscuits or graham crackers with gluten-free or nut-based crusts, but expect different textures and flavors.
7. How can I boost the flavor?
Add a pinch of sea salt or a splash of vanilla extract to enhance the chocolate flavor and add depth.
8. What if my chocolate seizes?
If your chocolate seizes, add a teaspoon of vegetable oil or warm milk to loosen it up again.
9. Should I serve it warm or cold?
This cheesecake is best served cold, straight from the fridge, to keep the texture silky and the flavor sharp.
10. Can I freeze leftover cheesecake?
Yes, you can freeze it for up to 2 months. Wrap tightly and thaw in the fridge before serving.
This no bake chocolate cheesecake is more than just a quick fix; it’s a reminder that sometimes simplicity yields the most satisfying results. The rich, velvety layers and crisp crust come together effortlessly, making it a go-to for spontaneous gatherings or a quiet treat after a long day.
Enjoying a slice straight from the fridge with its firm, luscious texture is one of those small pleasures that sneaks up on you. It’s a dessert that feels special without the fuss, perfect for when you want something sweet and satisfying without turning on the oven.

I’m Emily Richardson, the heart and soul behind Playing with Flavors. Cooking isn’t just a hobby for me – it’s a passion that I’ve cultivated for years, and it’s become the driving force of my life.
From the kitchen of my cozy café to the pages of this blog, every dish I create is a reflection of my love for food and the joy it brings to people.


