
Sometimes, the best desserts come from the simplest ideas. No Bake Chocolate Truffles are that kind of treat—rich, velvety, and ready in minutes without firing up the oven. It’s the kind of recipe you turn to when you want something sweet and satisfying but don’t want the fuss of complicated steps or waiting around.
What I love most is how forgiving this recipe is—the ingredients are humble, yet the results feel downright indulgent. Rolling those little balls of dark, fudgy goodness is oddly calming, and the aroma of melting chocolate fills the kitchen with a quiet promise of sweetness. Perfect for last-minute moments, or when you just need a tiny, decadent escape.
This recipe is inspired by the idea of making a decadent treat with minimal effort, perfect for those who want a rich chocolate fix without turning on the oven or dealing with complicated steps. It’s about embracing simplicity, using just a handful of ingredients, and still creating something that feels special and indulgent. The focus is on the tactile joy of rolling and tasting, rather than perfect presentation, making it accessible for busy mornings or last-minute cravings.
The tactile joy of chocolate
- Making these truffles always takes me back to lazy weekend afternoons, where chocolate melting scents fill the house and everything slows down just enough to savor it.
- I love how these little bites come together so quickly, making me feel like a domestic wizard even on my busiest days.
- There’s a quiet pride in rolling each ball—like creating tiny treasures—and knowing I can whip up something rich without much fuss.
- Sometimes, I just need a sweet escape that’s honest and straightforward, and these truffles deliver that in every bite.
The story behind this recipe
- This recipe came about during a night when I needed something sweet, fast, and deeply comforting. I was out of eggs and flour, but had a stash of dark chocolate and a bit of cream—perfect for improvising. As I melted the chocolate, I remembered how my grandma used to keep a jar of chocolates by her couch, a small treasure for a quick indulgence. It struck me that sometimes, the simplest ingredients can make the most memorable treats, especially when you’re in a rush or just craving something honest and rich.
- I’ve always loved the tactile part of rolling these truffles—it’s oddly meditative and makes the treat feel more special. Plus, no baking means fewer dishes and less stress, which is a win in my book. Every time I make them, I think about how they’re a little act of kindness—something to share, or just keep to savor slowly with a good cup of coffee or tea.
- heading
- story_type
Trivia and origins of no bake truffles
- These truffles originated as a way to use up leftover chocolate scraps in French kitchens, turning scraps into elegant treats.
- During wartime rationing, similar no-bake confections became popular as a way to enjoy rich chocolate without requiring ingredients like butter or eggs.
- The name ‘truffle’ is borrowed from the luxurious fungi, because their rich, earthy flavor and round shape evoke the same indulgence as the chocolate version.
Key ingredients for perfect truffles
- Dark chocolate: I prefer a high cocoa percentage, around 70%, for that deep, intense cocoa flavor. Swap with semi-sweet if you want sweeter, but don’t skimp on quality—it makes all the difference in the melt and richness.
- Heavy cream: It’s the secret to that silky, fudgy texture. If you’re dairy-free, coconut cream works well, adding a hint of coconut aroma and a slightly different richness.
- Butter: Just a little for sheen and smoothness. If you want to skip it, the truffles might be a tad less shiny but still creamy if you compensate with extra cream.
- Cocoa powder: For rolling—use natural unsweetened cocoa. You can try powdered freeze-dried raspberry or matcha for a flavor twist, but plain cocoa keeps that classic, velvety look and taste.
- Optional flavorings: A splash of vanilla or a pinch of sea salt heightens the chocolate’s depth. I’ve also added a dash of bourbon or espresso powder for complexity—experiment with what wakes up your palate.
- Add-ins: Chopped nuts, dried fruits, or a sprinkle of sea salt on top can elevate each bite. Keep them small and crunchy to contrast that melt-in-your-mouth feel.
- Sweetener: Usually just the chocolate and cream are enough, but if you like it sweeter, a tiny drizzle of honey or maple syrup can balance out the bitterness with a subtle shimmer of sweetness.
Spotlight on key ingredients
Dark chocolate:
- I prefer a high cocoa percentage, around 70%, for that deep, intense cocoa flavor. Swap with semi-sweet if you want sweeter, but don’t skimp on quality—it makes all the difference in the melt and richness.
- Heavy cream: It’s the secret to that silky, fudgy texture. If you’re dairy-free, coconut cream works well, adding a hint of coconut aroma and a slightly different richness.
Cocoa powder:
- For rolling—use natural unsweetened cocoa. You can try powdered freeze-dried raspberry or matcha for a flavor twist, but plain cocoa keeps that classic, velvety look and taste.
- Optional flavorings: A splash of vanilla or a pinch of sea salt heightens the chocolate’s depth. I’ve also added a dash of bourbon or espresso powder for complexity—experiment with what wakes up your palate.
Notes for ingredient swaps
- Dairy-Free: Swap heavy cream for coconut cream. It adds a slight coconut aroma and a richer, slightly firmer texture.
- Vegan Chocolate: Use dairy-free dark chocolate or ethically sourced cocoa solids. Expect a slightly different melt and less creaminess.
- Sweetener Variations: Add a teaspoon of honey or maple syrup to the ganache for a touch of floral or caramel notes.
- Butter Alternatives: Substitute with coconut oil or margarine if you prefer a dairy-free, smoother finish. Note that it may slightly alter the sheen.
- Cocoa Coating: Roll in powdered freeze-dried raspberry or matcha powder instead of cocoa for a colorful, flavor-rich twist.
- Flavor Boosts: Mix in a splash of bourbon, espresso powder, or a pinch of sea salt to enhance depth. These are optional but add complexity.
- Add-ins: Incorporate chopped nuts, dried fruits, or a sprinkle of flaky sea salt on top for extra texture and flavor contrast.
Equipment & Tools
- Microwave-safe bowl: To melt the cream and chocolate gently
- Small spoon or cookie scoop: For portioning and shaping the truffles
- Parchment paper: To prevent sticking and for easy cleanup
- Spatula or whisk: To stir the ganache smoothly
- Refrigerator: To set and firm up the truffles
Step-by-step guide to no bake truffles
- Gather your ingredients: high-quality dark chocolate (about 200g), 1/2 cup heavy cream, a tablespoon butter, and cocoa powder for coating. Have a small cookie scoop or teaspoon ready for shaping.
- Chop the chocolate into small, uniform pieces. This helps it melt evenly and quickly when heated.
- In a microwave-safe bowl, warm the heavy cream until just simmering—that’s about 30 seconds in my microwave at 700W. Watch for tiny bubbles around the edges.
- Pour the hot cream over the chopped chocolate. Let it sit untouched for 2 minutes, then stir gently until smooth and glossy. Add the butter and stir until fully incorporated. Smell that rich cocoa aroma—heaven!
- If the mixture feels too thick or isn’t melting smoothly, microwave it in 10-second bursts, stirring after each, until silky. Avoid overheating or you risk seizing the chocolate.
- Let the ganache sit at room temperature for about 15 minutes, or until it’s thickened enough to scoop but still soft enough to shape. It should be like thick, fudgy pudding—no runny bits, no cracks.
- Using a small scoop or spoon, portion out about 1-inch balls. Roll each between your palms quickly to keep the heat from melting the coating. Place on a parchment-lined tray.
- Roll each ball in cocoa powder, making sure they’re evenly coated. For a different look, you can dip them in chopped nuts or shredded coconut instead.
- Set the coated truffles in the fridge for at least 30 minutes. This helps them firm up and develop that shiny, fudgy exterior. Don’t skip this step—your truffles will thank you.
- Optional: For a final touch, dust with a little extra cocoa powder or sprinkle a pinch of sea salt on top before serving.
Let the truffles rest in the fridge at least 30 minutes before serving. Serve straight from the fridge for the best fudgy texture. For a more intense chocolate flavor, store in an airtight container up to a week—bring to room temperature for 5 minutes before biting in.
How to Know It’s Done
- The ganache should be smooth, shiny, and hold its shape when scooped.
- The balls should be firm but tender, with a slight jiggle when gently pressed.
- The outer coating should be matte but with a velvety appearance after rolling.
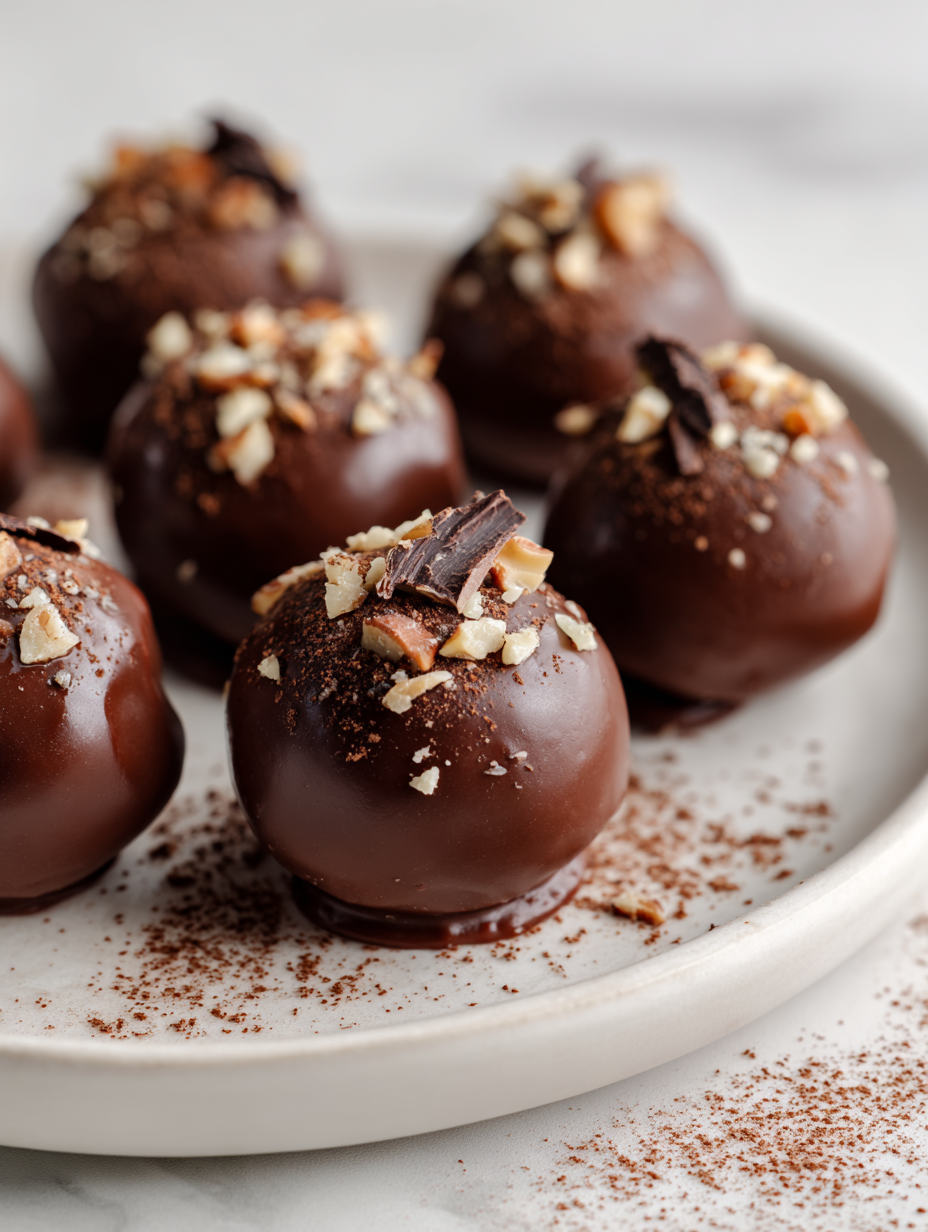
No Bake Chocolate Truffles
Ingredients
Equipment
Method
- Chop the dark chocolate into small, even pieces to help it melt smoothly.
- Warm the heavy cream until it just begins to simmer, about 30 seconds in the microwave, until tiny bubbles form around the edges.
- Pour the hot cream over the chopped chocolate and let it sit for 2 minutes, allowing the chocolate to soften.
- Gently stir the mixture with a spatula or whisk until smooth and glossy, then add the butter and stir until fully incorporated, releasing a rich chocolate aroma.
- Let the ganache cool at room temperature for about 15 minutes until it thickens to a fudgy consistency, no longer runny but still scoopable.
- Use a small spoon or cookie scoop to portion out about 1-inch balls of ganache and quickly roll them between your palms to shape smooth spheres.
- Roll each ball in the unsweetened cocoa powder, ensuring an even coating, and place on a parchment-lined tray.
- Set the coated truffles in the fridge for at least 30 minutes to firm up and develop their shiny, fudgy exterior.
- Once chilled, serve the truffles straight from the fridge or at room temperature for a more melt-in-your-mouth experience.
Notes
Pro tips for perfect truffles
- Use high-quality chocolate for a richer, more velvety melt and deep cocoa flavor.
- Warm the cream gently—just until it simmers—so it melds smoothly without seizing the chocolate.
- Stir the ganache slowly and thoroughly to achieve a glossy, fudgy consistency with no lumps.
- Chill the mixture until it’s firm but scoopable—about 15-20 minutes—to make shaping easier.
- Roll the truffles quickly between your palms to prevent the heat from melting the coating prematurely.
- Coat in cocoa powder immediately after shaping to prevent sticking and create a velvety exterior.
- Rest the finished truffles in the fridge at least 30 minutes to firm up and develop that perfect, fudgy finish.
Common mistakes and how to fix them
- FORGOT to sift cocoa powder → Sift cocoa for smooth coating and no lumps.
- DUMPED in hot cream → Pour cream over chocolate gently to prevent seizing.
- OVER-TORCHED chocolate → Heat chocolate in short bursts, stir often, avoid scorching.
- SKIPPED chilling → Chill enough to set, or truffles may be too soft to shape properly.
Quick fixes and pantry swaps
- When mixture is too thick → Warm slightly or add a splash of cream to loosen it.
- If truffles crack while rolling → Chill the ganache longer; it should be firm but pliable.
- Splash melted chocolate with a few drops of oil → To improve gloss and smoothness if look dull.
- Patch cracked ganache → Reheat gently and stir until smooth, avoid overheating.
- Shield delicate truffles from humidity → Store in airtight container, especially in humid weather.
Prep, store, and reheat tips
- You can prepare the ganache up to 2 days ahead; keep it covered in the fridge to prevent it from absorbing other odors. It will firm up and become easier to scoop later.
- Shape the truffles and roll them in cocoa powder or your chosen coating up to 24 hours in advance. Store them in an airtight container in the fridge; the texture stays fudgy and the flavors meld nicely.
- Shelf life is about a week when kept refrigerated, but the chocolate flavor intensifies over time, so I recommend enjoying within a few days for the best taste.
- To serve, take the truffles out of the fridge about 10 minutes before, or enjoy straight from the cold for that chilled, melt-in-your-mouth feel.
- If you want to re-crisp or freshen the outer coating after storage, a quick 30-second blast in the microwave (watch for melting) can restore shine and firmness, just be sure to not overheat.
Top questions about no bake truffles
1. Can I make these vegan?
Yes, using dairy-free chocolate and coconut cream makes them suitable for vegans, though texture might be slightly softer.
2. Are these dairy-free options effective?
Absolutely. Just choose dairy-free chocolate and coconut or almond cream instead of heavy cream.
3. Can I melt the chocolate in the microwave?
Yes, but make sure to melt the chocolate gently and avoid overheating to prevent seizing.
4. Is microwave melting okay?
Yes, but do it in short bursts and stir often to keep the chocolate smooth and shiny.
5. How long should I chill the ganache?
Chill the ganache until it’s firm enough to scoop, around 15-20 minutes, but not so cold it’s difficult to shape.
6. Can I make the ganache ahead of time?
You can prepare the ganache up to 2 days in advance and store it covered in the fridge.
7. Can I freeze the truffles?
Yes, you can freeze the shaped truffles for up to a month, just thaw in the fridge before serving.
8. My truffles are sticky or dull—what now?
If your coating feels dull or sticky, dust with fresh cocoa powder or re-chill briefly to firm up.
9. Does quality chocolate matter?
Use high-quality chocolate for best flavor and a glossy finish; lower-quality chocolate can result in dull, crumbly truffles.
10. Why does the quality of chocolate matter?
Yes, the quality chocolate melts better and gives a richer, more indulgent flavor.
Making these no-bake truffles is like holding onto a secret chocolate recipe from my childhood—simple, honest, and deeply satisfying. Each bite reminds me that sometimes, the best treats come from just a handful of ingredients whipped up with a little love and patience.
They’re perfect for those moments when you need something sweet fast, but still crave that rich, fudgy comfort. Sharing them feels like passing on a cozy little secret, one that’s easy to keep and hard to forget.

I’m Emily Richardson, the heart and soul behind Playing with Flavors. Cooking isn’t just a hobby for me – it’s a passion that I’ve cultivated for years, and it’s become the driving force of my life.
From the kitchen of my cozy café to the pages of this blog, every dish I create is a reflection of my love for food and the joy it brings to people.


