
These no bake hazelnut bites are my go-to when mornings are a whirlwind. They’re small, portable, and satisfy that sweet crunch craving without turning on the oven. Honestly, they’ve saved me more times than I can count, especially on days when I’m running out the door with barely a moment to breathe.
What I love most is how flexible they are—dairy-free, gluten-free, you name it. Plus, the process is almost meditative; stir, scoop, chill, and you’re done. It’s like making a tiny, crunchy piece of comfort that you can grab whenever the craving hits, no fuss, no mess, no heat involved.
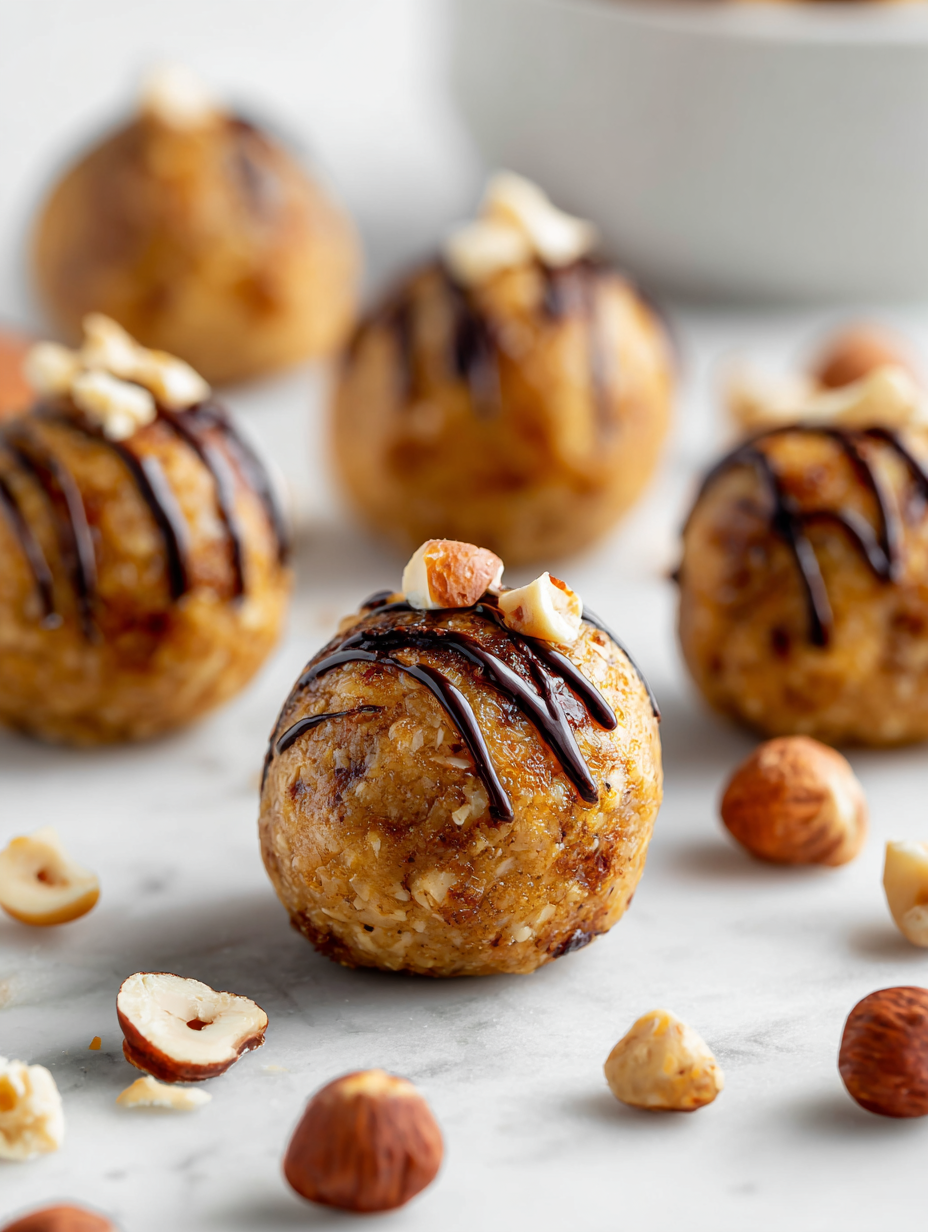
This recipe is inspired by the chaos of my busy mornings, when I need something quick, satisfying, and no-fuss. I love how these hazelnut bites come together in just minutes, no oven required, perfect for grabbing as I dash out the door or when I need a little sweet pick-me-up without the cleanup.
Morning chaos, sweet crunch
- I love how these bites remind me of childhood snacks—crunchy, nutty, and just a hint of sweetness that lingers.
- There’s a quiet satisfaction in how simple ingredients come together without any heat, especially on hectic mornings.
- Making these always feels like a small victory—quick, easy, and so satisfying when I need a little treat without the fuss.
- I get a little nostalgic every time I crunch into one, thinking of lazy afternoons and good conversations.
- These bites are my secret weapon for when I crave something indulgent but want to keep it real and simple.
The story behind this recipe
- This recipe actually came about during a messy weekend when I needed something sweet but had zero energy to cook. I remembered how my grandmother used to toss nuts and honey together, simple and honest, no fuss. That memory stuck with me, and I started experimenting with different textures and flavors until these bites emerged.
- They’re kind of a love letter to those lazy afternoons spent in the kitchen, just playing with ingredients and seeing what sticks. I like that they’re not perfect—each one a little rustic, a little messy, but full of flavor. Sometimes, I think the best recipes are born from just messing around, not overthought, just feeling your way through.
- heading
- story_type
Trivia and Historical Tidbits
- These bites have roots in traditional European nut confections, simplified for modern snacking without baking fuss.
- They echo the mid-20th century trend of no-bake treats, born out of necessity and a desire for quick indulgence.
- Hazelnuts have long been prized in Mediterranean and Middle Eastern cuisines, often roasted to bring out their smoky, sweet aroma, which inspired this recipe.
Ingredient breakdown: key components
- Hazelnuts: I love the roasted, smoky aroma they develop—adds depth. Toast them lightly if you want a crunchier bite, or skip roasting for a milder, nuttier flavor.
- Medjool Dates: Their sticky sweetness acts as the glue. If they’re dry, warm them slightly or soak in warm water for easier blending.
- Dark Chocolate: I prefer a good quality, sharp cocoa flavor. Melt slowly to avoid seizing. Use cacao nibs for extra crunch and intensity.
- Sea Salt: Just a pinch enhances all the flavors. If you like a sweeter bite, reduce or omit the salt entirely.
- Coconut Oil: Keeps the mixture smooth and helps set. Use unrefined for a richer aroma, or a neutral oil if you want the hazelnuts to shine more.
- Vanilla Extract: Adds a subtle warmth. For a more intense flavor, try vanilla bean paste instead.
- Optional Add-ins: Dried cherries or a sprinkle of sea salt on top can add contrast. Keep them small so the bites stay handheld and portable.
Spotlight on Key Ingredients
Hazelnuts:
- I love the roasted, smoky aroma they develop—adds depth. Toast them lightly if you want a crunchier bite, or skip roasting for a milder, nuttier flavor.
- Medjool Dates: Their sticky sweetness acts as the glue. If they’re dry, warm them slightly or soak in warm water for easier blending.
Dark Chocolate:
- I prefer a good quality, sharp cocoa flavor. Melt slowly to avoid seizing. Use cacao nibs for extra crunch and intensity.
- Sea Salt: Just a pinch enhances all the flavors. If you like a sweeter bite, reduce or omit the salt entirely.
Notes for ingredient swaps
- Dairy-Free: Swap regular chocolate for coconut or almond-based dairy-free chocolate chips. Expect a slightly different melt and richness.
- Sweetener: Use maple syrup or honey instead of dates if you prefer a different type of sweetness, but watch for a thinner texture.
- Nut Options: Almonds or cashews can replace hazelnuts for a milder nutty flavor; toast them for extra aroma.
- Oil Choices: Use avocado oil for a neutral, mild flavor or butter if you don’t mind a richer, dairy note.
- Add-ins: Dried cranberries or goji berries for tart bursts instead of dried cherries—adds a fruity contrast.
- Flavor Boost: A dash of espresso powder or smoked sea salt can deepen flavor profiles without overpowering the nuts.
- Texture Variation: Coarse sea salt or chopped roasted nuts on top for added crunch and visual appeal.
Equipment & Tools
- Mixing bowl: Combine and stir ingredients.
- Spatula: Mix and press mixture into molds.
- Small baking dish or silicone mold: Shape the bites for easy cutting.
- Microwave or double boiler: Gently melt chocolate without burning.
- Parchment paper: Line the mold or dish for easy removal.
Step-by-step guide to hazelnut bites
- Gather all equipment: a mixing bowl, spatula, small baking dish or silicone mold, and parchment paper for easy cleanup.
- Toast the hazelnuts lightly in a dry skillet over medium heat for about 5 minutes, stirring often until fragrant and slightly golden. Let cool.
- Pit the Medjool dates if they aren’t pitted, then chop them into small pieces to help them blend more easily.
- In the mixing bowl, combine the chopped dates and hazelnuts. Use a spatula or your hands to break down the dates into smaller bits and mix well.
- Melt the dark chocolate gently in a double boiler or microwave in 20-second bursts, stirring between each to prevent seizing. About 30 seconds in the microwave usually does it.
- Add the melted chocolate, a teaspoon of vanilla extract, a pinch of sea salt, and a tablespoon of coconut oil to the nut-date mixture. Mix until evenly coated and sticky.
- Scoop the mixture into your prepared mold or dish. Press it down firmly with the back of a spoon or your fingers to compact.
- Place in the fridge for at least 30 minutes to set. The mixture should feel firm and hold together when pressed.
- Once set, lift out of the mold and cut into small, bite-sized pieces. For a more refined look, roll into balls or press into silicone molds before chilling.
- Finish by sprinkling a little flaky sea salt or chopped hazelnuts on top for added texture and visual appeal. Serve immediately or store.
Chill the assembled bites in the fridge for at least 30 minutes until firm. Once chilled, cut or pop out of molds and serve immediately. Keep leftovers in an airtight container in the fridge for up to a week.
How to Know It’s Done
- Chocolate is shiny and fully melted without lumps.
- Mixture holds together when pressed, but isn’t too sticky or greasy.
- Bites are firm yet tender after chilling, with a slight crunch from nuts.
No-Bake Hazelnut Bites
Ingredients
Equipment
Method
- Start by lightly toasting the hazelnuts in a dry skillet over medium heat for about 5 minutes, until fragrant and golden, then let them cool completely.
- While the nuts cool, chop the pitted Medjool dates into small pieces to help them blend smoothly.
- Place the toasted hazelnuts in a mixing bowl, then add the chopped dates. Use a spatula or your fingers to break down the dates and mix everything together until well combined and sticky.
- Gently melt the dark chocolate in short bursts in the microwave, stirring in between, until smooth and shiny. You can also melt it over a double boiler if you prefer.
- Pour the melted chocolate into the bowl with the nut and date mixture, then add a teaspoon of vanilla extract, a pinch of sea salt, and the tablespoon of coconut oil. Mix everything thoroughly until the mixture is evenly coated and sticky.
- Line your small baking dish or silicone mold with parchment paper and press the mixture firmly into it, smoothing the top with the back of a spoon or spatula to create an even surface.
- Place the mold in the fridge and chill for at least 30 minutes, or until the mixture is firm and holds together when pressed.
- Once chilled and set, lift out the block and cut into small, bite-sized pieces. For a more polished look, you can roll them into balls or press into silicone molds before chilling.
- Finish by sprinkling a little flaky sea salt or chopped hazelnuts on top for extra flavor and crunch, then serve immediately or store in an airtight container in the fridge.
Pro tips for perfect hazelnut bites
- Use finely chopped nuts for a more uniform texture.
- Warm the dates slightly to make blending easier and more consistent.
- Melt chocolate gently over low heat or short bursts in the microwave.
- Press the mixture firmly into the mold for even bites and compact texture.
- Chill the bites until fully firm, at least 30 minutes, for clean cuts and proper setting.
- Finish with a sprinkle of sea salt or chopped nuts on top to enhance flavor and texture.
- Use a silicone mold or parchment-lined dish for easy removal and presentation.
Common mistakes and how to fix them
- FORGOT to cool nuts before chopping? Toast longer or add a pinch of salt for easier handling.
- DUMPED hot chocolate into mixture? Let it cool slightly to avoid melting the nuts or making mixture greasy.
- OVER-TORCHED nuts? Remove immediately, cool, and check for bitterness before using.
- MISSED the chill time? Extend fridge time or briefly freeze for quicker setting.
Quick fixes and pantry swaps
- If the mixture is too dry, splash in a little coconut oil to loosen it up.
- When bites crackle in the fridge, patch with a quick re-chill for 10 minutes.
- Splash warm water on sticky dates if blending becomes tough.
- Patch over-dried nuts by toasting briefly again for extra moisture and aroma.
- Shield delicate bites from moisture by wrapping tightly, preserving crunch and flavor.
Prep, store, and reheat tips
- You can prep the mixture a day ahead; keep it covered in the fridge to prevent it from drying out and absorbing other odors.
- Store the assembled bites in an airtight container in the fridge for up to a week. Expect the texture to firm up and flavors to meld.
- For longer storage, freeze the bites for up to 3 months. Wrap individually in parchment for easy thawing and to prevent freezer burn.
- Refrigerated bites may soften slightly; let them sit at room temperature for 5-10 minutes before serving to enhance flavor and texture.
- To reheat, briefly warm in the microwave at 20-second intervals until slightly melty, but avoid overheating to prevent melting the chocolate completely.
Top questions about hazelnut bites
1. Can I make these vegan?
Yes, you can substitute honey or maple syrup for a vegan option, but the texture might be slightly softer.
2. Can I add cacao nibs?
Absolutely, using cacao nibs adds a crunchy texture and intense chocolate flavor, making them richer.
3. My mixture is too sticky, what do I do?
If the mixture feels too sticky, toss it in the fridge for 10 minutes to firm up before shaping.
4. How long do these last?
Store these bites in an airtight container in the fridge for up to a week for optimal freshness.
5. How do I melt chocolate without burning it?
You can melt the chocolate in short bursts in the microwave, stirring in between to prevent seizing.
6. Can I customize the ingredients?
To customize, try adding a pinch of smoked sea salt or dried fruit pieces for extra flavor contrast.
7. Can I freeze these?
You can freeze the bites for up to 3 months, just wrap them well to prevent freezer burn.
8. Should I toast the hazelnuts first?
Using toasted hazelnuts gives a deeper, smoky flavor, but raw nuts work well if you prefer milder taste.
9. My bites crack when I cut them, what now?
If the bites crack or crumble when cutting, chill them longer or let them sit at room temperature briefly.
10. Why add salt to the recipe?
Adding a pinch of sea salt balances the sweetness and enhances the nuttiness of the bites.
These no bake hazelnut bites are a reminder that sometimes, the simplest ingredients create the most satisfying treats. There’s a certain charm in the rough edges, in the crunch and the richness of toasted hazelnuts against melting chocolate. They’re perfect for whenever I need a quick, honest little pick-me-up.
In a world that’s often hurried and complicated, these bites offer a moment of genuine comfort—no oven, no fuss, just good ingredients coming together. They remind me that the best recipes are often born from improvisation and a little bit of love, especially when I want something sweet with minimal effort.

I’m Emily Richardson, the heart and soul behind Playing with Flavors. Cooking isn’t just a hobby for me – it’s a passion that I’ve cultivated for years, and it’s become the driving force of my life.
From the kitchen of my cozy café to the pages of this blog, every dish I create is a reflection of my love for food and the joy it brings to people.


