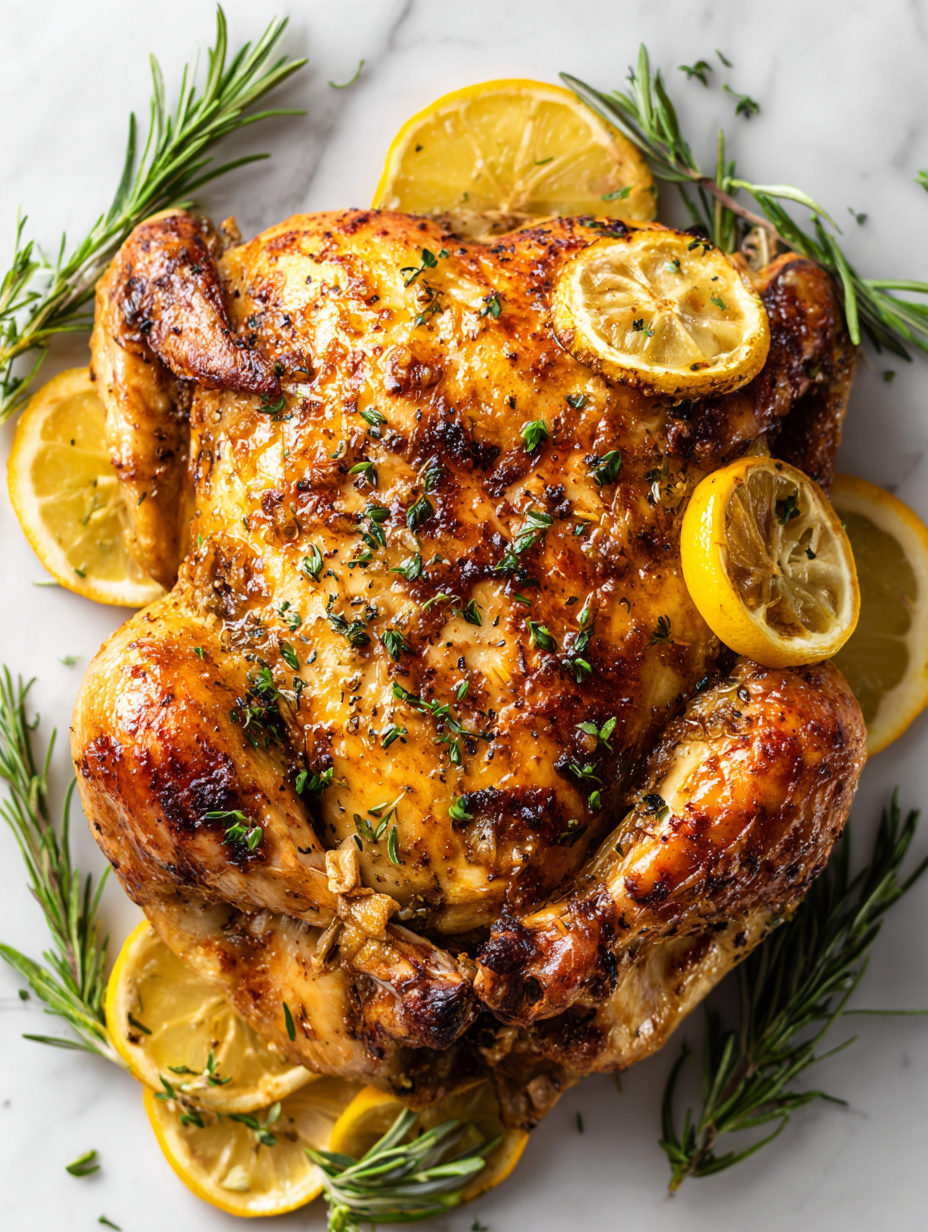
Category: Main Course

  • Haunted Kitchen: Bloody Spaghetti & Ghoulish Sausage Fingers

    Haunted Kitchen: Bloody Spaghetti & Ghoulish Sausage Fingers

    What if your Halloween dinner could be more than just spooky? Imagine a dish that combines the chaos of a haunted house with the joy of a messy, delicious meal. The Bloody Spaghetti with Sausage Fingers is that eerie delight, perfect for busting out during your creepy costume party.

    This recipe isn’t just about the look—though it’s pretty gory—it’s also about the fun of making something unexpected. It’s a clever way to entertain kids and adults alike, with playful, slightly sinister flair. Plus, the aroma of savory sausage and bubbling tomato sauce is guaranteed to add to the creepy atmosphere.

    Bloody Spaghetti with Sausage Fingers

    This dish features al dente spaghetti coated in a rich tomato sauce, topped with sausage pieces shaped like fingers to resemble spooky, bloody appendages. The sausages are baked until browned and arranged to look like severed fingers, creating a playful and eerie presentation for Halloween. The final dish combines a hearty pasta texture with a fun, gory visual effect.
    Prep Time 15 minutes
    Cook Time 30 minutes
    Total Time 45 minutes
    Servings: 4
    Course: Main Course
    Cuisine: Halloween
    Calories: 650

    Ingredients
      

    • 12 ounces spaghetti uncooked
    • 1 pound sausage links preferably pork or chicken sausage
    • 2 cups marinara sauce ready-made or homemade
    • 1 tablespoon olive oil
    • to taste salt and pepper
    • 1 egg egg wash for brushing sausage fingers

    Equipment

    • Large pot
    • Baking Sheet
    • Cooking spoon
    • Knife
    • Cutting Board

    Method
     

    1. Cook the spaghetti in a large pot of boiling salted water until al dente, then drain and set aside.
    2. Preheat your oven to 400°F (200°C). Line a baking sheet with parchment paper.
    3. Cut each sausage link into four equal pieces and gently shape each piece into a finger with a slight bend, tapering at one end to resemble a fingertip.
    4. Use a sharp knife to make small knuckle marks and nail imprints on the sausage fingers for a gory, realistic look.
    5. Place the sausage fingers on the prepared baking sheet. Brush them lightly with the egg wash to give a shiny, blood-like appearance.
    6. Bake the sausage fingers in the preheated oven for 15-20 minutes, until browned and cooked through, and the tips are slightly crisp.
    7. Meanwhile, heat the marinara sauce in a saucepan until bubbling and fragrant.
    8. Reheat the cooked spaghetti in the same pot or in a serving bowl until warm, then toss with the hot marinara sauce until evenly coated.
    9. Arrange the sauced spaghetti on a serving platter, creating a base to showcase the sausage fingers.
    10. Place the baked sausage fingers on top of the spaghetti, positioning some so they appear to be grasping the pasta or emerging from the sauce, adding a spooky touch.
    11. Finish with a drizzle of extra marinara or red sauce to mimic blood, enhancing the gory effect.
    12. Serve immediately and enjoy the creepy, delicious presentation of Bloody Spaghetti with Sausage Fingers!

    Notes

    Ensure sausages are cooked thoroughly and fingers are shaped carefully to resemble creepy fingers. Use red sauce generously for a bloody effect.
    As the plates empty and laughter echoes through the night, this dish proves that chaos in the kitchen can lead to the best memories. It’s a little spooky, a little silly, and totally satisfying.

    So, gather your ingredients and an eager crew of goblins and ghouls. It’s not just a meal; it’s a Halloween tradition in the making. Let the horrifyingly good times roll and see who dares to take the first bite.

  • Gory Goodness: Halloween Eyeball Pasta with Creepy Meatball ‘Eyeballs’

    Gory Goodness: Halloween Eyeball Pasta with Creepy Meatball ‘Eyeballs’

    Nothing screams Halloween quite like a plate of spooky, eyeball-inspired pasta that is just as fun to look at as it is to eat. This recipe turns simple pasta into a haunted culinary scene, complete with juicy meatball “eyeballs” staring back at you from a creamy, flavorful sauce. Perfect for a kids’ party or a twisted dinner theater, it combines a touch of chaos with familiar comfort.

    What makes this dish stand out is the playful presentation. The meatball “eyeballs” with an olive for a pupil bring a burst of spooky joy to any table. As the aroma of garlic and melt-in-your-mouth meatballs mingles with simmering tomato sauce, the whole kitchen fills with a sense of eerie anticipation. It’s not just dinner—it’s a temporary portal to a Halloween haunted house in your own home.

    Spooky Eyeball Pasta

    This dish features pasta topped with meatball ‘eyeballs’ that are embedded in a rich tomato sauce. The meatballs are shaped to resemble eyeballs, complete with an olive pupil, and the sauce is creamy and flavorful, creating a playful, spooky presentation. The final texture combines tender pasta, juicy meatballs, and a smooth sauce with an eye-catching appearance.
    Prep Time 20 minutes
    Cook Time 30 minutes
    Total Time 50 minutes
    Servings: 4
    Course: Main Course
    Cuisine: American
    Calories: 450

    Ingredients
      

    • 12 pieces meatballs prepared or homemade small meatballs
    • 1 cup tomato sauce preferably smooth
    • 8 oz pasta spaghetti or other preferred shape
    • 4 small black olives pitted
    • 2 cloves garlic minced
    • 2 tablespoons olive oil for cooking
    • to taste salt and pepper

    Equipment

    • Large pot
    • Skillet or saucepan
    • Mixing bowl
    • Cooking spoon
    • Measuring cups and spoons

    Method
     

    1. Bring a large pot of salted water to a boil, then add the pasta. Cook according to package instructions until al dente, then drain and set aside.
    2. Heat olive oil in a skillet over medium heat and add the minced garlic. Sauté until fragrant, about 30 seconds, until you smell the aroma and the garlic starts to turn golden.
    3. Add the tomato sauce to the skillet, stirring to combine with the garlic. Simmer gently for 5 minutes to warm through and develop flavor.
    4. While the sauce simmers, prepare the meatball ‘eyeballs.’ Take each meatball and gently shape it into a round sphere if needed. Slice a black olive in half to create the pupil.
    5. Place a meatball into the sauce, gently nestling it so it is partially submerged. Top each meatball with a halved black olive, pressing slightly to secure the pupil in place. Repeat with all meatballs, creating a spooky row of eyeballs.
    6. Allow the meatballs to cook in the sauce for about 10 minutes, turning occasionally if needed, until heated through and the sauce has thickened slightly around them.
    7. Add the cooked pasta to the skillet with the sauce and carefully toss everything together until the pasta is coated evenly and the dish looks visually appealing with the floating eyeballs.
    8. Taste and season with salt and pepper as needed. Serve hot, allowing the spooky meatball ‘eyeballs’ to stand out visually and flavorfully.

    Notes

    For extra spooky effect, you can add a few more halved olives as pupils or garnish with chopped basil or parsley.

    Crafting this creepy-cute pasta is a delightful way to get into the spooky spirit. Watching everyone’s faces light up when they see the grotesque yet adorable “eyeballs” is worth every second of effort. Plus, it offers a chance to turn a simple weeknight dish into a memorable, playful experience.

    Despite the fun, it’s surprisingly easy to whip up and adaptable to whatever you have on hand. The vibrant colors and surprising textures make it a favorite for those craving something unconventional yet comforting. As the night winds down, the lingering aroma and fun visuals remain etched as a perfect Halloween memory.

  • Reviving Comfort: An Unusual Spin on Classic Chicken Noodle Soup

    Reviving Comfort: An Unusual Spin on Classic Chicken Noodle Soup

    Uncover a hidden twist on the traditional chicken noodle soup that experiments with aromatic herbs you never expected to find in a bowl. This recipe is perfect for those chilly evenings when the usual just won’t do, and you crave something familiar yet surprisingly fresh. Crafting this soup will transport you to a cozy kitchen, where bold flavors and comforting textures collide.

    As someone who adores mixing memory with innovation, I’ve experimented extensively to elevate this humble dish. The secret lies in a unique blend of spices and vegetables that add layers of aroma and complexity, transforming a simple broth into a symphony of savory warmth. It’s not just a meal; it’s an experience that sparks nostalgia yet feels refreshingly new.

    Herb-Infused Chicken Noodle Soup

    This chicken noodle soup combines tender shredded chicken and al dente noodles in a flavorful broth enhanced with aromatic herbs and vegetables. The recipe involves simmering ingredients to develop layers of aroma, then finishing with fresh herbs for a fragrant, comforting dish with a clear, vibrant appearance.
    Prep Time 15 minutes
    Cook Time 30 minutes
    Total Time 45 minutes
    Servings: 4
    Course: Main Course
    Cuisine: Comfort Food
    Calories: 350

    Ingredients
      

    • 1 lb boneless, skinless chicken breasts or thighs, shredded after cooking
    • 8 oz egg noodles cooked separately before adding
    • 1 medium onion finely chopped
    • 3 cloves garlic minced
    • 3 carrots carrots diced
    • 2 stalks celery diced
    • 8 cups chicken broth
    • 1 tsp dried thyme
    • 1 bay leaf bay leaf
    • Fresh fresh herbs parsley, dill, and basil, chopped

    Equipment

    • Large pot
    • Wooden spoon

    Method
     

    1. Place the chicken breasts into a large pot, cover with chicken broth, and bring to a gentle simmer. Cook until the chicken is cooked through and tender, about 15 minutes.
    2. Remove the chicken from the broth, let it cool slightly, then shred into bite-sized pieces. Meanwhile, add chopped onion, diced carrots, and diced celery into the broth and continue simmering for another 10 minutes until the vegetables are tender.
    3. While the vegetables are cooking, cook the egg noodles in a separate pot according to package instructions until al dente. Drain and set aside.
    4. In the simmering broth, add minced garlic, dried thyme, and bay leaf. Let it simmer uncovered for 5 minutes until the broth becomes fragrant and slightly reduced.
    5. Remove the bay leaf, then stir in the shredded chicken and cooked noodles. Warm through for another 2-3 minutes.
    6. Taste the soup and season with salt and freshly ground pepper as needed. Finally, sprinkle chopped fresh herbs over the top for a burst of aroma and color.
    And there you have it — a chicken noodle soup that’s a little bit rebellious and a lot comforting. It’s perfect for a busy weeknight or a lazy weekend afternoon, offering instant warmth with every spoonful. This recipe reminds me that food is as much about tradition as it is about curiosity and play.

    Next time you’re craving something hearty but flavorful, give this recipe a try. The mixture of familiar aromas and unexpected herbs will make it feel like a special discovery every single time. Sometimes, the best comfort food surprises us just enough to keep things interesting.

  • Transform Your Soup Game with This Cozy Lasagna Soup Twist

    Transform Your Soup Game with This Cozy Lasagna Soup Twist

    Imagine a soup that captures the essence of lasagna but warms you from the inside out. This lasagna soup recipe is my secret weapon for busy weeknights or when nostalgia hits hard. Its rich flavors and comforting texture make it a must-try for anyone craving that classic Italian infusement.

    What makes this dish stand out is how it strips down traditional lasagna to its pure, broth-based form—yet still delivers all the cheesy, tomato-ey goodness we adore. Plus, it’s incredibly quick to whip up, perfect for those frantic evenings when time isn’t on your side.

    Lasagna Soup

    Lasagna soup is a broth-based dish that captures the flavors of traditional lasagna using rich tomato broth, seasoned meats, and melted cheese. It features tender pasta and a comforting, hearty texture with a cheesy topping, resembling a deconstructed lasagna in a bowl.
    Prep Time 10 minutes
    Cook Time 30 minutes
    Total Time 40 minutes
    Servings: 4
    Course: Main Course
    Cuisine: Italian
    Calories: 350

    Ingredients
      

    • 1 tablespoon olive oil
    • 1 pound ground beef or Italian sausage for added flavor
    • 1 medium onion finely chopped
    • 3 cloves garlic minced
    • 28 oz can tomato sauce
    • 4 cups chicken or vegetable broth
    • 8 oz uncooked pasta (small shapes like ditalini or shells)
    • 1 teaspoon dried oregano
    • 1 teaspoon dried basil
    • 0.5 teaspoon red pepper flakes optional, for heat
    • 1 cup shredded mozzarella cheese for topping
    • 0.25 cup grated Parmesan cheese for serving

    Equipment

    • Large pot
    • Wooden spoon

    Method
     

    1. Heat olive oil in a large pot over medium heat. Add the ground meat and cook, breaking it apart with a spoon, until browned and cooked through, about 5-7 minutes.
    2. Add the chopped onion and minced garlic to the pot. Sauté until fragrant and translucent, about 2-3 minutes, with the onions softening and garlic releasing aroma.
    3. Pour in the tomato sauce and broth, stirring to combine. Bring the mixture to a gentle boil, allowing the flavors to meld, about 5 minutes.
    4. Add the dried oregano, basil, red pepper flakes (if using), and season with salt and pepper to taste. Stir well to evenly distribute the herbs.
    5. Stir in the uncooked pasta, ensuring it’s submerged in the broth. Cover the pot and cook until the pasta is al dente, about 10 minutes.
    6. Once the pasta is cooked, ladle the hot soup into bowls. Sprinkle shredded mozzarella and grated Parmesan on top.
    7. Allow the cheese to melt slightly, then serve immediately for a warm, cheesy, and hearty bowl of lasagna flavors in soup form.

    Notes

    Feel free to add fresh basil or a drizzle of olive oil before serving for extra flavor.
    This lasagna soup isn’t just a dish; it’s a warm hug in a bowl that reminds you of family dinners around a bustling table. It’s ideal for cozy nights when you want something satisfying without the fuss.

    As the seasons shift, embracing hearty, flavorful meals like this becomes essential. With every spoonful, you’ll find comfort and a touch of Italy on your plate, stirred into a pot that’s just as lively as your dinner table.

  • Spook-tacularly Fun: Halloween Mummy Pizza

    Spook-tacularly Fun: Halloween Mummy Pizza

    Imagine transforming simple pizza into a playful, spooky feast that sparks both nostalgia and chaos in your kitchen. The idea of wrapping cheese and pepperoni in strips of dough to mimic mummies is a whimsical way to celebrate Halloween. It’s a recipe that invites chaos, laughter, and very delicious results, perfect for any costume party or family dinner.

    As the oven crackles and the smell of seasoned dough fills your space, you’re reminded of childhood magic. These mummy pizzas are not just food but a memory in the making. They’re quick, fun, and a little bit spooky—just the way Halloween should feel.

    Mummy Pepperoni Pizzas

    These mummy pepperoni pizzas are made by wrapping pizza dough strips around cheese and pepperoni to create a spooky, mummy-like appearance. The pizzas are baked until the dough is golden and crispy, with melted cheese and crispy pepperoni peeking through the bandages. The final dish has a fun, chaotic look with a crispy crust and gooey toppings.
    Prep Time 15 minutes
    Cook Time 15 minutes
    Total Time 30 minutes
    Servings: 4
    Course: Main Course
    Cuisine: American
    Calories: 250

    Ingredients
      

    • 1 roll pre-made pizza dough store-bought or homemade
    • 1 cup shredded mozzarella cheese
    • 20 slices pepperoni slices
    • 2 tablespoons olive oil for brushing the crust
    • to taste salt

    Equipment

    • Baking Sheet
    • Rolling pin

    Method
     

    1. Preheat your oven to 400°F (200°C). Lightly flour a clean surface and roll out the pizza dough into a rectangle, about ¼ inch thick. Transfer the dough to a baking sheet lined with parchment paper.
    2. Spread a thin layer of shredded mozzarella over the dough, leaving about an inch around the edges free for the crust.
    3. Place pepperoni slices randomly over the cheese, ensuring some pieces are close to the edges for added fun.
    4. Using a sharp knife or pizza cutter, cut the dough into strips about ¼ to ½ inch wide. These will serve as the mummy bandages.
    5. Carefully wrap the strips of dough over the cheese and pepperoni, leaving small gaps to reveal some pepperoni and cheese underneath, mimicking mummy bandages.
    6. Brush the exposed crust edges with a little olive oil to help them turn golden during baking.
    7. Place the baking sheet in the oven and bake for 12-15 minutes, or until the crust is golden brown and crispy, and the cheese is bubbling.
    8. Remove from the oven and let sit for a couple of minutes; the cheese will set slightly, making it easier to serve.
    9. Slice the pizzas into pieces and serve immediately, displaying the fun mummy-like appearance with crispy dough and melty toppings.

    Whether you’re baking these mummy pizzas for a festive gathering or a spontaneous Halloween night treat, they bring a lively spirit to the table. The balance of crispy crust, melty cheese, and those goofy, bandage-like dough strips creates a delightful mix of textures and flavors.

    Enjoy the chaos, the giggles, and the proud moments when everyone at your table spots these adorable monsters. They are a perfect way to celebrate the season with a dish that’s as fun to make as it is to eat. Happy Halloween cooking!

  • The Art of Stuffed Peppers: A Unexpected Flavor Journey

    The Art of Stuffed Peppers: A Unexpected Flavor Journey

    Stuffed peppers are often seen as simple comfort food, but taking a deeper dive reveals a world of flavor possibilities. I recently experimented with a unique blend of Mediterranean herbs, sun-dried tomatoes, and a whisper of smoky paprika to elevate this humble dish. The process of stuffing and baking releases an intoxicating aroma, making it irresistible even before the first bite.

    What excites me most is how versatile this recipe is. It’s perfect for a cozy weekend dinner or a quick weeknight fix. Plus, customizing the fillings keeps it interesting; every batch can be a new adventure in your kitchen. Let’s explore why this classic dish deserves a modern twist.

    Mediterranean Stuffed Peppers

    Stuffed peppers are prepared by filling halved bell peppers with a seasoned mixture of rice, herbs, sun-dried tomatoes, and cheese, then baked until tender. The final dish features bright, colorful peppers with a flavorful, moist filling and a slightly browned top, offering a hearty, textured presentation.
    Prep Time 20 minutes
    Cook Time 30 minutes
    Total Time 50 minutes
    Servings: 4
    Course: Main Course
    Cuisine: Mediterranean
    Calories: 320

    Ingredients
      

    • 4 large bell peppers preferably colorful, cored and halved
    • 1 cup cooked rice white or brown, cooled
    • 1/2 cup sun-dried tomatoes chopped
    • 1 cup shredded cheese feta, mozzarella, or a mix
    • 2 tbsp olive oil
    • 2 cloves garlic minced
    • 1 tsp dried oregano
    • 1/2 tsp smoked paprika
    • to taste salt and black pepper

    Equipment

    • Baking dish
    • Chef’s knife
    • Cutting Board
    • Mixing bowl
    • Sauté pan
    • Spoon
    • Aluminum foil

    Method
     

    1. Preheat your oven to 375°F (190°C). Arrange the halved peppers cut side up in a baking dish and lightly brush them with a teaspoon of olive oil. Bake uncovered for about 10 minutes to soften the peppers slightly. The peppers should be fragrant and beginning to char around the edges.
    2. Meanwhile, heat a tablespoon of olive oil in a sauté pan over medium heat. Add the minced garlic and cook for about 30 seconds until fragrant, stirring constantly to prevent burning. The garlic should become aromatic and slightly golden.
    3. Add the chopped sun-dried tomatoes to the pan and sauté for another 2 minutes. The mixture will become fragrant, and the tomatoes will soften slightly, releasing vibrant aromas.
    4. In a mixing bowl, combine the cooked rice, sautéed sun-dried tomatoes, dried oregano, smoked paprika, and a pinch of salt and pepper. Mix everything thoroughly until the ingredients are evenly distributed and the mixture is moist but firm.
    5. Carefully spoon the rice mixture into each of the parbaked pepper halves, pressing gently to fill them completely and create a rounded top. Ensure all peppers are evenly filled for uniform baking and presentation.
    6. Sprinkle the shredded cheese evenly over the filled peppers. The cheese will melt and create a golden, bubbly crust, enhancing the flavor and visual appeal of the dish.
    7. Place the filled peppers back in the oven, uncovered, and bake for an additional 20 minutes. The peppers should be soft, with the cheese melted and bubbling, and the edges slightly browned. Stop baking once you see a caramelized appearance on top.
    8. Remove the dish from the oven and let the stuffed peppers rest for a few minutes. This helps the filling set and makes them easier to serve.
    9. Garnish the peppers with freshly chopped herbs if desired, then serve warm. The peppers should be tender with a flavorful, cheesy filling and a slightly toasted top.

    Incorporating unexpected ingredients into stuffed peppers transforms a familiar dish into a memorable experience. The aroma, texture, and burst of flavors make it a favorite that I keep returning to. Whether you’re sharing or savoring solo, the blend of colors and aromas makes every bite special.

    As the seasons shift, this recipe remains a reliable staple, warming the soul with each forkful. It’s a celebration of simplicity and creativity in one dish, perfect for those who love a little culinary surprise. Enjoy the process, and revel in the comforting familiarity of a well-stuffed pepper.

  • Monster Burgers for a Haunted Feast: A Fun Flip on Halloween Classics

    Monster Burgers for a Haunted Feast: A Fun Flip on Halloween Classics

    Introducing a playful twist for your Halloween table—the Monster Burgers, where chaos in the kitchen becomes a feast. These burgers aren’t just meant to satisfy hunger; they’re a visual spectacle of googly eyes, jagged cheese teeth, and monsterous textures. Perfect for turning a simple family dinner into a spooky celebration everyone will remember.

    Preparation is part of the fun: gather your favorite burger ingredients and unleash your inner monster artist. Brightly colored condiments and crispy toppings add an extra layer of delight, making each bite a little adventure. This recipe can be as wild or as simple as you want—just enough to turn heads and spark giggles.

    WHY I LOVE THIS RECIPE?

    • I get to combine my love of childhood monsters with my culinary creativity.
    • The chaotic decorating process is pure joy—sometimes messy, often hilarious.
    • Kids and adults both melt over the silly, spooky eye and teeth details.
    • This dish is a nostalgic nod to Halloweens past, with a modern, playful twist.
    • Nothing beats the aroma of sizzling beef mingling with Halloween spices and laughter.

    AVOID MY DISASTER (You’re Welcome)

    • FORGOT to check the burger size? They turn soggy fast. Keep small patties handy. • DUMPED ketchup on a white shirt? It’s a pumpkin massacre. Use a napkin fast. • OVER‑TORCHED cheese? Charred teeth ruin the look—grab a new slice quickly. • MISS when decorating? Lost the eyes? Use olives or candy buttons—quick fix! • SKIPPED chilling the patties? They fall apart. Chill for 15 minutes before grilling for best shape.

    QUICK FIXES THAT SAVE YOUR DAY

    • SPLASH some cold water on over-charred areas to tame smoky flavor. • PATCH with extra cheese if your monster has a jagged, cheesy grin. • SHIELD your buns with foil if the grill flare gets wild. • WHEN eyes fall off, glue them back with a dab of melted cheese. • Always keep a bag of frozen patties in the freezer for last-minute feasts, smell that satisfying crackle when cooking.

    Creating these Monster Burgers is more than just a Halloween hack; it’s a chance to inject some humor and chaos into your seasonal spread. Seeing the smiles—and occasional shrieks—makes all the effort worthwhile. Plus, they’re a fantastic way to share a ghoulishly good meal that sparks stories long after the candy is gone.

    So gather your ingredients and embrace the mess. With a little patience and a lot of fun, your monster lineup will steal the show. These burgers won’t just be eaten—they’ll be remembered as part of your spooky tradition.

    Monster Burgers

    Monster Burgers are playful, creatively decorated beef patties served on buns with colorful toppings and cheese to resemble a monster’s face. The burgers combine grilled beef patties with melted cheese, vibrant condiments, and monster-inspired decorations like googly eyes and jagged cheese teeth, resulting in a fun, textured presentation. The final dish features juicy, crispy, and cheesy elements with a whimsical and spooky appearance.
    Prep Time 15 minutes
    Cook Time 15 minutes
    Total Time 30 minutes
    Servings: 4
    Course: Main Course
    Cuisine: American
    Calories: 540

    Ingredients
      

    • 1 pound ground beef 80/20 blend for juiciness
    • 4 slices cheddar cheese cut into jagged teeth shapes
    • 4 buns hamburger buns preferably toasted lightly
    • small assorted googly eyes or black olives for monster eyes
    • 2 tablespoons ketchup for monster mouths
    • 2 tablespoons mustard for additional decoration
    • handful shredded lettuce lettuce for monster hair and decoration
    • to taste salt and pepper for seasoning

    Equipment

    • Grill or skillet
    • Spatula

    Method
     

    1. Preheat your grill or skillet over medium-high heat and season the ground beef mixture with salt and pepper, then form into four small, slightly flattened burger patties.
    2. Cook the patties for about 4–5 minutes per side until they develop a nice char and are cooked through, filling the air with a savory aroma.
    3. During the last minute of cooking, top each patty with a slice of cheddar cheese and let it melt until oozy and slightly bubbly.
    4. While the cheese melts, briefly toast the hamburger buns until golden and fragrant.
    5. Assemble each monster burger by spreading ketchup and mustard on the bottom bun, then placing the cheesy beef patty on top.
    6. Add shredded lettuce for hair or wild monster features, then place googly eyes or black olives on the cheese for eyes.
    7. Use additional ketchup, mustard, or cheese to create jagged monster teeth and mouths on the burger for a spooky, fun face.
    8. Top each assembled burger with the other half of the bun, gently pressing down to secure the decorations.
    9. Serve the monster burgers immediately with extra toppings or sides to match the spooky theme.

    As Halloween night winds down, there’s a charm in watching everyone marvel at your monstrous creations. The bits of shredded cheese and silly eyes bring a sense of shared chaos, making the evening even more memorable. It’s not about perfection; it’s about the joy of crafting something wildly fun and a little bit silly.

    When you’re packing up or cleaning after the party, you realize this messy, joyful process is what makes the holiday special. These Monster Burgers aren’t just for a festivity—they’re about making imperfect, hilarious moments that everyone will carry with them. And that’s the true magic of Halloween in the kitchen.

  • Spooky Sweetness: Halloween Jack-o’-Lantern Stuffed Peppers

    Spooky Sweetness: Halloween Jack-o’-Lantern Stuffed Peppers

    Halloween often dances on the edge of spooky and sweet, but these Jack-o’-Lantern stuffed peppers bring a playful twist to your seasonal table. Instead of the usual candies or pies, this recipe invites you to carve out a culinary surprise that’s as charming as it is tasty. Bright orange peppers hollowed out and transformed into mini pumpkins make a delightful centerpiece.

    Each pepper is filled with a savory mixture that balances the earthy pepper with flavors like smoky cheese, fragrant herbs, and a hint of heat. The carved faces give off smiling or mischievous expressions, making every bite a little face-to-face with fun. It’s an unexpected way to enjoy your vegetables while embracing the festive spirit.

    Jack-o’-Lantern Stuffed Peppers

    These mini pumpkin-shaped peppers are hollowed out and carved with cheerful or mischievous faces, then filled with a savory mixture of cheese, herbs, and spices. They are baked until tender and bubbling, presenting a festive and visually appealing centerpiece with a combination of crispy edges and melty filling.
    Prep Time 20 minutes
    Cook Time 25 minutes
    Total Time 45 minutes
    Servings: 4
    Course: Main Course
    Cuisine: American
    Calories: 220

    Ingredients
      

    • 4 peppers Orange bell peppers preferably uniform in size
    • 1 cup crumbled cheese cheddar or pepper jack works well
    • 1/2 cup cooked rice white or jasmine rice
    • 2 tablespoons chopped fresh herbs parsley, cilantro, or chives
    • 1 teaspoon smoked paprika adds depth and color
    • 0.5 teaspoon cayenne pepper optional for heat
    • to taste salt and pepper for seasoning
    • 2 tablespoons olive oil for roasting and brushing

    Equipment

    • Chef’s knife
    • Spoon
    • Baking dish
    • Piping bag or small plastic bag

    Method
     

    1. Preheat your oven to 375°F (190°C). Carefully cut the tops off each pepper and set aside; then use a spoon to hollow out the seeds and membranes, creating small pumpkin-shaped shells.
    2. Mix the cooked rice, crumbled cheese, chopped herbs, smoked paprika, cayenne pepper, salt, and pepper in a bowl until well combined. This fragrant mixture will be your stuffing.
    3. Fill each hollowed pepper with the cheese and rice mixture, pressing gently to pack the filling in completely and level with the top.
    4. Place the stuffed peppers upright in a baking dish and brush the outside of each with olive oil to enhance golden color and crispness.
    5. Bake the peppers in the preheated oven for about 25 minutes, until they are tender and slightly caramelized around the edges, with bubbling filling.
    6. While they bake, carve faces into the reserved pepper tops using a small knife or a paring knife to create smiling or mischievous expressions.
    7. Once baked, carefully place the carved tops back onto each pepper to resemble tiny pumpkins; they add a charming finishing touch.
    8. Serve the Jack-o’-Lantern stuffed peppers warm, ideally as a festive centerpiece with their cheerful faces and vibrant color.

    Notes

    Use a small sharp knife for carving. Be gentle when hollowing out peppers to avoid cracks. For a vegan version, substitute cheese with a bean or vegetable-based filling.
    As Halloween approaches, these stuffed peppers offer both a visual delight and a hearty, satisfying bite. They’re perfect for parties, potlucks, or even a family dinner with a fun twist. Watching the carved faces light up as they bake is almost as rewarding as tasting the first cheesy, crunchy bite.

    This recipe isn’t just about keeping the tradition alive; it’s about adding a sprinkle of imagination to your fall table. With simple ingredients and a little carving, you can turn ordinary peppers into edible works of art that will charm even the shyest goblins around. Happy haunting and happy eating.

  • A Cozy Tin Can Chili Revival: A Secret Ingredient Twist

    A Cozy Tin Can Chili Revival: A Secret Ingredient Twist

    When I think of chili, I often recall the cold evenings wrapped in a blanket, the aroma wafting from my grandma’s vintage tin can sitting on the stove. This recipe is my tribute to those nostalgic moments, but with a modern, unexpected twist that transforms the classic into a playful culinary adventure. It’s not just about comfort; it’s about relishing a dish that carries memories and surprises your taste buds.

    This chili begins with a secret ingredient — a splash of smoky bourbon that enhances the depth of flavors and adds a subtle warmth. It’s perfect for weekends when you crave a hearty, soulful meal with a hint of old-school charm. And the best part? It’s ridiculously easy to throw together, even on your busiest days.

    Smoky Bourbon Chili

    This chili is a hearty stew made with ground meat, beans, and a rich tomato base, flavored with smoked paprika and a splash of bourbon for added depth. It has a thick, chunky consistency with a vibrant, reddish-brown appearance. The dish is simmered until flavors meld and the texture is tender and satisfying.
    Prep Time 15 minutes
    Cook Time 40 minutes
    Total Time 55 minutes
    Servings: 6
    Course: Main Course
    Cuisine: American
    Calories: 350

    Ingredients
      

    • 1 lb ground beef or turkey or other ground meat
    • 1 medium yellow onion diced
    • 3 cloves garlic minced
    • 1 can (15 oz) diced tomatoes with juice
    • 1 can (15 oz) kidney beans drained and rinsed
    • 2 tablespoons olive oil
    • 2 teaspoons smoked paprika
    • 1 teaspoon cumin
    • 0.5 cup bourbon adds depth and warmth
    • Salt and pepper to taste

    Equipment

    • Large Pot or Dutch Oven
    • Wooden Spoon or Spatula
    • Sharp Knife
    • Cutting Board

    Method
     

    1. Heat the olive oil in a large pot over medium heat until shimmering.
    2. Add the diced onion and cook, stirring occasionally, until it becomes translucent and starts to soften, about 5 minutes.
    3. Stir in the minced garlic and cook for another minute until fragrant and slightly golden.
    4. Add the ground meat to the pot, breaking it apart with your spoon, and cook until browned and cooked through, about 8 minutes.
    5. Sprinkle in the smoked paprika, cumin, and a pinch of salt and pepper, stirring to coat the meat and vegetables evenly.
    6. Pour in the bourbon, allowing it to sizzle as it deglazes the pan, and cook for 2-3 minutes until the alcohol evaporates slightly.
    7. Stir in the diced tomatoes with their juice and bring the mixture to a gentle simmer.
    8. Pour in the drained and rinsed kidney beans, then reduce the heat to low and cover the pot.
    9. Let the chili simmer gently for about 25-30 minutes, stirring occasionally, until thickened and flavors meld.
    10. Taste and adjust seasoning with salt and pepper as needed before serving.
    11. Spoon the hot, hearty chili into bowls and enjoy with your favorite toppings or crusty bread.

    Notes

    For a smoky flavor boost, add a dash of chipotle powder or smoked chili flakes. This chili tastes even better the next day, allowing flavors to deepen.
    As you ladle this chili into bowls, notice the rich, inviting scent that promises a satisfying meal. Paired with crusty bread or over a bed of steaming rice, it’s a perfect antidote to chilly evenings.

    This dish reminds me that sometimes the simplest ingredients, treated with a touch of creativity, yield the most comforting results. It’s a reminder that cooking should be joyful, spontaneous, and full of little surprises that turn ordinary into extraordinary.

  • The Unexpected Twist in My Favorite Turkey Chili

    The Unexpected Twist in My Favorite Turkey Chili

    Cooking turkey chili is a staple for cozy nights and busy weeknights alike. But today, I want to share a version that turns tradition on its head by incorporating a mysterious ingredient that transforms the flavor profile entirely. It’s a secret I discovered by accident, and now I can’t imagine making chili without it.

    This recipe allows you to enjoy the comforting warmth of classic chili while also surprising your palate with a subtle, sweet undertone. It’s perfect for those who usually stick to the basics but crave a tiny adventure in their bowl. Let’s dive into how this unassuming ingredient can make all the difference.

    Secret-Enhanced Turkey Chili

    This turkey chili features a blend of ground turkey, beans, tomatoes, and spices simmered together to develop rich flavors and a hearty texture. A mysterious, sweet undertone is added through an unexpected ingredient, creating a subtly unique variation of the classic dish. The final chili is thick, colorful, and inviting, with a balanced blend of savory and sweet notes.
    Prep Time 15 minutes
    Cook Time 30 minutes
    Total Time 45 minutes
    Servings: 4
    Course: Main Course
    Cuisine: American
    Calories: 350

    Ingredients
      

    • 1 pound ground turkey preferably lean
    • 1 can diced tomatoes 14.5-ounce can, with juice
    • 1 can kidney beans 15-ounce can, drained and rinsed
    • 1 cup chicken or vegetable broth for simmering
    • 1 medium onion diced
    • 2 cloves garlic minced
    • 2 tablespoons chili powder
    • 1 teaspoon cumin
    • 1 teaspoon paprika
    • 1 pinch cinnamon a surprise ingredient for subtle sweetness
    • to taste salt and pepper
    • 2 teaspoons olive oil for cooking

    Equipment

    • Large Pot or Dutch Oven
    • Wooden Spoon or Spatula

    Method
     

    1. Heat olive oil in a large pot over medium heat until shimmering. Add the diced onion and cook, stirring occasionally, until it becomes translucent and fragrant, about 5 minutes.
    2. Add the minced garlic and cook for another 30 seconds, until fragrant and slightly golden.
    3. Increase the heat to medium-high and add the ground turkey. Break it apart with your spoon and cook until browned all over, about 7 minutes. The meat should be cooked through and no longer pink.
    4. Sprinkle in the chili powder, cumin, paprika, and a pinch of cinnamon. Stir well to evenly coat the turkey with the spices, letting the aroma develop for about a minute.
    5. Pour in the diced tomatoes with their juice and the chicken broth. Stir to combine all ingredients, scraping the bottom of the pot to loosen any browned bits for extra flavor.
    6. Add the drained kidney beans and stir everything together. Bring the mixture to a gentle boil, then reduce the heat to low and cover the pot.
    7. Let the chili simmer, uncovered, for about 20 minutes, stirring occasionally. The sauce should thicken and flavors meld, with the chili developing a rich, hearty consistency.
    8. Taste and season with salt and pepper as desired, adjusting the flavor to your liking.
    9. Once the chili has thickened and is bubbling gently, turn off the heat and let it rest for a few minutes to deepen the flavors.
    10. Serve the turkey chili hot in bowls, garnished with your favorite toppings like shredded cheese, sour cream, or chopped cilantro if desired.

    Notes

    The cinnamon adds a subtle sweetness that complements the spice blend. Feel free to adjust the chili powder and spices to suit your heat preference.
    This turkey chili is more than just a meal; it’s a reminder that even familiar dishes can be refreshed with a bit of culinary curiosity. Whether you’re feeding a crowd or just yourself, its hearty textures and layered flavors deliver every time.

    As the seasons change, so do our cravings for warm, satisfying meals. This recipe fits right into those cozy, overcast days when a bowl of chili becomes a small celebration of comfort and creativity.