
There’s something about a cheese ball that feels like a little act of rebellion at a party. It’s rustic, a bit goofy, but utterly charming in its imperfect roundness. I grew up seeing it perched proudly on snack trays, a magnet for kids and adults alike, melting into smiles with just a few ingredients and a bit of effort.
Making a cheese ball isn’t about finesse; it’s about nostalgia and comfort. It’s the kind of dish that invites you to get your hands a little messy, to roll it in nuts or herbs, and to remember simpler times when a cheesy bite was enough to make everything feel right. It’s a messy, heartfelt way to bring people together around the table.
This recipe is my way of holding onto that charm—no fuss, just good cheese, a little seasoning, and a lot of memories. It’s perfect for casual gatherings, a dip that doesn’t demand perfection, just honest, cheesy joy that everyone can share.
Focusing on the cheese ball as a nostalgic party centerpiece that brings back childhood memories of family gatherings and late-night snack trays, emphasizing its imperfect, rustic charm and the joy of sharing simple, cheesy comfort.
Nostalgic Party Staples
- This cheese ball recipe sparks childhood memories of holiday parties and family gatherings, where simplicity reigned supreme.
- I love the chaotic joy of rolling it in crunchy nuts—each one a tiny, imperfect masterpiece of flavor and texture.
- There’s a quiet pride in making this from scratch, knowing it’s a centerpiece that invites everyone to dig in with happy anticipation.
- It’s messy, it’s nostalgic, and honestly, it’s one of the few dishes I don’t mind getting a little cheesy and gooey.
A nostalgic party favorite
- This cheese ball started as a way to make a simple appetizer feel a little special. I remember my grandma rolling her eyes at my obsession with perfecting the crust, but she always admired how forgiving and cozy it was. It’s a dish that kind of grew on me, especially when I realized how much joy it brought to casual gatherings—no fuss, just cheesy goodness and a messy, satisfying roll in herbs or nuts.
- Every time I make it, I think of lazy Sunday afternoons and family chaos around the table. It’s one of those recipes that’s more about the imperfect charm than precision, and that’s what makes it so comforting. Sharing it makes everyone relax, grab a cracker, and forget about the fancy stuff—just pure, cheesy, slightly messy fun.
- heading: ‘The story behind this recipe’
Cheese ball trivia & history
- The cheese ball dates back to the 1950s, gaining popularity as a party staple during post-war celebrations.
- It likely originated from American mid-century appetizer trends, where simplicity and portability were valued.
- Originally, cheese balls were made with processed cheese, making them affordable and accessible for family gatherings.
- The rustic round shape is believed to symbolize abundance and sharing, making it perfect for communal feasts.
- Over the decades, countless regional variations emerged, adding spices, herbs, or nuts to personalize the classic recipe.
Key ingredients and tips
- Cream cheese: I love how it melts into a silky base, making the ball creamy and rich. Use full-fat for best flavor, but light works if you prefer a lighter touch.
- Cheddar cheese: Sharp, aged cheddar gives a punch of flavor. Grate it finely so it incorporates easily—no one wants a cheese chunk in their bite.
- Green onions: They add a fresh, slightly spicy crunch. Chop them finely—big pieces can overpower or slip out when rolling.
- Herbs (parsley, dill): I toss in chopped herbs for brightness. Fresh herbs make a big difference, but dried can work in a pinch—just use less.
- Nuts (walnuts, pecans): Toasted nuts add crunch and a nutty aroma. Chop them coarsely—too fine and they might stick to your fingers more than the cheese.
- Worcestershire sauce: A few dashes bring umami and depth. It’s subtle but makes the flavor pop, so don’t skip it if you want that savory kick.
- Spices (paprika, pepper): A sprinkle of paprika adds color and a smoky hint, while black pepper brings a gentle heat. Adjust to taste, but don’t go overboard.
Spotlight on key ingredients
Cream cheese:
- I love how it melts into a silky base, making the ball creamy and rich. Use full-fat for best flavor, but light works if you prefer a lighter touch.
- Cheddar cheese: Sharp, aged cheddar gives a punch of flavor. Grate it finely so it incorporates easily—no one wants a cheese chunk in their bite.
- Green onions: They add a fresh, slightly spicy crunch. Chop them finely—big pieces can overpower or slip out when rolling.
Herbs and nuts:
- Nuts (walnuts, pecans): Toasted nuts add crunch and a nutty aroma. Chop them coarsely—too fine and they might stick to your fingers more than the cheese.
- Herbs (parsley, dill): I toss in chopped herbs for brightness. Fresh herbs make a big difference, but dried can work in a pinch—just use less.
Ingredient swap ideas
- Dairy-Free: Swap cream cheese for a cashew-based spread or dairy-free cream cheese. It won’t be as tangy but still creamy.
- Vegan Cheese: Use a store-bought vegan cheese or make a seasoned tofu mixture. Expect a different, milder flavor and slightly firmer texture.
- Nut Alternatives: Replace walnuts or pecans with toasted sunflower seeds or pumpkin seeds. Keep the crunch but add a different nutty note.
- Herbs: Fresh basil or chives can replace parsley and dill for a different herbaceous punch. Use fresh for the best flavor.
- Spices: Smoked paprika instead of regular paprika adds a smoky depth. Black pepper can be swapped for cayenne for more heat.
- Cheese: Gruyère or Monterey Jack can substitute cheddar, giving a milder or creamier melt with less sharpness.
- Add-ins: Crumbled cooked bacon or chopped sun-dried tomatoes can add texture and flavor if you want to mix it up.
Equipment & Tools
- Medium mixing bowl: Combine and mix all ingredients evenly.
- Spatula: Stir ingredients and shape the cheese mixture.
- Plastic wrap: Shape and chill the cheese ball, making it easy to handle.
- Baking sheet: Place the wrapped cheese ball in the fridge for chilling.
- Plate: Roll the cheese ball in nuts and serve.
Step-by-step guide to cheese ball
- Gather your equipment: a medium mixing bowl, a spatula, a plastic wrap, a baking sheet, and a plate for rolling. Preheat your fridge to 4°C (39°F).
- In the bowl, soften 200g (7 oz) of cream cheese by leaving it out for 15 minutes or microwaving for 10 seconds. It should be soft and spreadable.
- Finely grate 150g (5 oz) of sharp cheddar cheese. Set aside. Chop 2 green onions and a handful of fresh herbs (parsley/dill).
- Mix the softened cream cheese with the grated cheese, green onions, herbs, 1 tsp Worcestershire sauce, and a pinch of black pepper. Stir until well combined, about 2 minutes.
- Taste and adjust seasoning if needed. If too soft, chill for 10 minutes. If too loose, add a bit more grated cheese.
- Scoop mixture onto a large sheet of plastic wrap. Using your hands or a spatula, shape into a ball about 8cm (3 inches) in diameter. Wrap tightly.
- Refrigerate for at least 1 hour, or up to 24 hours. This helps the flavors meld and makes rolling easier.
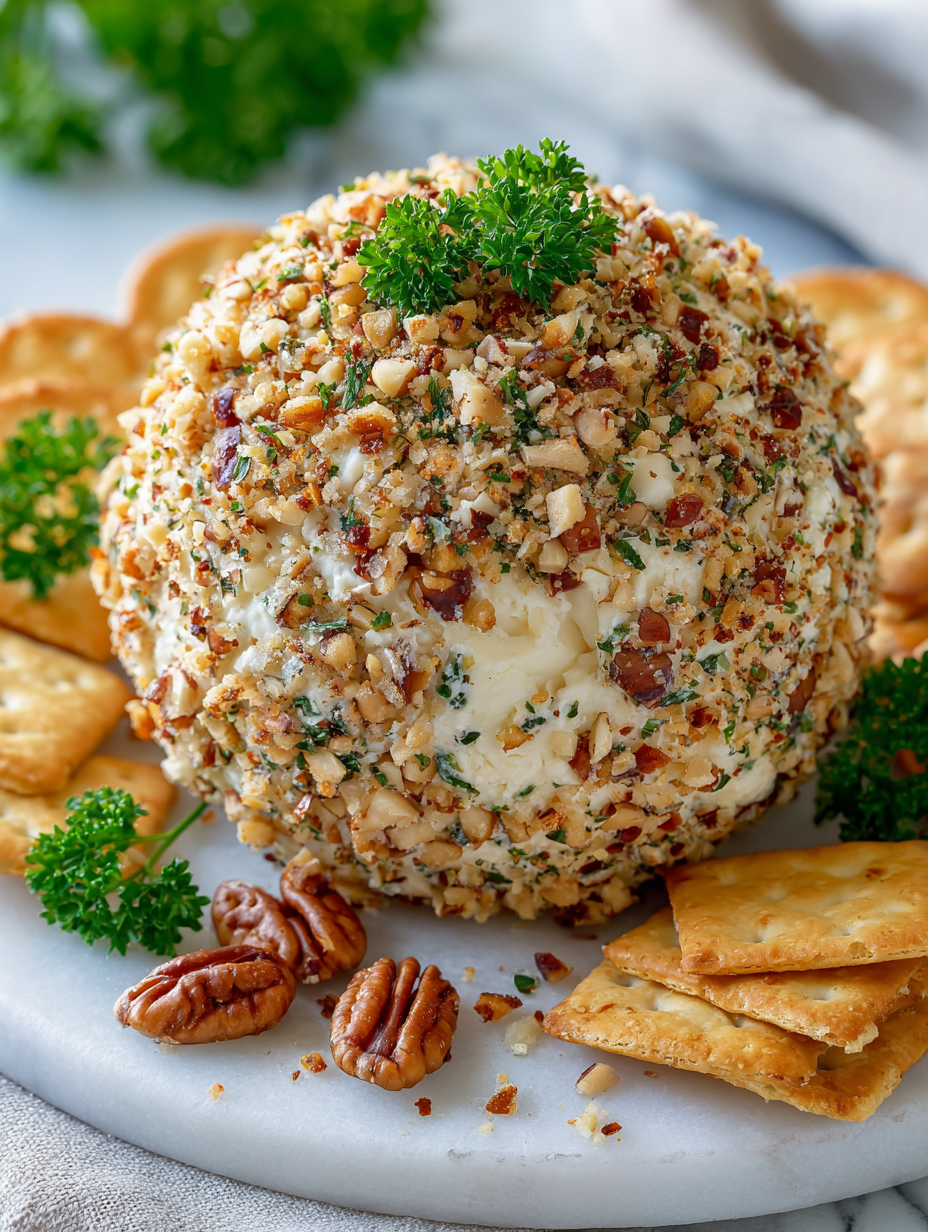
- Place the nuts (walnuts or pecans) on a plate. Unwrap the cheese ball and roll it in the nuts until evenly coated. Press gently to adhere.
- Transfer to a serving plate. Garnish with a sprinkle of paprika or additional herbs if desired. Serve with crackers, baguette slices, or veggie sticks.
- Enjoy the cheese ball at room temperature for the best flavor and texture—about 20 minutes out of the fridge before serving.
Chill the cheese ball wrapped in plastic for at least 1 hour. Before serving, unwrap and roll in nuts. Serve on a platter with crackers or veggies. Let it sit at room temperature for 20 minutes to soften slightly, enhancing flavor and texture.
How to Know It’s Done
- The cheese mixture is firm enough to hold shape without cracking when rolled.
- The nuts adhere evenly and cover the entire surface of the cheese ball.
- The cheese ball develops a slightly firm exterior after chilling, with a soft, cheesy interior.
Classic Cheese Ball
Ingredients
Equipment
Method
- Gather your softened cream cheese, grated cheddar, chopped green onions, and herbs in a medium bowl, and set out your Worcestershire sauce and black pepper.
- Use a spatula to mix the cream cheese until smooth, then fold in the grated cheddar, green onions, herbs, Worcestershire sauce, and black pepper until the mixture is evenly combined and creamy.
- Scoop the cheese mixture onto a large piece of plastic wrap, then use your hands or the spatula to shape it into a rough sphere about 8cm in diameter. Wrap it tightly with the plastic wrap.
- Refrigerate the wrapped cheese ball for at least 1 hour, or up to 24 hours, to let the flavors meld and the shape firm up.
- Once chilled, unwrap the cheese ball and place the toasted nuts on a plate. Gently roll the cheese ball in the nuts, pressing lightly to make the coating stick evenly all over.
- Transfer the coated cheese ball to a serving plate. Optionally, sprinkle with a little paprika or additional herbs for a pop of color.
- Let the cheese ball sit at room temperature for about 15-20 minutes before serving to soften slightly and enhance flavor. Serve with crackers, baguette slices, or veggie sticks for dipping.
Notes
Tips & Tricks for Perfect Cheese Ball
- Chill the mixture: Ensure the cheese is well chilled to make rolling easier and help it hold shape.
- Toast the nuts: Toast nuts until fragrant and golden—this intensifies their flavor and adds crunch.
- Use room temperature cheese: Softening cheese slightly makes mixing smoother and more uniform.
- Coarse nut chop: Chop nuts roughly for better adhesion and a more satisfying crunch in each bite.
- Don’t skip resting: Chill the formed cheese ball for at least an hour; flavors meld and it firms up.
- Roll in nuts: Gently press nuts onto the cheese ball, ensuring even coverage without crushing the nuts.
- Serve at room temp: Take the cheese ball out 15-20 minutes before serving to enhance flavor and texture.
Common mistakes and how to fix them
- FORGOT to let the cheese soften before mixing? Warm it slightly or microwave 10 seconds.
- DUMPED too much nuts? Use a coarser chop or press gently to help nuts stick better.
- OVER-TORCHED the cheese ball? Chill immediately and cover loosely to prevent cracking.
- MISSED a step? Chill the mixture for at least 1 hour for optimal shape and flavor melding.
Quick Fixes and Pantry Swaps
- When cheese cracks, splash a teaspoon of milk into the mixture and stir gently.
- If nuts are stale, swap with toasted seeds for crunch and freshness.
- Over-torched cheese? Shield with a damp cloth and chill immediately to stop browning.
- Forgot to chill the shaped cheese ball? Rest it in the fridge for 30 minutes to firm up.
- If the cheese mixture is too soft, add a bit more grated cheese or let it chill longer.
Prep, store, and reheat tips
- Prepare the cheese mixture and shape it into a ball a day in advance. Wrap tightly and refrigerate; flavors meld, and it firms up, making rolling easier later.
- The cheese ball can be stored in the fridge for up to 3 days. The longer it sits, the more the flavors deepen, but it may soften slightly—best served at room temp.
- If freezing, wrap the uncoated cheese ball tightly in plastic wrap and foil. Freeze for up to 1 month. Thaw in the fridge overnight before rolling in nuts.
- Reheat isn’t necessary—serve chilled or at room temperature. If the cheese softens too much after sitting, give it a quick chill for 15 minutes before serving.
- For a fresh hit of flavor, re-roll in nuts just before serving to keep the coating crisp and vibrant. The texture will be slightly softer if left longer.
Top Questions About Cheese Balls
1. What exactly is a cheese ball?
A cheese ball is a creamy, cheesy mixture shaped into a sphere, often rolled in nuts or herbs, perfect for parties.
2. How do I soften the cream cheese properly?
Use softened cream cheese for smoothness. It’s best to leave it out for 15 minutes or microwave briefly.
3. How long should I chill the cheese ball?
Chill the shaped cheese ball for at least an hour to help it firm up and flavors meld.
4. Can I use different coatings besides nuts?
Yes, you can substitute nuts with toasted seeds like sunflower or pumpkin seeds for crunch.
5. What herbs work best for rolling the cheese ball?
Adding herbs like dill or parsley brightens the flavor. Use fresh herbs for the best aroma and color.
6. Can I customize the cheese ball ingredients?
Yes, cheese balls are versatile. You can add cooked bacon, sun-dried tomatoes, or spices for variety.
7. How long can I store a cheese ball?
Store in an airtight container in the fridge for up to 3 days. Flavors deepen, but texture softens slightly.
8. When should I serve the cheese ball?
Serve at room temperature for optimal flavor and creamy texture—about 20 minutes out of the fridge.
9. What if the cheese mixture is too soft or cracks?
If it cracks when rolling, chill it longer or add a splash of milk to the mixture and mix gently.
10. How should I prepare the nuts for rolling?
Use a coarse chop for nuts to ensure they stick well and provide satisfying crunch on each bite.
Making this cheese ball takes me back to easy family nights and the mess of rolling nuts. It’s imperfect and cozy, exactly how a good party snack should be. When I serve it, I watch everyone dig in with smiles and no fuss—just cheesy, crunchy chaos.
In a world of fancy appetizers, this one feels honest and real. It’s a dish that invites sharing and remembering, even if it’s a little wonky around the edges. That’s what makes it special, a simple reminder of good times around the table.