
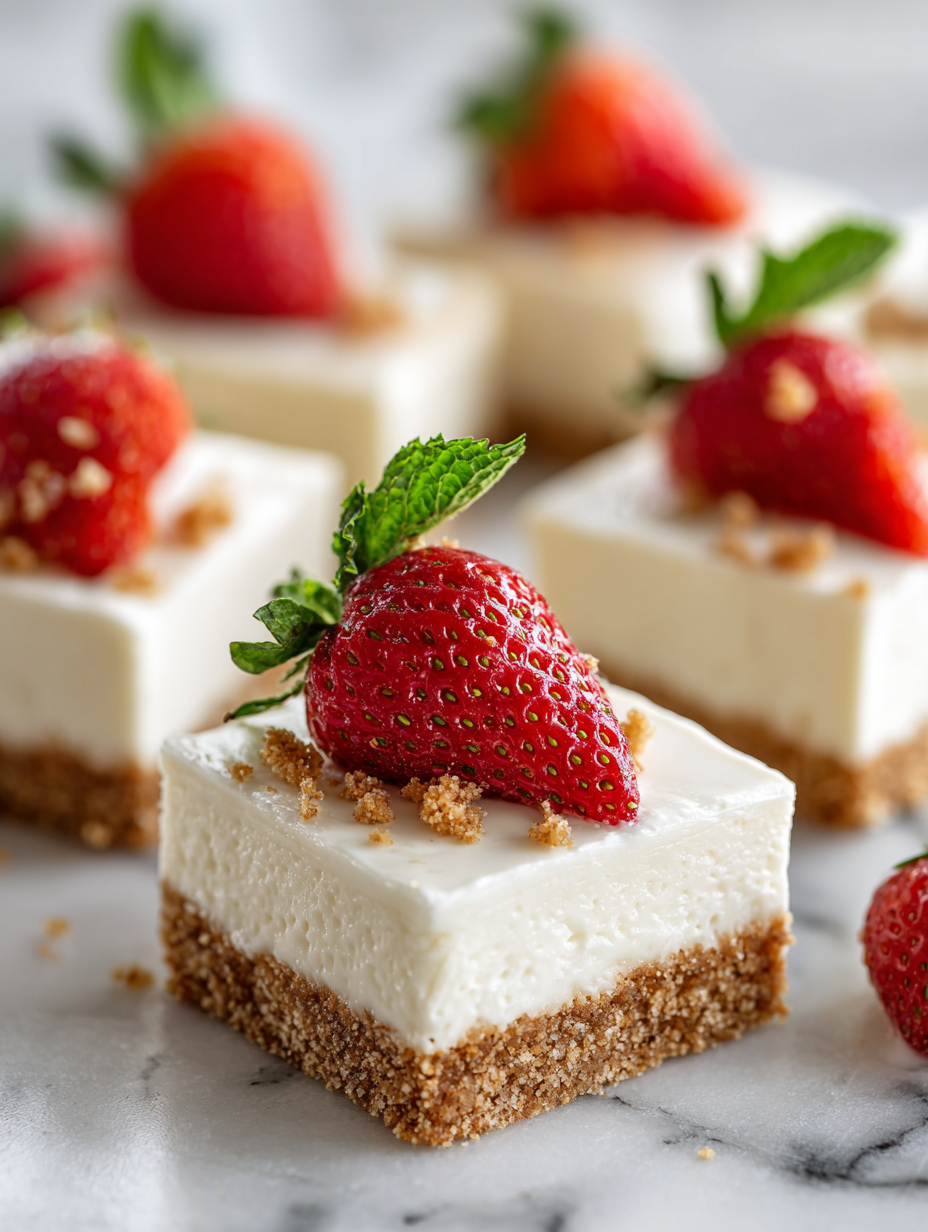
This no-bake cheesecake bars recipe is my go-to when life throws a curveball and I need something sweet, fast. It’s born out of those frantic afternoons when I realize I forgot to prepare dessert, but still crave that creamy, tangy bite. No oven, no fuss, just a straightforward way to satisfy a sweet tooth without heating up the kitchen.
There’s something oddly satisfying about putting together these bars with minimal effort but maximum flavor. It’s also a reminder that you don’t need fancy ingredients or complicated steps to make a dessert that feels indulgent and comforting. Sometimes, the best recipes are the ones you can assemble in a flash, especially when friends drop by unexpectedly or you’re just craving a little something special.
This recipe is inspired by the chaos of last-minute gatherings, where you need something sweet but don’t want to turn on the oven. It’s about the thrill of pulling together a creamy, tangy treat in minutes, using what’s already in your fridge. No bake, no fuss, just pure, honest comfort for unexpected guests or a quick weekend fix.
Unexpected charm of creamy simplicity
- I love how this recipe saves me from oven heat on hot days, giving me more time to relax instead of fussing over desserts.
- Whipping up these bars always triggers a rush of nostalgia — reminds me of summer picnics and lazy afternoons at grandma’s.
- There’s a quiet pride in turning simple ingredients into something that’s rich, tangy, and downright satisfying in just minutes.
- Every time I make these, I feel a little bit of relief — no bake means less mess and fewer worries about overcooking.
- Sharing these with friends feels like a small victory — quick, effortless, and always devoured fast, leaving smiles all around.
Unexpected charm of creamy simplicity
- This recipe came about on a lazy Sunday when I had friends coming over last-minute. I didn’t want to turn on the oven or fuss with complicated desserts, so I threw together these bars with whatever cream cheese and cookies I had in the pantry. The creamy tang and crunchy crust came together surprisingly well, and now it’s become my go-to quick treat for any impromptu gathering.
- It’s funny how sometimes the simplest ideas—like pressing cookies into a pan and mixing cream cheese—turn into the most satisfying desserts. I love that these bars remind me not to overthink dessert; just trust the ingredients, keep it honest, and enjoy the results. They’re a little messy, a little imperfect, but always a hit when you need something sweet fast.
- heading: ‘Unexpected charm of creamy simplicity’
Historical tidbits about no-bake cheesecake bars
- No-bake desserts gained popularity during the mid-20th century when convenience became key for home cooks.
- This cheesecake bar style likely evolved from traditional New York-style cheesecake, adapted for quick assembly and portability.
- Initially, these recipes used crushed graham crackers and cream cheese as a cost-effective, accessible way to indulge sweet cravings.
- The trend surged in the 1970s as busy households sought simple, no-fuss dessert options that required minimal equipment.
- Today, these bars have become a nostalgic staple, blending retro charm with modern ease and flavor versatility.
Ingredient breakdown: key components
- Cream cheese: I like it softened and at room temperature for easy mixing—cold cream cheese can be lumpy, so give it a little time out of the fridge before starting. You want it silky and smooth, like a gentle cloud of tang.
- Graham cracker crumbs: I crush my own for a slightly coarser texture that adds crunch—store-bought works too, just don’t skip the buttery, toasty aroma it brings to the crust. Press firmly into the pan for a sturdy base.
- Butter: I melt it until shimmering and just barely golden—this helps bind the crumbs better, creating a crust that stays firm and crumbly. Skip the salt here unless you want a subtle savory edge.
- Sweetened condensed milk: I eyeball about half a can—rich, sweet, and creamy. It’s the glue that makes the filling velvety. If you prefer a less sweet vibe, cut back slightly, but honestly, it’s what makes it addictive.
- Lemon juice: I add a splash of fresh lemon to brighten the flavor—bright, zesty, with a slight zing that cuts through the richness. If you want more tang, squeeze in a bit more or add lemon zest for extra punch.
- Vanilla extract: I use real vanilla for depth—just a teaspoon, but it makes a difference. Skip or swap with almond extract if you want a different aromatic twist, though the vanilla keeps it classic.
- Optional toppings: I love fresh berries or a drizzle of chocolate—think about what flavor punch you want on top. They add color, contrast, and that little spark of freshness or richness.
Spotlight on key ingredients
Cream cheese:
- I prefer softened and at room temp for silky smoothness—cold cheese can be stubborn and lumpy. Aim for a gentle, fluffy texture that melds easily into the filling.
- Graham cracker crumbs: I crush my own for a coarser crunch, which adds texture and aroma. Store-bought works fine, but fresh homemade crumbs give a richer, toasty scent that really makes the crust pop.
Lemon juice:
- Sweetened condensed milk: I eyeball about half a can—rich, sweet, and velvety. It’s the glue that makes the filling smooth and luscious. If you want less sweetness, cut back a little, but it’s pretty essential for that melt-in-your-mouth feel.
- I add a splash of fresh lemon for brightness—its zing cuts through the richness and adds a lively contrast. It’s that little spark that makes the flavor sing, especially with the creamy filling.
Notes for ingredient swaps
- Dairy-Free: Swap cream cheese for coconut cream or cashew-based cheese. Expect a slightly different tang and creaminess, but still rich and satisfying.
- Gluten-Free: Use gluten-free graham cracker crumbs or crushed digestive biscuits. Keep in mind, texture may be a bit coarser but still crunchy and flavorful.
- Sweetener Variations: Replace sweetened condensed milk with coconut condensed milk or honey. The flavor will shift slightly, with honey adding a floral note and coconut offering a richer, tropical flavor.
- Lemon Juice: Use bottled lemon juice in a pinch, but fresh lemon brightens the flavor with a zing that bottled can’t match. For more punch, add lemon zest.
- Crust Base: Substitute graham crackers with crushed pretzels for a salty crunch or digestive biscuits for a subtler flavor. Adjust butter slightly if using a saltier cracker.
- Flavor Enhancers: Add a splash of vanilla extract or a pinch of citrus zest to intensify the overall flavor profile. Use sparingly to avoid overpowering the tang.
- Toppings: Fresh berries, fruit compote, or chocolate drizzle work well. For a different twist, sprinkle toasted nuts for added texture and aroma.
Equipment & Tools
- 9-inch square pan: To shape and hold the bars during chilling and serving.
- Mixing bowl: To combine and beat the filling ingredients.
- Spatula: To spread and smooth the filling evenly.
- Parchment paper: To line the pan for easy removal and clean slicing.
- Rolling pin: To crush the graham crackers efficiently.
Step-by-step guide to no bake cheesecake bars
- Gather your equipment: a 9-inch square pan, a mixing bowl, a spatula, and a parchment paper-lined tray for easy removal.
- Crush the graham crackers: place them in a zip-top bag and crush with a rolling pin until fine but slightly coarse for texture.
- Melt the butter: do this gently in the microwave or on the stove until just shimmering, about 30 seconds in the microwave on medium power.
- Combine crumbs and butter: mix thoroughly until all crumbs are coated and resemble wet sand. Press firmly into the bottom of your prepared pan to form an even crust. Chill in the fridge for 10-15 minutes to set.
- Make the filling: in a mixing bowl, beat the softened cream cheese until smooth and fluffy, about 2 minutes. Add in the sweetened condensed milk, lemon juice, and vanilla extract. Mix until well combined, thick, and creamy. Scrape down sides as needed.
- Pour the filling over the chilled crust: spread evenly with a spatula. Smooth the top for a flat surface. Cover loosely with plastic wrap.
- Chill the bars: place in the fridge for at least 4 hours, preferably overnight. This allows the filling to firm up and flavors to meld.
- Check for doneness: the filling should be set, with a slight jiggle in the center, and not shiny or runny. The crust should be firm and crumbly, holding its shape well.
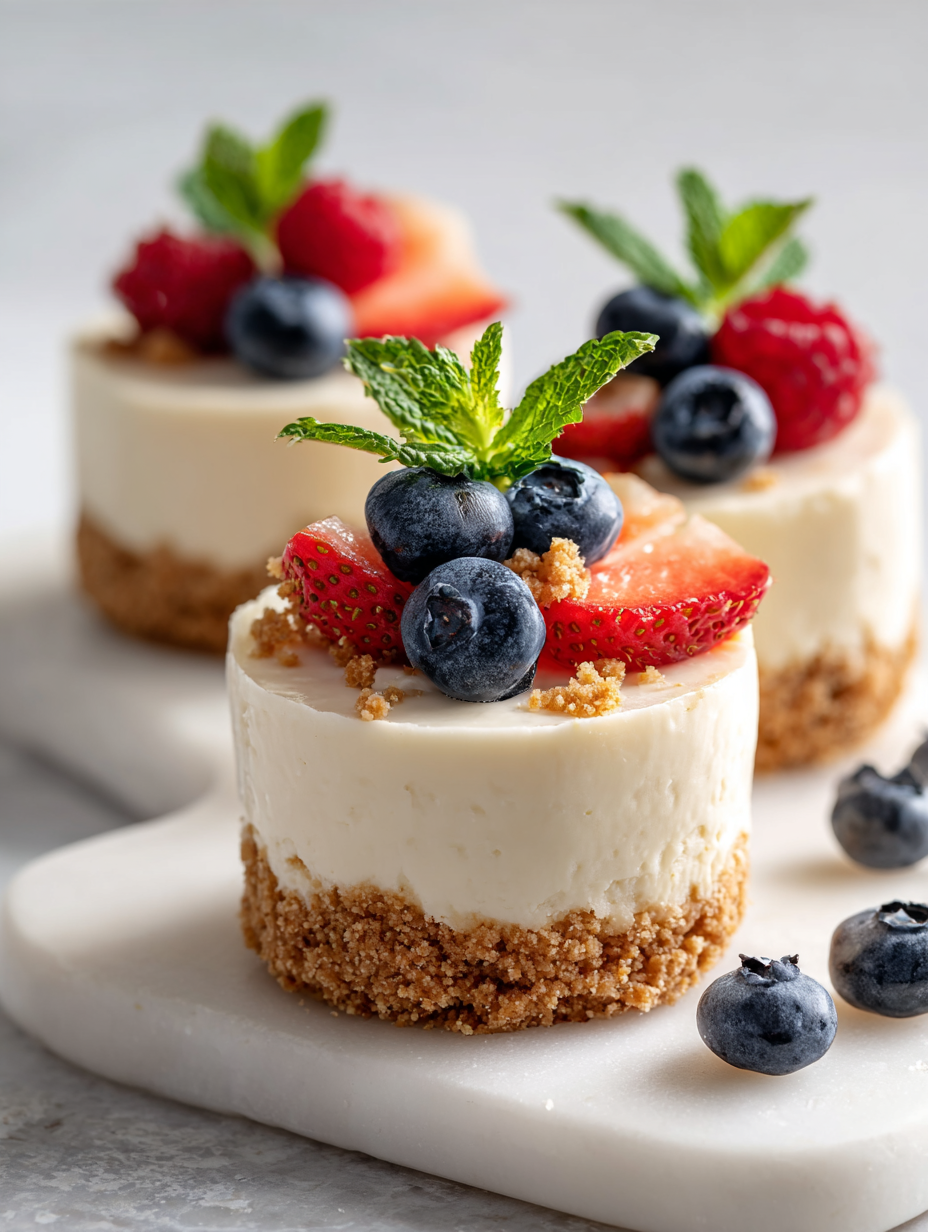
- Slice and serve: lift the bars out with parchment paper, cut into squares with a sharp knife, cleaning the blade between cuts. Add fresh berries or a drizzle of chocolate if desired.
- Finish with presentation: serve chilled, with a slight crack in the top indicating perfect setting and a satisfying, creamy bite.
After chilling, lift the bars out using the parchment paper. Slice into neat squares with a hot, sharp knife. Serve immediately or store covered in the fridge for up to 3 days. For cleaner cuts, wipe the knife between slices and avoid pressing too hard.
How to Know It’s Done
- Filling is firm and slightly jiggly in the center but not runny.
- Crust is golden, crumbly, and holds shape when pressed.
- Top surface is smooth and set without shiny or wet patches.
No-Bake Cheesecake Bars
Ingredients
Equipment
Method
- Line your square pan with parchment paper for easy removal and set aside.
- Place the graham crackers in a zip-top bag and crush them with a rolling pin until you have fine, slightly coarse crumbs that smell toasty and sweet.
- Melt the butter gently in the microwave or on the stove until just shimmering, about 30 seconds in the microwave.
- Mix the crushed graham crackers with the melted butter until all the crumbs are evenly coated, resembling wet sand.
- Press the buttery crumbs firmly into the bottom of your prepared pan, creating an even crust. Chill in the refrigerator for about 10-15 minutes to set.
- In a mixing bowl, beat the softened cream cheese with a spatula or hand mixer until smooth and fluffy, about 2 minutes, until no lumps remain.
- Add the sweetened condensed milk, lemon juice, and vanilla to the cream cheese, and mix until the filling is thick, creamy, and well combined.
- Pour the luscious filling over the chilled crust and spread evenly with a spatula, smoothing out the surface.
- Cover the pan loosely with plastic wrap and refrigerate for at least 4 hours or overnight, allowing the filling to firm up and flavors to meld beautifully.
- Once set, lift the bars out of the pan using the parchment paper and cut into neat squares with a sharp knife, wiping the blade clean between slices for clean edges.
- Serve chilled, garnished with fresh berries or a drizzle of chocolate if you like, and enjoy the creamy, tangy bites.
Pro tips for perfect cheesecake bars
- Bolded mini-head: Use room temperature cream cheese for a silky, lump-free filling—cold cheese can be stubborn and lumpy.
- Bolded mini-head: Crush your graham crackers finely but leave a slight coarseness for added texture and aroma in the crust.
- Bolded mini-head: Melt the butter gently until shimmering—this helps the crumbs bind together without making the crust greasy.
- Bolded mini-head: Chill the crust for at least 10-15 minutes before adding the filling to prevent slumping or cracking.
- Bolded mini-head: Ensure the filling is only slightly cooled before pouring—hot filling can melt the crust or cause cracks.
- Bolded mini-head: Check the set with a gentle jiggle—if the center wobbles slightly but isn’t shiny or runny, it’s ready.
- Bolded mini-head: Wipe your knife between slices and use a hot blade for clean cuts—this avoids tearing and keeps it neat.
Common mistakes and how to fix them
- FORGOT to chill the crust properly → Chill for at least 15 minutes before filling.
- DUMPED hot filling into crust → Ensure filling is cooled slightly to prevent melting the crust.
- OVER-TORCHED the crust → Bake just until golden; avoid darkening to keep it crisp and tender.
- MISSED mixing cream cheese smoothly → Beat well until silky, avoiding lumps for a creamy texture.
Quick fixes and pantry swaps
- When the filling is runny, splash in a little more cream cheese and mix well.
- If the crust crumbles when pressed, patch it together with a few extra drops of melted butter.
- Splash a few drops of lemon juice to brighten a dull filling and restore tang.
- Patch cracks by smoothing with a hot, damp spatula or knife for a seamless look.
- Shield over-torched crust with a sprinkle of crushed graham crackers or a drizzle of chocolate.
Prep, store, and reheat tips
- You can prepare the crust and press it into the pan a day ahead. Keep covered in the fridge to stay crisp.
- The cheesecake filling can be made up to 24 hours in advance. Cover tightly and store in the fridge; it firms up and develops better flavor overnight.
- These bars are best eaten within 3 days of making. The texture stays creamy, but the crust may soften slightly over time.
- To reheat, serve chilled directly from the fridge. If you’d like a slightly softer texture, let it sit at room temperature for 10 minutes, noticing the creamy, tangy aroma bloom.
Top questions about no bake cheesecake bars
1. How do I prevent lumps in the filling?
Use softened cream cheese at room temperature for smooth mixing. Cold cheese tends to be lumpy and harder to blend well.
2. Can I use different crackers for the crust?
Crush graham crackers finely but leave a slight texture for crunch. Store-bought crumbs are fine, but crushing your own adds aroma.
3. Should the butter be hot or cooled before mixing?
Melt butter until just shimmering, not browned, to bind the crust without making it greasy. Let it cool slightly before mixing.
4. Can I substitute the condensed milk with something else?
Use about half a can of sweetened condensed milk for richness. Adjust slightly if you prefer less sweetness or creaminess.
5. How much lemon juice should I add?
Adding fresh lemon juice brightens the flavor with a zing. Lemon zest intensifies the citrus, making the filling pop.
6. Why is my crust sinking or cracking?
Chill the crust for at least 15 minutes before adding the filling to prevent slumping or cracking.
7. How do I know when the bars are fully set?
Check the set by gently shaking the pan—center should jiggle slightly but not be shiny or runny; edges should be firm.
8. How can I get neat slices?
Slice with a hot, sharp knife, wiping between cuts for clean edges. This prevents tearing and gives a polished look.
9. Can I make these in advance?
You can prepare the crust a day ahead. Keep it covered in the fridge to stay crisp and ready for filling.
10. How long do these cheesecake bars last?
Store leftovers in an airtight container in the fridge for up to 3 days. Serve chilled or at room temperature for best texture.
These no-bake cheesecake bars are a reminder that sometimes the simplest ingredients create the most satisfying treats. Their creamy texture and tangy flavor are perfect for when you need something quick but crave comfort. Plus, they’re a good excuse to keep a stash of cream cheese and cookies in your pantry.
Whenever I make these, I appreciate how a little planning—like chilling the crust or letting the filling set—makes all the difference. They’re a little imperfect, a little messy, but always a hit. It’s honest, easy dessert that you can throw together with whatever you’ve got on hand, no fuss involved.
 Hello, I’m Emily Richardson, the heart and soul behind Playing with Flavors. Cooking isn’t just a hobby for me – it’s a passion that I’ve cultivated for years, and it’s become the driving force of my life.
From the kitchen of my cozy café to the pages of this blog, every dish I create is a reflection of my love for food and the joy it brings to people.
Hello, I’m Emily Richardson, the heart and soul behind Playing with Flavors. Cooking isn’t just a hobby for me – it’s a passion that I’ve cultivated for years, and it’s become the driving force of my life.
From the kitchen of my cozy café to the pages of this blog, every dish I create is a reflection of my love for food and the joy it brings to people.


