
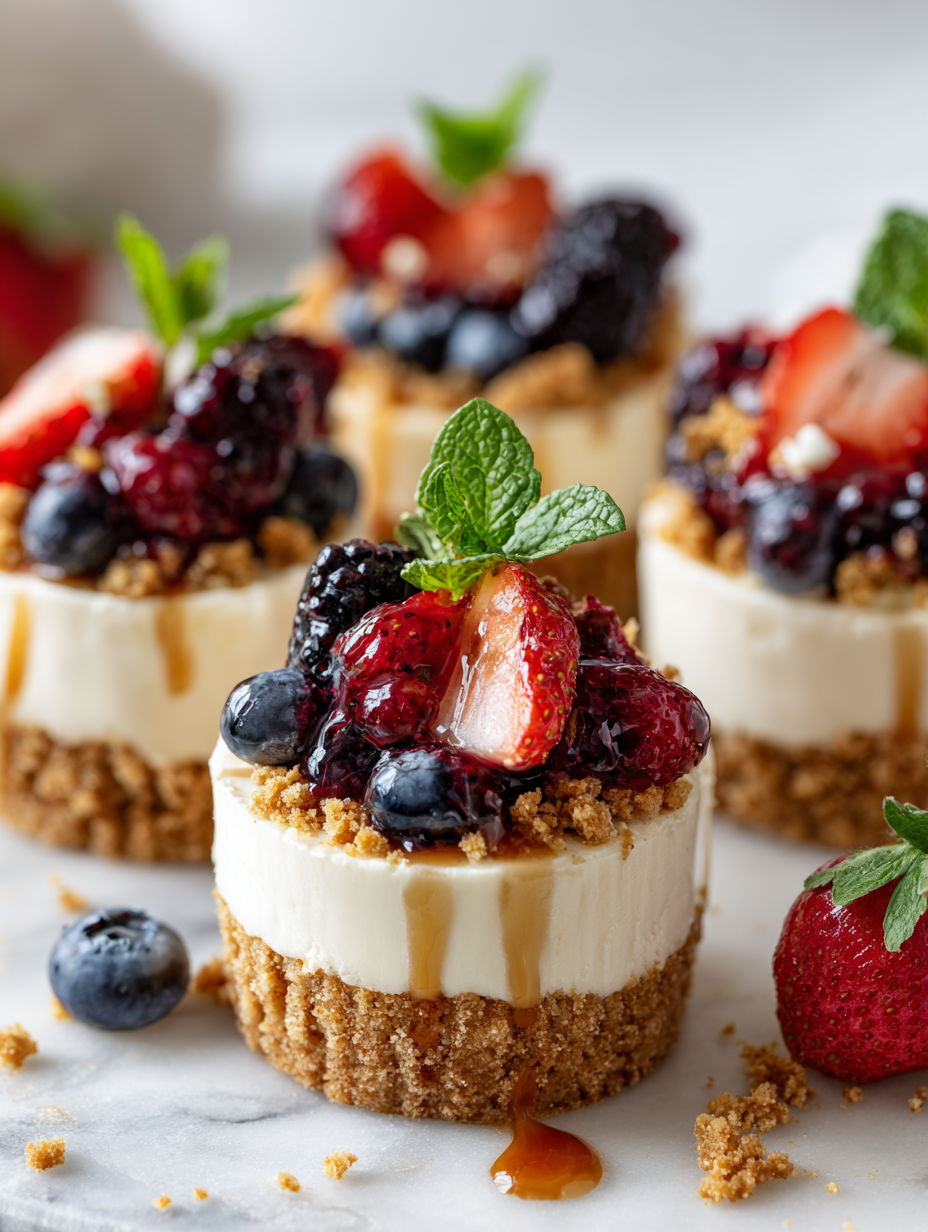
These no bake cheesecake cups are my go-to when I want something sweet but don’t want to mess with a full-sized cheesecake. They’re simple, quick, and give me the chance to get playful with toppings—think fresh berries, crushed cookies, a drizzle of caramel. It’s almost like building little dessert sculptures, one spoonful at a time.
What I love most is how adaptable they are. You can make a big batch for a crowd or just whip up a few for yourself. No oven, no fuss, and the best part—each cup feels like a tiny personal treat, perfect for snacking or sharing. It’s that satisfying combo of creamy, tangy, and crunchy that keeps me coming back.
Focusing on the unexpected joy of customizing each cheesecake cup with personal toppings, turning a simple dessert into a small, creative ritual that feels both nostalgic and playful.
Tiny Cheesecake Rituals
- Making these cheesecake cups feels like a tiny victory—simple, satisfying, and just enough sweetness to brighten any day.
- I remember the first time I topped one with fresh strawberries—the burst of juiciness reminded me why I love small, personalized desserts.
- There’s a quiet joy in assembling these cups; it’s a little ritual that turns a regular afternoon into a moment of mindful indulgence.
- Sharing these mini cheesecakes with friends always sparks nostalgic conversations about childhood treats and simple pleasures.
The story behind this recipe
- This recipe came from a lazy weekend craving—something creamy and satisfying but without the oven heat. I wanted a dessert that felt indulgent but easy enough to throw together after a long day. The first batch was a happy accident, mixing graham cracker crumbs with a splash of vanilla, then folding in whipped cream until it was just right.
- Every time I make these, I think about how they’re like tiny, portable slices of comfort. No fuss, no waiting, just cool, creamy goodness that feels like a small rebellion against the usual kitchen chaos. They remind me that sometimes, the simplest ideas make the sweetest memories.
- heading: Tiny Cheesecake Rituals
Trivia and Origins
- These cheesecake cups draw inspiration from vintage 1950s gelatin molds, simplified for modern, no-bake ease.
- The concept of individual desserts like these gained popularity in the early 2000s, aligning with the rise of portion-controlled treats.
- Cream cheese-based desserts have roots in Eastern European cuisines, where they were often fresh and tangy, adapted here for quick assembly.
- Using cups or jars for desserts became trendy in the last decade, turning everyday ingredients into portable, personalized servings.
Ingredient breakdown
- Cream Cheese: I prefer a full-fat block for that rich, velvety texture—scooping out the tangy, soft spread makes it easy to blend smoothly. If you want a lighter version, try Neufchâtel, but it’s a bit less lush.
- Graham Cracker Crumbs: I like the crunch and sweetness they add, but if you’re out, crushed digestive biscuits work well. Toast them lightly before mixing for a toasty, toffee aroma.
- Sweetener (Powdered Sugar): I use powdered sugar for its fine dissolve—skip granulated or you’ll get grainy bites. Honey or maple syrup can add a different vibe, but adjust the liquid content accordingly.
- Lemon Juice: Brightens everything up with a zesty punch—trust me, fresh lemon juice beats bottled. If you prefer less tang, cut back a bit, but don’t skip it entirely.
- Heavy Cream: Whipped to soft peaks, it’s the fluffy fairy dust that makes these cups feel airy. If dairy isn’t your thing, coconut cream whips up just as well, with a hint of tropical warmth.
- Toppings (Berries, Chocolate, Caramel): I go wild here—fresh berries add juiciness, chocolate shavings bring richness, caramel drizzle is pure indulgence. Feel free to mix and match, just keep it balanced.
- Vanilla Extract: A splash of pure vanilla makes everything taste finished and cozy. Skip it if you’re out, but it’s the magic that pulls all the flavors together.
Spotlight on key ingredients
Cream Cheese:
- I prefer full-fat blocks for that rich, velvety texture—scooping out the tangy, soft spread makes it easy to blend smoothly. If you want a lighter version, try Neufchâtel, but it’s a bit less lush.
- Graham Cracker Crumbs: I like the crunch and sweetness they add, but if you’re out, crushed digestive biscuits work well. Toast them lightly before mixing for a toasty, toffee aroma.
Heavy Cream:
- Lemon Juice: Brightens everything up with a zesty punch—trust me, fresh lemon juice beats bottled. If you prefer less tang, cut back a bit, but don’t skip it entirely.
- Whipped to soft peaks, it’s the fluffy fairy dust that makes these cups feel airy. If dairy isn’t your thing, coconut cream whips up just as well, with a hint of tropical warmth.
Notes for ingredient swaps
- Dairy-Free: Swap cream cheese for a vegan cream cheese alternative. It’s a bit softer and less tangy, but still creamy.
- Gluten-Free: Use gluten-free graham cracker crumbs or crushed gluten-free cookies. Expect a slightly different crunch and sweetness.
- Sweetener: Replace powdered sugar with maple syrup or honey. These add moisture and a richer flavor, but may make filling a bit softer.
- Lemon Juice: Use bottled lemon juice in a pinch, but fresh lemon brightens the flavor with a zingy punch.
- Heavy Cream: Coconut cream whipped until fluffy makes a tropical, dairy-free alternative with a hint of coconut aroma.
- Toppings: Swap fresh berries for sliced peaches, chopped nuts, or chocolate chips for variety and texture.
- Vanilla: Almond extract or a splash of bourbon can add warmth if vanilla isn’t available, but keep it subtle.
Equipment & Tools
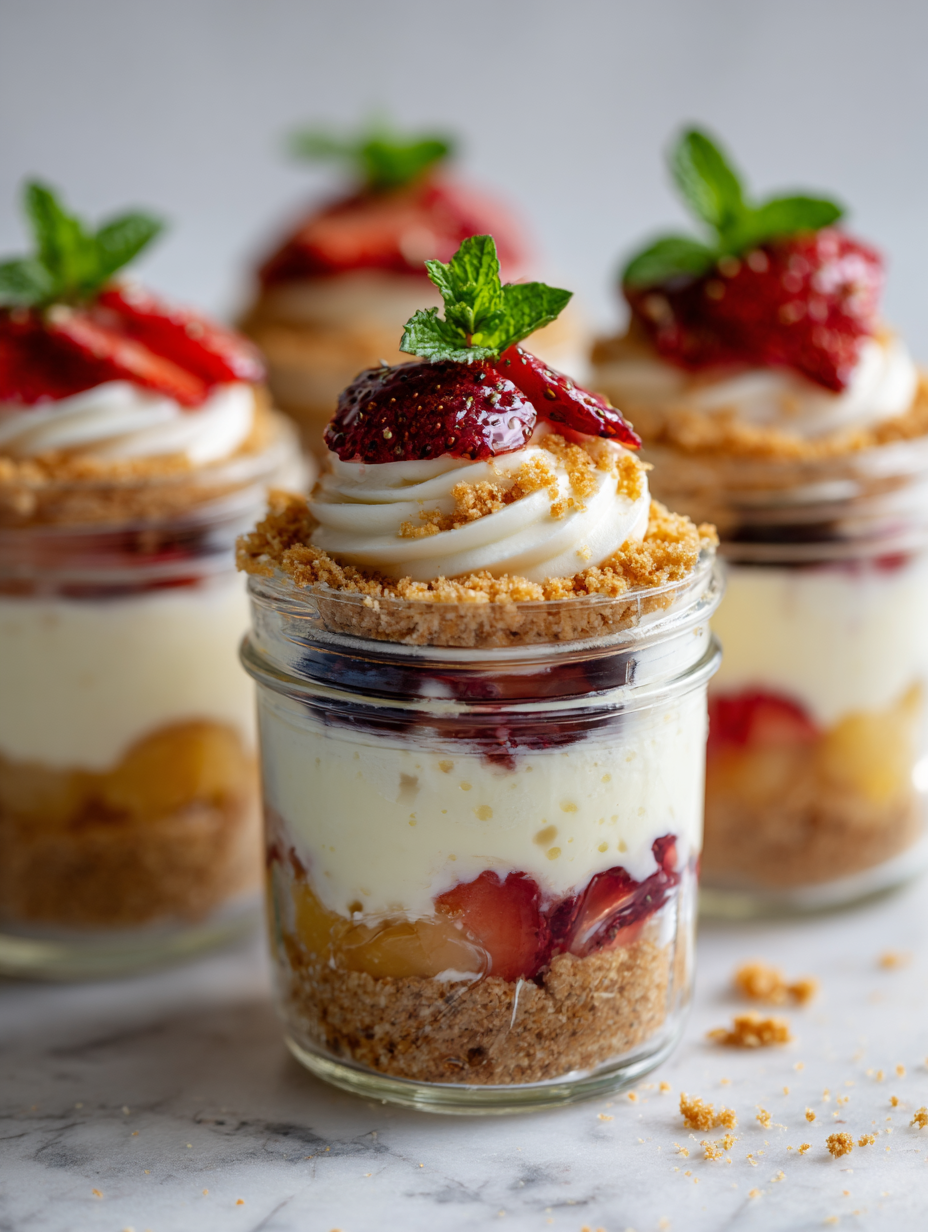
- Small jars or cups: For serving individual cheesecake portions.
- Mixing bowls: To combine crust and filling ingredients.
- Spoon/spatula: For mixing, pressing crust, and smoothing filling.
- Piping bag (optional): For decorative topping application.
- Refrigerator: To chill and set the cheesecake.
Step-by-step guide to no bake cheesecake cups
- Gather your equipment: 4 small jars or cups, a mixing bowl, a spoon, a small spatula, and a piping bag if you want decorative toppings.
- Crush the graham crackers: place in a zip-top bag and crush with a rolling pin until fine, about 1-2 minutes. Measure out about 1/2 cup for each cup.
- Mix the crust: in a bowl, combine crushed graham crackers, 2 tbsp powdered sugar, and 2 tbsp melted butter per batch. Stir until crumbly and moist.
- Divide the crust: spoon about 1-2 tablespoons into the bottom of each jar, pressing down gently with the back of a spoon to create a firm base. Chill for 10 minutes to set.
- Prepare the filling: in a bowl, beat 8 oz of softened cream cheese with 1/4 cup powdered sugar and 1 tsp vanilla until smooth, about 2 minutes.
- Add lemon: stir in 1 tbsp fresh lemon juice for brightness. If the mixture is too stiff, add a splash more lemon or a teaspoon of milk to loosen.
- Whip the cream: in a separate bowl, beat 1/2 cup heavy cream until soft peaks form, about 2-3 minutes. Gently fold into the cream cheese mixture until combined.
- Fill the cups: spoon or pipe the filling over the crust, filling each jar nearly to the top. Smooth the surface with a spatula or the back of a spoon.
- Chill again: cover loosely and refrigerate for at least 2 hours, or overnight if possible. The filling will firm up and develop flavor.
- Add toppings: before serving, decorate with fresh berries, chocolate shavings, or a drizzle of caramel. Use a piping bag for a professional look if desired.
- Serve cold: enjoy these creamy, tangy bites straight from the fridge. The texture should be smooth and firm, with a crisp crust and bright topping.
Let the assembled cups rest in the fridge for at least 2 hours to firm up. Before serving, add toppings for visual appeal and fresh flavor. Serve chilled for best texture—creamy and cool with a slight jiggle.
How to Know It’s Done
- Crust is firm and pressed evenly at the bottom.
- Filling is smooth, fluffy, and holds shape when piped or spooned.
- Toppings are vibrant and fresh, adding contrast and texture.
No-Bake Cheesecake Cups
Ingredients
Equipment
Method
- Crush the graham crackers in a zip-top bag using a rolling pin until fine, then transfer to a small bowl.
- Mix the crushed graham crackers with melted butter until evenly coated and crumbly.
- Spoon about 1-2 tablespoons of the crust mixture into each small jar or cup, pressing down gently to form a firm base.
- In a mixing bowl, beat the softened cream cheese with powdered sugar and vanilla extract until smooth and creamy, about 2 minutes.
- Stir in the fresh lemon juice to brighten the flavor.
- In a separate bowl, whip the heavy cream until soft peaks form, creating a light, fluffy texture.
- Gently fold the whipped cream into the cream cheese mixture, combining just until smooth and airy.
- Spoon or pipe the creamy filling over the prepared crust in each jar, filling nearly to the top and smoothing the surface.
- Cover the jars loosely and refrigerate for at least 2 hours to allow the filling to set and flavors to meld.
- Just before serving, top each cheesecake cup with fresh berries, chocolate shavings, or a drizzle of caramel for added flavor and visual appeal.
- Enjoy these cool, creamy cheesecake cups straight from the fridge for the perfect bite of tangy, sweet, and crunchy goodness.
Pro Tips for Perfect Cups
- Bolded Mini-Head: Use cold cream cheese to avoid clumping and ensure a smooth, velvety filling.
- Bolded Mini-Head: Chill the crust mixture before pressing to help it set firmly and prevent sogginess.
- Bolded Mini-Head: Incorporate whipped cream gently to keep the filling light and airy without deflating it.
- Bolded Mini-Head: For a cleaner look, pipe the filling with a star tip and smooth the tops carefully.
- Bolded Mini-Head: Slightly under-mix the filling for a small air pocket that adds a pleasant, fluffy texture.
- Bolded Mini-Head: Rest the assembled cups in the fridge at least 2 hours to fully set and meld flavors.
- Bolded Mini-Head: Add toppings just before serving to keep berries fresh and chocolate shavings crisp.
Common mistakes and how to fix them
- FORGOT to chill crust before filling → Chill crust for 10 minutes for better adhesion.
- DUMPED filling mixture too quickly → Spoon gently to avoid air bubbles and cracks.
- OVER-TORCHED the topping → Use low heat or remove early to prevent burning or hardening.
- MISSED to check firmness before serving → Ensure filling is set with a slight jiggle, not liquid.
Quick fixes and pantry swaps
- When mixture is too runny, splash in a bit more crushed cookies to thicken.
- If crust sticks to your fingers, patch with a damp cloth for easier pressing.
- Splash a little hot water on the jar edges to help toppings slide off smoothly.
- When filling cracks, gently patch with extra whipped cream and smooth out.
- If the fridge smells off, shield the cups with plastic wrap to prevent flavor transfer.
Prep, store, and reheat tips
- Prepare the crust and filling components a day in advance; keep the crust refrigerated and the filling tightly covered to prevent absorbing fridge odors.
- Assemble the cheesecake cups a few hours before serving to allow flavors to meld and the filling to set, ensuring a firmer texture and a cool, creamy bite.
- Store the assembled cups in an airtight container in the fridge for up to 24 hours; the texture remains smooth with a slight chill fog that enhances the tanginess.
- Reheat individual cups briefly at room temperature or in the fridge for a few minutes—frosty or overly chilled cheesecake can be warmed slightly to revive creaminess, but avoid microwave overheating to prevent melting or separation.
Top questions about cheesecake cups
1. Can I use a lighter cream cheese?
Use full-fat cream cheese for the richest, smoothest texture. Light versions are okay but less creamy.
2. How long should I chill the cheesecake cups?
Chill the assembled cups for at least 2 hours in the fridge. They should feel firm but still creamy when ready.
3. Can I substitute the graham crackers?
Yes, you can swap graham crackers for digestive biscuits or gluten-free cookies. Expect a slightly different crunch and sweetness.
4. Can I use bottled lemon juice?
Fresh lemon juice brightens the flavor with a zesty punch. Bottled lemon works in a pinch but lacks vibrancy.
5. Is there a dairy-free option for the filling?
Whipped coconut cream creates a dairy-free, fluffy filling with a subtle coconut aroma. Chill and beat until soft peaks.
6. How do I keep the filling fluffy?
Overmixing can deflate the filling. Gently fold whipped cream into the cream cheese mixture to keep it airy.
7. When should I add toppings?
Add toppings just before serving to keep berries fresh and chocolate crisp. Store toppings separately if making ahead.
8. How do I prevent a soggy crust?
If the crust is soggy, chill it well before adding the filling. If cracks appear, smooth with extra whipped cream.
9. How can I fill the cups neatly?
Use a piping bag or spoon to fill cups neatly. Chill thoroughly before adding toppings for a clean look.
10. How long can I keep the cheesecake cups?
Store leftovers in an airtight container in the fridge for up to 24 hours. Let sit at room temp for a few minutes before serving if too chilled.
These cheesecake cups are a little reminder that sometimes the simplest desserts carry the most comfort. They’re quick, flexible, and hit that sweet spot of tang and creaminess that feels just right. No matter the occasion, they’re a small, satisfying treat you can pull together without much fuss.
In a busy season or when cravings strike unexpectedly, these cups come through—cool, creamy, and topped with whatever you have on hand. They’re not just a dessert, but a chance to enjoy a homemade moment, one spoonful at a time.

 Hello, I’m Emily Richardson, the heart and soul behind Playing with Flavors. Cooking isn’t just a hobby for me – it’s a passion that I’ve cultivated for years, and it’s become the driving force of my life.
From the kitchen of my cozy café to the pages of this blog, every dish I create is a reflection of my love for food and the joy it brings to people.
Hello, I’m Emily Richardson, the heart and soul behind Playing with Flavors. Cooking isn’t just a hobby for me – it’s a passion that I’ve cultivated for years, and it’s become the driving force of my life.
From the kitchen of my cozy café to the pages of this blog, every dish I create is a reflection of my love for food and the joy it brings to people.


