
These no-bake chocolate chewies are my secret weapon for when the sweet tooth strikes but I’m not in the mood to turn on the oven. They’re a little messy, a little fudge-y, and totally addictive. Honestly, they remind me of childhood afternoons spent sneaking bites of my mom’s homemade treats, quick to whip up and impossible to resist.
What I love most is how forgiving this recipe is; no fancy equipment, just a spoon, a bowl, and a few pantry staples. They come together fast enough that you barely need a plan, yet they hit that perfect sweet spot—rich, chewy, with just enough chocolate to keep you coming back for more. It’s the kind of dessert that makes you feel like a kid again, even if you’re just making it after a long day.
Focusing on the nostalgic comfort of childhood treats, I see these no-bake chocolate chewies as a way to reconnect with simpler, carefree moments. They’re a quick fix for the sweet cravings that hit unexpectedly, especially when I’m short on time but still want something rich and satisfying. This recipe is about reclaiming those cozy, messy kitchen memories, with a little chaos and a lot of love in each bite.
Nostalgic chocolate bites
- Baking these always takes me back to lazy Sunday afternoons, when chocolate was the ultimate treat and time didn’t matter.
- I love how these chewies can turn a rough day into a cozy moment with just a spoonful of chocolate goodness.
- There’s a wild, rebellious joy in sneaking bites of these before they even set, feeling like a kid again.
- Sharing these with friends feels like passing along a secret, a simple pleasure that sparks genuine smiles.
- Sometimes, I make a batch just for myself—no fuss, just rich, chewy chocolate to keep me grounded.
The story behind this recipe
This recipe came together one rainy afternoon when I was craving something sweet but didn’t want to turn on the oven. I remembered those fudge-like treats I used to make with my grandma, quick and messy but so satisfying. It’s funny how a simple combination of pantry staples can suddenly feel like a warm hug, especially when life’s a bit chaotic. Now, whenever I need a quick chocolate fix, these chewies are my go-to, bringing a little bit of childhood back with every bite.
Historical and Cultural Tidbits
- These chewies echo a mid-20th-century homemade candy tradition, where families relied on simple pantry ingredients for quick treats.
- They gained popularity during rationing eras when oven use was limited, making no-bake recipes a kitchen staple.
- Despite their humble roots, no bake chocolate chewies have become a nostalgic symbol of comfort across many households, especially in North America.
- The recipe’s flexibility allowed families to adapt it with local ingredients, creating regional variations that still celebrate childhood sweetness.
Key Ingredients Breakdown
- Unsweetened cocoa powder: I love how this deepens the chocolate flavor with a slight bitter edge, but you can swap in dark cocoa for a richer punch.
- Sweetened condensed milk: It’s the glue that holds everything together, adding that luscious, sticky sweetness—skip this if you want a less rich version, but you’ll miss the chew.
- Butter: I use unsalted to control salt levels, and a little melts in, giving the chewies a soft, fudgy texture; margarine works in a pinch but alters the richness.
- Chocolate chips: I prefer semi-sweet for balance, but switching to dark or milk chocolate changes the flavor profile—think smoky or sweeter, respectively.
- Vanilla extract: Just a splash brightens everything up with a subtle warmth—omit if you want a more straightforward chocolate hit, but it’s worth the aroma.
- Optional add-ins: Nuts or dried fruit add texture and surprise—chopped pecans give a buttery crunch, while dried cranberries bring a tart pop.
- Salt: A pinch enhances the chocolate’s richness—skip or reduce if you’re watching your sodium, but trust me, a tiny pinch makes a difference.
Spotlight on key ingredients
Cocoa powder:
- Unsweetened cocoa powder: I love how this deepens the chocolate flavor with a slight bitter edge, but you can swap in dark cocoa for a richer punch.
- Sweetened condensed milk: It’s the glue that holds everything together, adding that luscious, sticky sweetness—skip this if you want a less rich version, but you’ll miss the chew.
- Chocolate chips: I prefer semi-sweet for balance, but switching to dark or milk chocolate changes the flavor profile—think smoky or sweeter, respectively.
Butter & Oats:
- Butter: I use unsalted to control salt levels, and a little melts in, giving the chewies a soft, fudgy texture; margarine works in a pinch but alters the richness.
- Oats: Quick or rolled oats work equally well, but quick oats blend more seamlessly, giving a smoother chew and less grainy texture.
Notes for ingredient swaps
- Dairy-Free: Swap butter with coconut oil or vegan butter; keeps the chewies rich but adds a subtle coconut aroma.
- Sweetener: Use honey or maple syrup instead of condensed milk, but expect a slightly different, less sticky texture.
- Vegan Chocolate: Replace semi-sweet chips with dairy-free dark chocolate chunks for deep, smoky flavor.
- Oats: Try gluten-free oats if you’re sensitive; they behave the same but make it safe for GF diets.
- Nuts & Fruits: Omit or swap with dried cranberries or chopped dried apricots for a different chew and burst of flavor.
- Cocoa Powder: For a milder chocolate taste, mix in a bit of carob powder—less bitter, but still sweet.
- Flavor Boost: Add a pinch of cinnamon or espresso powder to deepen the chocolate notes and add complexity.
Equipment & Tools
- 20×20 cm (8×8 inch) baking dish: Holds and shapes the mixture for easy slicing.
- Heatproof bowl: Melts the chocolate and butter gently without burning.
- Saucepan: Provides simmering water for melting ingredients indirectly.
- Spatula: Stirs and spreads the mixture smoothly.
- Parchment paper: Prevents sticking and makes removal and cleanup easier.
Step-by-step guide to chewies
- Gather equipment: a 20×20 cm (8×8 inch) square baking dish, a heatproof bowl, a spatula, and parchment paper. Line the dish with parchment for easy removal.
- In a medium heatproof bowl, combine 1 cup (250 g) unsalted butter, 2/3 cup (80 g) unsweetened cocoa powder, and 1 cup (200 g) semi-sweet chocolate chips.
- Set the bowl over a saucepan with simmering water (about 80°C/176°F). Stir constantly until the mixture is smooth, glossy, and heated through (about 3-4 minutes).
- Remove from heat. Quickly stir in 1 can (14 oz / 396 g) sweetened condensed milk and 1 teaspoon vanilla extract until fully combined. The mixture should be thick and gooey.
- Add 3 cups (300 g) quick oats or rolled oats, folding until evenly coated. If you want extra texture, toss in chopped nuts or dried fruit now.
- Transfer the mixture to your prepared dish. Use a spatula to spread and press it evenly into the corners. Smooth the top for a flat surface.
- Refrigerate uncovered for at least 2 hours, or until firm. For quicker setting, pop it in the freezer for 1 hour (check that it’s not frozen solid).
- Once set, lift out using the parchment paper and cut into 16 squares. Serve immediately or store for later.
Refrigerate uncovered for at least 2 hours until firm. Cut into squares with a sharp knife. Serve directly from the fridge for best texture, or let sit at room temperature for 10 minutes for softer bites.
How to Know It’s Done
- The mixture is shiny and smooth, with no lumps when combined.
- The edges are slightly firm but the center still has a bit of jiggle when lightly pressed.
- The surface is matte but not sticky, with a uniform appearance after pressing into the dish.
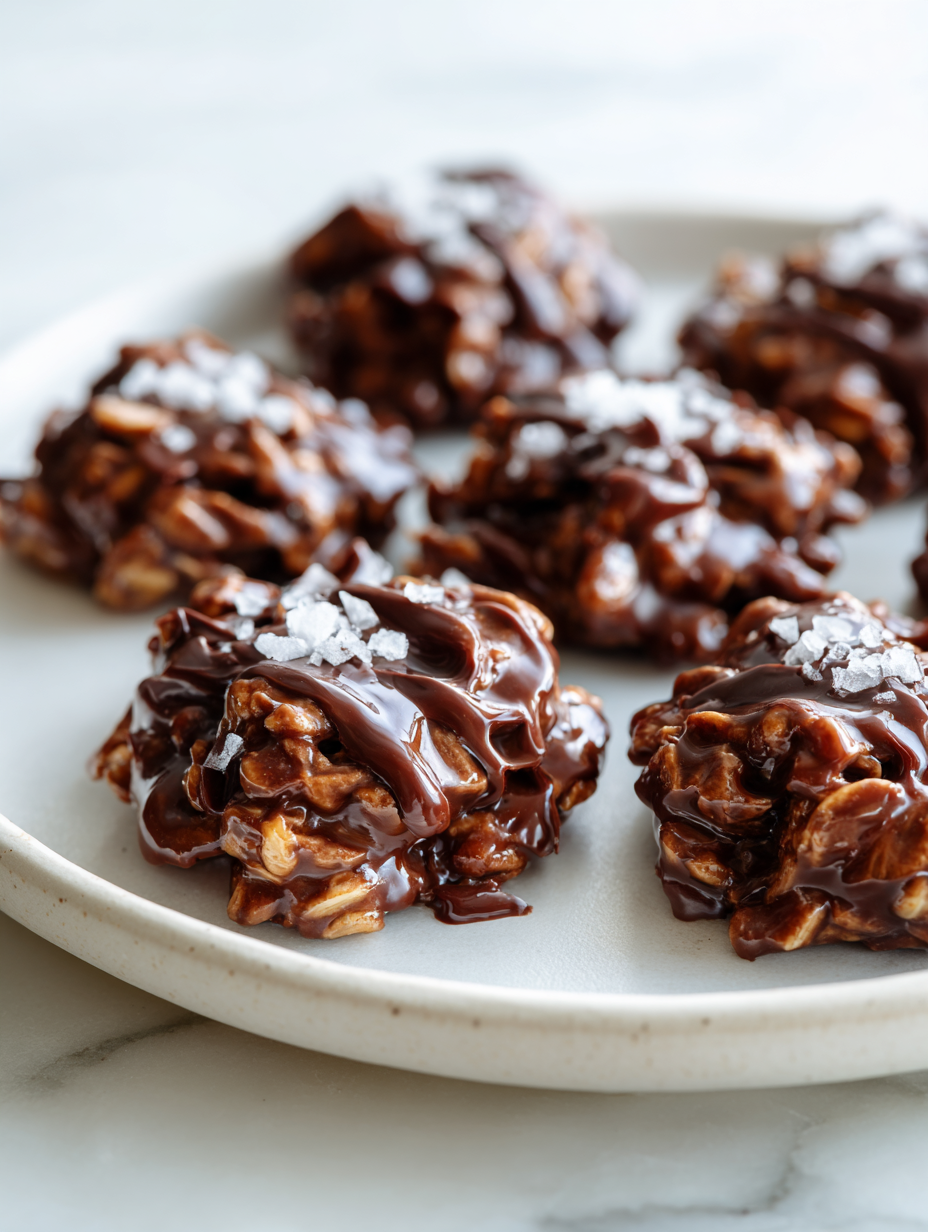
Nostalgic No-Bake Chocolate Chewies
Ingredients
Equipment
Method
- Line your baking dish with parchment paper, leaving overhang for easy removal. Set aside.
- Combine butter, cocoa powder, and chocolate chips in a heatproof bowl. Place over a saucepan with simmering water, making sure the bowl doesn’t touch the water.
- Stir constantly with a spatula as the mixture melts, creating a glossy, smooth chocolate sauce. This takes about 3-4 minutes.
- Remove the bowl from heat and quickly stir in sweetened condensed milk and vanilla extract until fully incorporated and the mixture is thick and gooey.
- Gently fold in the oats (and nuts or dried fruit if using) until everything is evenly coated and sticky.
- Transfer the mixture into your prepared dish. Use a spatula to spread it evenly, pressing down gently to pack it in and smooth the top.
- Refrigerate uncovered for at least 2 hours or until firm. For faster setting, place in the freezer for about 1 hour.
- Once set, lift the block out of the dish using the parchment overhang. Slice into 16 squares with a sharp knife dipped in hot water for clean edges.
- Serve immediately or store in an airtight container at room temperature for up to 3 days, or freeze for longer storage.
Notes
Pro tips for perfect chewies
- Use room temperature butter for a smoother melt and even mixing.
- When melting chocolate, keep the water simmering gently—avoid boiling to prevent seizing.
- Press the mixture firmly into the dish to ensure even setting and clean edges.
- Chill uncovered to prevent condensation from making the surface sticky.
- For cleaner cuts, dip your knife in hot water before slicing the set mixture.
- Add a pinch of salt to enhance chocolate flavor and balance sweetness.
- Incorporate mix-ins like nuts or dried fruit last to distribute evenly without breaking the mixture.
Common mistakes and how to fix them
- FORGOT to stir constantly → Stir slowly to avoid burning the chocolate.
- DUMPED in all ingredients at once → Add ingredients gradually for better texture.
- OVER-TORCHED the chocolate mixture → Remove from heat once glossy and smooth.
- USED cold ingredients directly from fridge → Warm slightly for easier melting and mixing.
Quick fixes and pantry swaps
- When mixture is too stiff → Splash in a tiny bit of hot water and stir well.
- If mixture is too runny → DUMP in a bit more oats and fold gently.
- Over-melting chocolate → PATCH with a small spoonful of cocoa powder to stabilize texture.
- Forgot to line pan → Use parchment paper or a silicone mat for easy removal.
- When chewies are sticky → SHIELD with a dusting of cocoa powder or powdered sugar while cutting.
Prep, store, and reheat tips
- You can prepare the mixture a day in advance; keep it covered in the fridge to meld flavors and develop a richer chocolate aroma.
- Store the finished chewies in an airtight container at room temperature for up to 3 days; the texture stays chewy, and the chocolate remains glossy.
- For longer storage, freeze the cut squares wrapped tightly in plastic wrap and placed in a freezer bag; they keep well for up to a month, with minimal flavor loss.
- Refrigerate or thaw frozen chewies in the fridge for a few hours before serving; they’ll firm up slightly but retain their chewy, fudgy texture.
- To reheat, microwave a single square for 10-15 seconds until just soft and warm—look for a slight shimmer and a gentle crackle of melting chocolate.
Top questions about no bake chewies
1. How do I melt the chocolate without burning it?
You can melt the chocolate mixture over low heat on the stove or in short bursts in the microwave, stirring until smooth. Always keep an eye to prevent burning or seizing the chocolate.
2. Can I substitute oats with something else?
Yes, you can swap the oats for crushed graham crackers or crushed cookies for a different texture and flavor, but expect a slightly different chew and consistency.
3. My mixture is too sticky or too dry, what should I do?
If the mixture seems too sticky to spread, chill it in the fridge for 15-20 minutes before pressing into the pan. If it’s too dry, add a splash of cream or milk and stir until more pliable.
4. How long do no bake chewies last?
Store the chewies in an airtight container at room temperature for up to 3 days, or freeze for up to a month. Bring to room temp or microwave briefly before serving for best texture.
5. Can I change the type of chocolate used?
For a richer chocolate flavor, use dark chocolate chips or a mix of semi-sweet and bittersweet. For lighter flavor, milk chocolate works well. Adjust according to your taste.
6. How do I know when the chewies are done?
Refrigerate the mixture for at least 2 hours or until firm. For quicker setting, freeze for 1 hour. The chewies are ready when they’re firm but still chewy and shiny on top.
7. Can I add nuts or dried fruit?
Yes, adding chopped nuts or dried fruit can enhance texture and flavor. Stir them in just before transferring to the pan to distribute evenly.
8. How do I get clean cuts?
Use a sharp, hot knife to cut the chewies. Dip the knife in hot water, wipe dry, then slice for clean, smooth edges.
9. What if the chocolate mixture seizes?
If the chocolate seizes or becomes grainy, add a teaspoon of vegetable oil or a splash of warm water and stir gently until smooth again.
10. How do I prevent sticking?
To prevent sticking, line your pan with parchment paper and lightly butter or spray it. This makes removal easier and cleaner.
These chewies are a little slice of childhood chaos—no oven, just a spoon and some good chocolate. They remind me that sometimes, the simplest recipes bring the biggest comfort, especially when life’s busy or messy. I keep a batch in the fridge for those moments when I need a quick, rich fix that doesn’t ask for much effort.
Sometimes, I toss in whatever nuts or dried fruit I have lying around, making each batch a little surprise. They’re imperfect, a little messy, but that’s what makes them feel real. And honestly, there’s rarely a better way to satisfy a sweet craving with honest, honest ingredients and a little bit of love.
 Hello, I’m Emily Richardson, the heart and soul behind Playing with Flavors. Cooking isn’t just a hobby for me – it’s a passion that I’ve cultivated for years, and it’s become the driving force of my life.
From the kitchen of my cozy café to the pages of this blog, every dish I create is a reflection of my love for food and the joy it brings to people.
Hello, I’m Emily Richardson, the heart and soul behind Playing with Flavors. Cooking isn’t just a hobby for me – it’s a passion that I’ve cultivated for years, and it’s become the driving force of my life.
From the kitchen of my cozy café to the pages of this blog, every dish I create is a reflection of my love for food and the joy it brings to people.


