
This recipe is born from those afternoons when I’m craving something sweet but don’t want to turn on the oven or wait around. It’s about quick fixes—no bake, no fuss, just ingredients that come together in a messy, satisfying way. Honestly, I love how flexible it is, letting me toss in whatever nuts, seeds, or chocolate chips I have lying around.
There’s a certain charm in these bars—imperfect, chewy, and rich with chocolate flavor. They remind me of childhood snacks but with a grown-up twist. Plus, they’re perfect for grabbing on the go, whether I’m rushing out the door or just need a moment of sweet relief during a chaotic day.
This recipe is inspired by the messy, spontaneous moments in my kitchen where I toss together ingredients just to see what sticks—no oven, no fuss, just pure improvisation that turns into a sweet, chewy reward. It’s about embracing the chaos of craving something sweet without the hassle of baking, especially on those busy days or when the oven’s busy with other projects.
The story behind this recipe
- This recipe came about when I needed a sweet treat fast, but my oven was busy with dinner prep. I remembered those childhood granola bars, but with a richer chocolate twist I could toss together without heat. That spontaneous moment of improvisation turned into a recipe I now turn to whenever I crave something quick and satisfying.
- I love how this recipe feels like a small victory—something simple that turns out better than expected. It’s a bit chaotic, a bit messy, but always delicious. Plus, it’s a reminder that sometimes, the best ideas come from just throwing things together and seeing what sticks.
- heading
- The story behind this recipe
Ingredient breakdown: key components
- Oats: I use old-fashioned rolled oats—they give the bars a chewy texture and nutty flavor. Feel free to try quick oats if you’re in a rush, but expect a slightly softer bite.
- Chocolate: I prefer dark chocolate chips—they melt nicely and add a rich, bittersweet punch. You can swap for semi-sweet or even dairy-free chocolate, but the flavor shifts a bit towards milder sweetness.
- Butter or coconut oil: I rely on butter for a creamy, rich base, but coconut oil works beautifully for a dairy-free version with a subtle tropical scent. Melt it gently to avoid splatters and smell that toasted coconut aroma.
- Honey or maple syrup: I love honey’s sticky, floral sweetness—it helps everything hold together with a glossy finish. Maple syrup is a good substitute but adds a slightly earthier tone, so adjust sweetness accordingly.
- Nuts and seeds: I toss in chopped almonds and sunflower seeds for crunch and contrast. Feel free to mix in whatever you like—pecans, pumpkin seeds—they all add different textures and flavors, just toast them lightly for extra oomph.
- Vanilla extract: I add a splash for warmth and depth, but you can skip it if you want a more straightforward chocolate hit. Just a little brightens the whole thing and enhances the chocolate aroma.
- Salt: I sprinkle a pinch for balance—without it, the sweetness can feel flat. A flaky sea salt finish right before slicing makes each bite pop with flavor.
Spotlight on key ingredients
Oats and Chocolate:
- Oats: I use old-fashioned rolled oats—they give the bars a chewy texture and nutty flavor. Feel free to try quick oats if you’re in a rush, but expect a slightly softer bite.
- Chocolate: I prefer dark chocolate chips—they melt nicely and add a rich, bittersweet punch. You can swap for semi-sweet or even dairy-free chocolate, but the flavor shifts a bit towards milder sweetness.
Notes for ingredient swaps
- Dairy-Free: Swap butter for coconut oil. It adds a subtle tropical aroma and keeps the bars dairy-free, but expect a slightly softer texture.
- Sweetener: Use agave syrup instead of honey. It’s thinner and has a milder sweetness, which might change the stickiness slightly.
- Chocolate: Dark chocolate chips can be replaced with dairy-free or semi-sweet chips. Expect a different intensity of cocoa flavor.
- Nuts: Almonds can be swapped for walnuts or pecans. Toast them lightly for extra crunch and flavor.
- Oats: Gluten-free oats work fine if you need a gluten-free version, but check for cross-contamination if sensitive.
- Sweetener: Maple syrup can replace honey for a more earthy sweetness. It may alter the overall flavor profile slightly.
- Add-ins: Dried fruits like cranberries or apricots can replace nuts for extra chew and tartness.
Equipment & Tools
- 20cm/8-inch square pan: Holds the mixture while setting and slicing.
- Parchment paper: Prevents sticking and makes removal easy.
- Large mixing bowl: Combines ingredients thoroughly.
- Spatula or spoon: Stirs and presses the mixture into the pan.
- Knife: Slices the set bars cleanly.
Guide to No Bake Chocolate Oat Bars
- Gather all ingredients and equipment. Line a 20cm/8-inch square pan with parchment paper for easy removal.
- In a large mixing bowl, combine 2 cups rolled oats, 1/2 cup honey, 1/4 cup melted butter or coconut oil, and 1 teaspoon vanilla extract. Stir until well coated and sticky.
- Add 1 cup chocolate chips, 1/2 cup chopped nuts, and a pinch of salt. Mix until evenly distributed.
- Transfer the mixture into the prepared pan. Use a spatula or the back of a spoon to press firmly and evenly into the pan, about 1-inch thick.
- Place the pan in the fridge for at least 2 hours. The mixture should firm up and become chewy. If it feels too soft, extend chilling time.
- Once set, remove from fridge. Use parchment paper to lift the whole block out of the pan. Slice into bars or squares.
- For a cleaner cut, wipe the knife with a damp cloth between slices. Serve immediately or store in an airtight container.
Chill the bars in the fridge for at least 2 hours until firm. Slice with a sharp knife. Serve directly from the fridge or at room temperature for softer texture.
How to Know It’s Done
- Bars are firm and hold shape when pressed lightly.
- Chocolate is slightly melted and glossy but not oily.
- Oats and nuts are evenly distributed and pressed tightly into the pan.
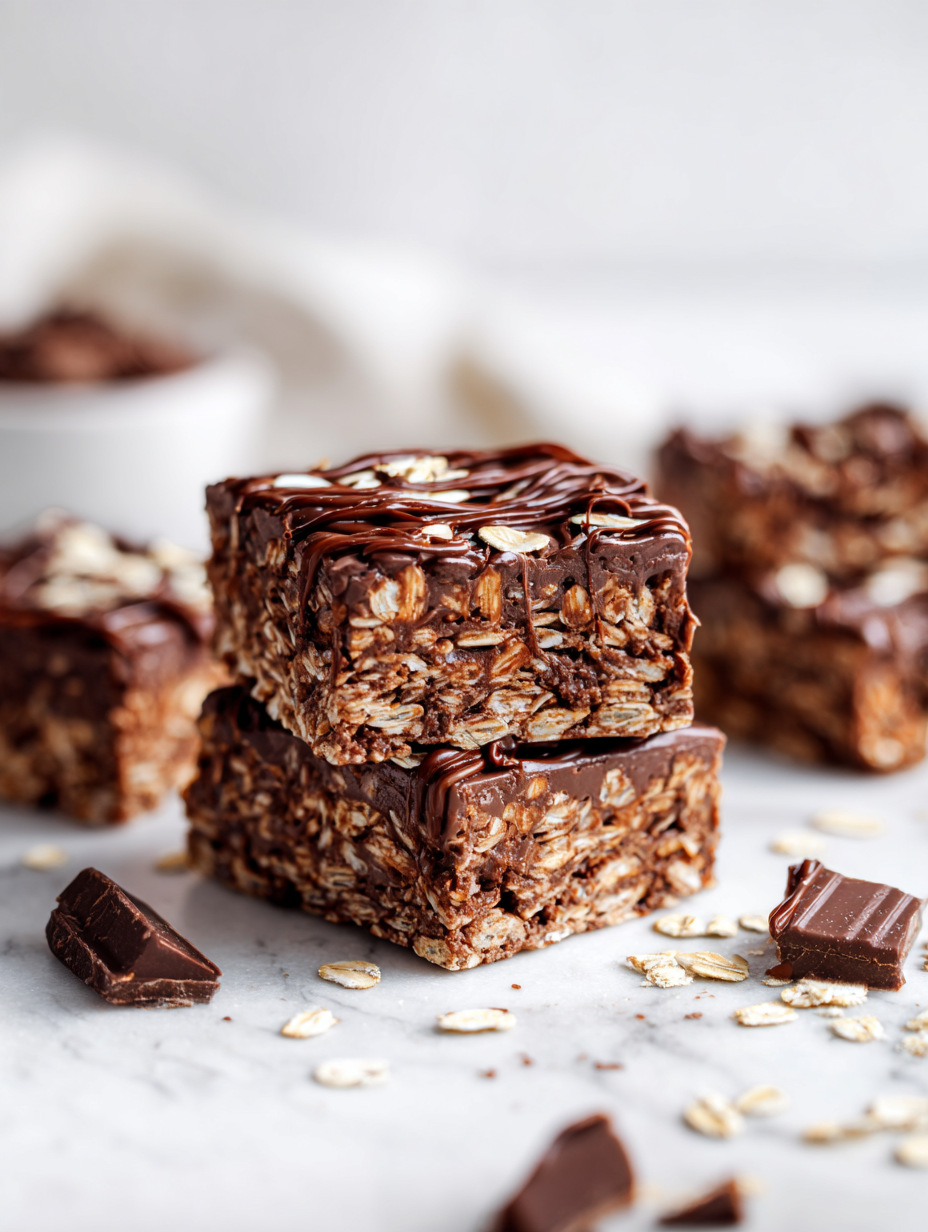
No Bake Chocolate Oat Bars
Ingredients
Equipment
Method
- Line your square pan with parchment paper, leaving some overhang for easy removal. Gather all ingredients nearby.
- In a large mixing bowl, combine the rolled oats, chopped nuts, a pinch of salt, and vanilla extract. Stir until evenly mixed.
- Pour in the melted butter or coconut oil and honey, then stir until the mixture becomes sticky and well coated, with all ingredients starting to cling together.
- Fold in the chocolate chips, distributing them evenly throughout the mixture. The mixture should feel thick and sticky.
- Transfer the mixture into the prepared pan. Use a spatula or the back of a spoon to press it firmly into an even layer, about 1 inch thick. Press down until the surface feels compact and smooth.
- Place the pan in the fridge and chill for at least 2 hours, or until the mixture is firm and set. You’ll hear it firming as it cools.
- Once chilled, lift the block out of the pan using the parchment overhang. Place on a cutting board and cut into bars or squares with a sharp knife.
- Wipe the knife with a damp cloth between cuts for clean, even slices. Serve immediately or store in an airtight container in the fridge for up to a week.
Pro tips for perfect bars
- Use parchment paper: Line your pan for easy removal and a clean, crack-free edge when slicing.
- Press firmly: When spreading the mixture, press down with the back of a spatula to compact and prevent crumbling.
- Chill thoroughly: Let the bars set in the fridge for at least 2 hours—this ensures they hold together without being too soft.
- Temperature check: The chocolate should be glossy and slightly melted but not oily—if it’s looking greasy, give it a few more minutes in the fridge.
- Add-ins at the end: Mix in nuts or seeds last to maintain their crunch and prevent them from sinking or becoming soggy.
- Use a sharp knife: Wipe the blade with a damp cloth between cuts for clean, even slices without crushing the bars.
- Adjust sweetness: Taste your melted chocolate before pouring—if it’s too bitter, a tiny pinch of salt or extra sweetener can enhance the flavor.
Common mistakes and how to fix them
- FORGOT to evenly press mixture → press firmly, ensuring uniform thickness.
- DUMPED too much chocolate → add gradually, checking for desired meltiness.
- OVER-TORCHED the nuts → toast lightly, watch for golden edges.
- MISSED chilling time → chill at least 2 hours for proper firmness.
Quick fixes and pantry swaps
- When mixture is too sticky → splash a little more honey or warm water to loosen it.
- If bars are crumbly → patch with a thin layer of melted chocolate and refrigerate briefly.
- Splash cold water on softened chocolate → shield with a damp cloth, then stir to smooth.
- Dumped too much salt → sprinkle a tiny pinch on top for balance, then press gently.
- When chocolate shimmers or crackles in microwave → rescue by stirring until glossy and smooth.
Prep, store, and reheat tips
- Prepare the mixture ahead of time and refrigerate. The flavors meld and the mixture firms up, making pressing into the pan easier.
- Store the bars in an airtight container in the fridge for up to a week. The cool temp keeps them chewy and preserves the chocolate shine.
- For longer storage, freeze bars wrapped tightly in plastic wrap and then in a container. They stay good for up to a month and can be thawed in the fridge or at room temp.
- Reheat slices briefly in the microwave—about 10 seconds—until just softened, with a slight crackle of melted chocolate for a warm, gooey experience.
Top questions about no bake chocolate oat bars
1. Can I use quick oats instead of rolled oats?
Yes, using quick oats will give a softer, less chewy texture, but it works in a pinch.
2. Can I substitute the type of chocolate?
Absolutely, you can swap dark chocolate for milk or semi-sweet, which will make the bars sweeter and creamier.
3. My mixture is too sticky to press down, what do I do?
If the mixture feels too sticky, try chilling it a bit longer or lightly dusting your hands with cocoa powder when pressing.
4. Can I freeze the bars for later?
Yes, you can freeze these bars for up to a month. Wrap them tightly to prevent freezer burn.
5. How can I make these nut-free?
For a nut-free version, omit nuts or replace with seeds like sunflower or pumpkin for crunch and flavor.
6. Can I make these dairy-free?
Using coconut oil instead of butter will add a tropical scent and make the bars dairy-free, but expect a slightly softer set.
7. My bars aren’t firm enough, what went wrong?
If your bars aren’t setting properly, make sure to press firmly and chill longer until they are firm and hold their shape.
8. Should I add salt or toppings?
Yes, adding a pinch of sea salt on top before chilling enhances the chocolate flavor and balances the sweetness.
9. How do I press the mixture evenly?
A warm spoon or spatula helps press the mixture evenly into the pan and prevents sticking.
10. What if the chocolate seizes or looks greasy?
If the chocolate looks greasy or separates, give it a quick stir or zap in the microwave for a few seconds to smooth out.
These no bake chocolate oat bars are a simple reminder that sometimes, the best treats come from just tossing ingredients together without fuss. They’re perfect for those busy moments when you need a quick, satisfying bite that doesn’t compromise on flavor. Plus, they bring back that nostalgic, homemade feeling in every chewy, chocolatey bite.
Whenever I make these, I think about how small, spontaneous kitchen experiments can turn into my favorite go-to snacks. No matter the chaos outside, these bars offer a little moment of calm—rich, textured, and honestly, pretty irresistible. They’re a small victory in my kitchen that I keep coming back to.