
This recipe is inspired by my late-night snack memories, when I needed something quick, satisfying, and no-fuss. It’s a reminder that comfort can be simple—just chocolate, peanut butter, and a little patience for chilling.
I love how these bars come together without turning on the stove, which makes them perfect for those nights when I just want something sweet and easy. Plus, they pack a punch of flavor that hits just right—rich, nutty, and just a hint of salt.
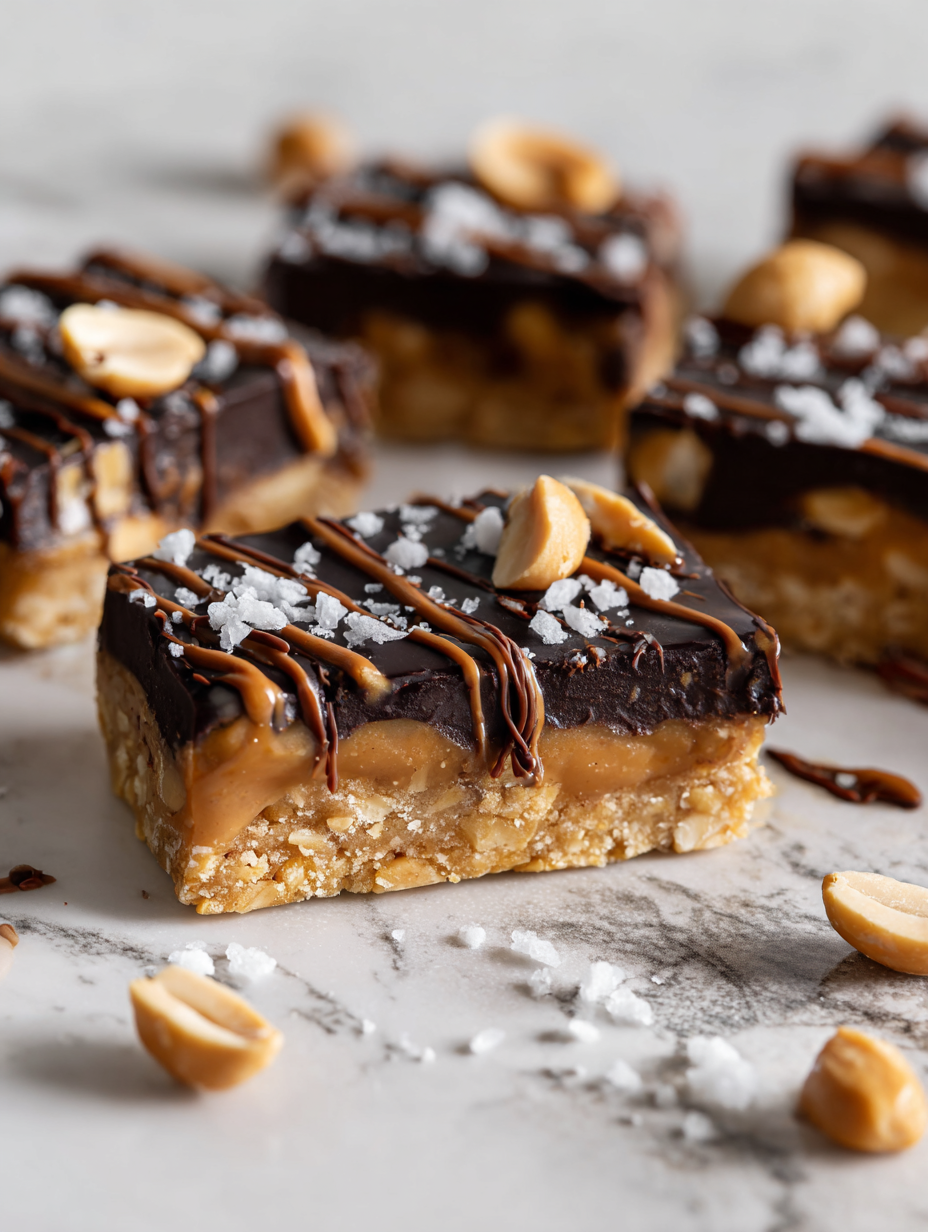
No Bake Chocolate Peanut Bars are my go-to for busy days or when I want to whip up something homemade without a ton of cleanup. They’re honestly a tiny bit addictive, and I keep coming back to this recipe because it’s honest, straightforward, and so satisfying.
This recipe is inspired by my late-night snack memories, when I needed something quick, satisfying, and no-fuss. It’s a reminder that comfort can be simple—just chocolate, peanut butter, and a little patience for chilling.
The story behind this recipe
- This recipe came from a lazy weekend afternoon when I wanted something sweet but didn’t want to turn on the stove or mess with baking. I remember rummaging through my pantry, grabbing what I had—peanut butter, a bag of chocolate chips, and some graham crackers. That moment of improvisation turned into this little treasure.
- It’s funny how often the simplest treats are born out of necessity—no fuss, just flavor. I love that these bars remind me of childhood afternoons, where the kitchen smelled of melting chocolate and peanut butter, and everything felt just a little more manageable. Now, they’re my go-to when I need a quick fix of comfort.
- heading: ‘The story behind this recipe’
Key Ingredients Breakdown
- Peanut Butter: I go for a creamy, slightly salty variety—sinks into the mixture with a rich, nutty aroma that makes the whole kitchen smell like comfort. Feel free to swap for almond butter if you want a different nutty kick.
- Chocolate Chips: I prefer semi-sweet because they melt just enough to be oozy but still hold shape. Use dark chocolate for a deeper flavor or even vegan chips if needed—just watch the melting point.
- Honey or Maple Syrup: Adds a subtle sweetness and helps everything stick together. If you want a less sweet bar, cut back a bit. For a richer caramel note, try a splash of molasses, but adjust sweetness accordingly.
- Graham Crackers or Oats: I like crushed graham crackers for a buttery crumb, but oats work fine if you want more texture. Toast the crackers lightly for extra depth or leave them as-is for a softer bite.
- Butter: I use unsalted, melted until just golden—this gives a faint nutty aroma and helps the bars set. For a dairy-free version, coconut oil works, but the flavor shifts to more tropical. Keep an eye on melting times to avoid overdoing it.
- Salt: I sprinkle a pinch to heighten all the flavors—don’t skip it, or the bars might taste flat. A tiny bit of flaky sea salt on top after pouring makes a pretty finish and elevates the chocolate and peanut butter.
- Optional Add-ins: Crushed nuts, shredded coconut, or even a dash of espresso powder—add these at the mixing stage for extra layers of flavor and texture.
Spotlight on key ingredients
Peanut Butter:
- I go for a creamy, slightly salty variety—sinks into the mixture with a rich, nutty aroma that makes the whole kitchen smell like comfort. Feel free to swap for almond butter if you want a different nutty kick.
- Chocolate Chips: I prefer semi-sweet because they melt just enough to be oozy but still hold shape. Use dark chocolate for a deeper flavor or even vegan chips if needed—just watch the melting point.
Chocolate Chips:
- I prefer semi-sweet because they melt just enough to be oozy but still hold shape. Use dark chocolate for a deeper flavor or even vegan chips if needed—just watch the melting point.
- Honey or Maple Syrup: Adds a subtle sweetness and helps everything stick together. If you want a less sweet bar, cut back a bit. For a richer caramel note, try a splash of molasses, but adjust sweetness accordingly.
Notes for ingredient swaps
- Dairy-Free: Swap regular chocolate chips for coconut or soy-based chips—flavor stays rich, but expect less creamy melt.
- Nut-Free: Use sunflower seed butter instead of peanut butter—same sticky texture, different nutty aroma.
- Sweetener: Honey can be replaced with maple syrup or agave—each brings a distinct flavor, but sweetness levels may vary.
- Crunch: Replace graham crackers with crushed rice cereal or gluten-free cookies—maintains crunch, slightly different flavor profile.
- Butter: Coconut oil works as a dairy-free alternative—adds a subtle tropical note and melts quickly, watch for quick setting.
- Chocolate: Dark or semi-sweet chips can be swapped for milk chocolate—sweeter, creamier, but less intense chocolate flavor.
- Add-ins: Mix in shredded coconut, chopped nuts, or dried fruit—customize texture and flavor, just keep the quantities balanced.
Equipment & Tools
- 8-inch square baking dish: Holds the mixture for setting.
- Microwave-safe bowl: Melts the chocolate and butter efficiently.
- Spatula: Spreads and presses the mixture evenly.
- Parchment paper: Prevents sticking and makes removal easy.
- Knife: Slices the set bars cleanly.
Step-by-step guide to no bake bars
- Gather your equipment: 8-inch square baking dish, microwave-safe bowl, spatula, parchment paper, and a spoon for spreading.
- Line the dish with parchment paper, leaving some overhang for easy removal later. Set aside.
- In a microwave-safe bowl, combine 1 cup of chocolate chips and 2 tablespoons of butter. Microwave in 30-second bursts, stirring each time, until melted and smooth. (Total about 1-2 minutes).
- Add 1 cup of creamy peanut butter to the melted chocolate mixture. Stir until fully incorporated and glossy.
- Crush 1.5 cups of graham crackers into small crumbs—either by hand or in a zip-top bag with a rolling pin. Mix into the chocolate-peanut butter blend.
- Pour the mixture into the prepared dish. Use a spatula to spread evenly, pressing down lightly to compact.
- Refrigerate uncovered for about 2 hours, or until firm. The edges should be set and the top shiny but not sticky.
- Once firm, lift the bars out of the dish using the parchment overhang. Place on a cutting board.
- Slice into 12 even squares using a sharp knife. Wipe the blade between cuts for clean edges.
- Optional: Melt an additional 1/4 cup of chocolate chips to drizzle on top for decoration. Let set for 10 minutes in the fridge.
Refrigerate uncovered for at least 2 hours until firm. Slice into squares and serve directly from the fridge or at room temperature for a softer bite.
How to Know It’s Done
- Chocolate mixture is smooth and glossy, no lumps.
- Bars are firm and hold shape when sliced.
- Top surface is shiny and not sticky after refrigeration.
No Bake Chocolate Peanut Bars
Ingredients
Equipment
Method
- Line your 8-inch square baking dish with parchment paper, leaving some overhang for easy removal.
- In a microwave-safe bowl, combine the chocolate chips and butter. Microwave in 30-second bursts, stirring well each time, until the mixture is smooth and glossy.
- Add the creamy peanut butter to the melted chocolate mixture, stirring until fully incorporated and smooth.
- Stir in the crushed graham cracker crumbs until evenly distributed, creating a thick, cohesive mixture.
- Pour the mixture into the prepared dish, then use a spatula to spread it evenly across the surface, pressing down gently to compact.
- Refrigerate uncovered for about 2 hours until the mixture is firm and set, with a shiny, smooth top.
- Once chilled, lift the bars out of the dish using the parchment overhang, placing them on a cutting board.
- Slice into 12 even squares with a sharp knife, wiping the blade between cuts for clean edges.
- If desired, melt a few additional chocolate chips to drizzle over the bars for decoration, then let sit for 10 minutes in the fridge to set.
- Serve the bars chilled or at room temperature for a softer bite, and enjoy the rich, nutty flavor with a satisfying firm texture.
Pro tips for perfect bars
- Bolded mini-head: Use a microwave-safe bowl → Melts chocolate evenly and quickly, avoiding scorching.
- Bolded mini-head: Stir in stages → Incorporate melted butter gradually for a smooth, glossy texture.
- Bolded mini-head: Crush crackers finely → Ensures even distribution and cohesive bars, avoid large chunks.
- Bolded mini-head: Chill in layers → For faster setting, freeze in 30-minute intervals, check firmness with finger.
- Bolded mini-head: Drizzle melted chocolate → Creates a decorative finish, adds a bit of extra richness.
- Bolded mini-head: Press firmly when spreading → Removes air pockets, ensures uniform thickness, prevents cracking.
- Bolded mini-head: Use parchment edges → Makes lifting the entire block easier, prevents sticking and mess.
Common mistakes and how to fix them
- FORGOT to chill bars completely → Chill for at least 2 hours for best result.
- DUMPED in too much chocolate → Use the recommended amount; excess can cause sogginess.
- OVER-TORCHED the chocolate → Melt slowly in short bursts, stir often, avoid burning.
- MISSED the parchment lining → Always line your dish for easy removal and clean-up.
Quick fixes and pantry swaps
- When mixture is too dry → Splash in a teaspoon of milk to loosen.
- If bars crack when slicing → Warm the knife slightly for cleaner cuts.
- Splash melted chocolate on the surface → Chill briefly to set the drizzle quickly.
- Patch a cracked top → Reheat and spread a thin layer of melted chocolate over the crack.
- heading: “Quick fixes and pantry swaps”
Make-Ahead and Storage Tips
- Prepare the mixture and have it ready to pour—can be made a day ahead, kept covered in the fridge, and the flavors will meld overnight.
- Store the finished bars in an airtight container in the fridge for up to a week—note the chocolate may soften slightly but will stay tasty.
- Freeze the bars for longer storage—wrap tightly in plastic wrap and keep up to 3 months, thaw in fridge or at room temp for 10 minutes for best texture.
- Reheat slightly in the microwave (10-15 seconds) if you want the chocolate to be melty again—watch for overheating, which can burn the chocolate or cause separation.
Top questions about no bake bars
1. How do I cut the bars cleanly?
You can soften the bars slightly by letting them sit at room temperature for a few minutes before slicing, which makes serving easier and enhances flavor.
2. My chocolate is lumpy, what’s wrong?
If your chocolate isn’t melting smoothly, try melting it in short bursts and stirring well between each to prevent burning.
3. How long do these bars last?
Storing in the fridge keeps the bars firm and fresh for up to a week; for longer storage, freeze them wrapped tightly in plastic.
4. Can I use natural peanut butter?
Using natural peanut butter can sometimes make the mixture softer; if that happens, add a bit more crushed crackers to firm it up.
5. Can I add extra toppings?
For a richer flavor, add a pinch of sea salt on top after pouring the mixture into the dish. It enhances the chocolate and peanut butter taste.
6. Can I use different kinds of chocolate?
Yes, you can swap dark chocolate chips for milk or vegan chocolate—just keep an eye on melting times as they vary slightly.
7. The mixture is too stiff, what do I do?
If the mixture feels too dry, mix in a teaspoon of milk or a splash of cream to loosen it up before pressing into the dish.
8. My bars crack when I cut them, how do I fix it?
To prevent cracks when slicing, warm your knife slightly with hot water and wipe it dry before each cut.
9. The chocolate drizzle cracks when I try to spread it?
If the chocolate drizzle sets too quickly and cracks, microwave it for a few seconds and stir before drizzling again.
10. Can I prepare these in advance?
When making ahead, keep the bars in an airtight container in the fridge; they will stay fresh and maintain their texture.
These no bake bars are a testament to how simple ingredients can come together into something unexpectedly indulgent. They’re perfect for when I need a quick sweet fix without the fuss of baking or waiting for long chill times. Honestly, they remind me to keep it straightforward—good flavor, minimal effort.
Every time I make these, I appreciate how accessible and forgiving they are. Whether I’m rushing or just craving a nostalgic treat, they never let me down. Sometimes, the best recipes are the ones that feel like a little secret in the pantry, waiting to be shared.