
Sometimes the simplest treats are the hardest to resist, especially when they come together without turning on the oven. These no bake chocolate rice bars are my go-to for a quick fix of childhood nostalgia—crunchy, gooey, and just sweet enough. They’re the kind of snack that feels like a little secret, made with pantry staples I always keep on hand.
What I love most is how forgiving they are—no fuss, no measuring chaos, just melting chocolate and mixing rice cereal until everything sticks. It’s a messy, satisfying process, perfect for those moments when you want to whip up something sweet without the fuss of proper baking. Plus, they’re great for sharing, or just keeping around for when that chocolate craving hits hard.
This recipe is about reclaiming childhood simplicity, using only a handful of pantry staples to create a nostalgic treat that’s both quick and satisfying. It’s perfect for those moments when you want something sweet without turning on the oven or fussing over complicated steps, all while reliving the messy joy of making snacks with your hands.
The story behind this recipe
- This recipe came from a lazy afternoon craving and a cluttered pantry. I wanted something quick, no fuss, but still satisfying enough to curb that chocolate urge. Making these bars reminded me of sneaking snacks as a kid—messy hands, sticky fingers, and that rush of sweet and crunch.
- One day, I threw together whatever I had—rice cereal, melted chocolate, a handful of nuts—and it turned out better than expected. It’s become my go-to for stress moments, when I just need a little sweet triumph without the oven or the fuss. Sometimes, the simplest ideas are the ones that stick.
- heading
- story_type
Ingredient breakdown: key components
- Chocolate: I prefer a good quality dark chocolate with a rich, deep flavor—melts smoothly and gives that glossy finish; you can swap for semi-sweet if you prefer a sweeter bite.
- Rice Cereal: The crunch is what makes these bars addictive—trust me, the plain, unsweetened kind stays crispy and holds everything together well; try toasted rice for extra toasty flavor.
- Butter: I use unsalted butter for control over salt, but salted works just fine if that’s what you have—adds a subtle richness that makes everything taste more decadent.
- Sweetener (optional): Sometimes I add a drizzle of honey or a spoonful of maple syrup for a touch of floral sweetness—if you like a more uniform sweetness, stick to sugar or a sugar syrup.
- Add-ins (nuts, dried fruit): I love tossing in toasted nuts or dried cranberries—gives a chewy, salty, or tart punch that cuts through the chocolate’s richness; don’t overload, keep it balanced.
- Vanilla Extract: Just a splash lifts the chocolate and adds warmth—skip it if you want a more straightforward, intense cocoa flavor.
- Optional Toppings: For a bit of flair, sprinkle sea salt or chopped nuts on top before chilling—crunchy, salty contrast makes the chocolate pop.
Spotlight on key ingredients
Chocolate:
- I prefer a good quality dark chocolate with a rich, deep flavor—melts smoothly and gives that glossy finish; you can swap for semi-sweet if you prefer a sweeter bite.
- Rice Cereal: The crunch is what makes these bars addictive—trust me, the plain, unsweetened kind stays crispy and holds everything together well; try toasted rice for extra toasty flavor.
- Butter: I use unsalted butter for control over salt, but salted works just fine if that’s what you have—adds a subtle richness that makes everything taste more decadent.
Rice Cereal:
- The crunch is what makes these bars addictive—trust me, the plain, unsweetened kind stays crispy and holds everything together well; try toasted rice for extra toasty flavor.
- Butter: I use unsalted butter for control over salt, but salted works just fine if that’s what you have—adds a subtle richness that makes everything taste more decadent.
- Vanilla Extract: Just a splash lifts the chocolate and adds warmth—skip it if you want a more straightforward, intense cocoa flavor.
Notes for ingredient swaps
- Chocolate: I prefer a good quality dark chocolate with a rich, deep flavor—melts smoothly and gives that glossy finish; you can swap for semi-sweet if you prefer a sweeter bite.
- Rice Cereal: The crunch is what makes these bars addictive—trust me, the plain, unsweetened kind stays crispy and holds everything together well; try toasted rice for extra toasty flavor.
- Butter: I use unsalted butter for control over salt, but salted works just fine if that’s what you have—adds a subtle richness that makes everything taste more decadent.
- Sweetener (optional): Sometimes I add a drizzle of honey or a spoonful of maple syrup for a touch of floral sweetness—if you like a more uniform sweetness, stick to sugar or a sugar syrup.
- Add-ins (nuts, dried fruit): I love tossing in toasted nuts or dried cranberries—gives a chewy, salty, or tart punch that cuts through the chocolate’s richness; don’t overload, keep it balanced.
- Vanilla Extract: Just a splash lifts the chocolate and adds warmth—skip it if you want a more straightforward, intense cocoa flavor.
- Optional Toppings: For a bit of flair, sprinkle sea salt or chopped nuts on top before chilling—crunchy, salty contrast makes the chocolate pop.
Equipment & Tools
- 20×20 cm (8×8 inch) pan: Holds the mixture for setting and cutting.
- Parchment paper: Prevents sticking and makes removal easier.
- Heatproof spatula: Stirs melted chocolate without damage.
- Mixing spoon: Folds the cereal into the melted chocolate.
- Sharp knife: Slices the set bars cleanly.
Step-by-step guide to no bake chocolate rice bars
- Gather your equipment: a 20×20 cm (8×8 inch) square pan, a heatproof spatula, a mixing spoon, and parchment paper. Line the pan with parchment for easy removal.
- In a large saucepan, melt 200g (about 7 oz) of dark chocolate over low heat, stirring constantly to prevent burning. This should take about 3-4 minutes until smooth and shiny. Add 2 tablespoons (30g) of unsalted butter, and stir until fully melted and integrated. Smell the rich cocoa and buttery aroma.
- Once melted, remove the pan from heat. Quickly stir in 3 cups (90g) of rice cereal, folding gently until evenly coated. Be careful not to crush the cereal—aim for a uniform, sticky mixture that looks glossy and inviting.
- Transfer the mixture into the prepared pan. Use a spatula or your fingers to press it down evenly, creating a compact layer. Press firmly but gently, aiming for a smooth, level surface. If the mixture is too sticky, dampen your fingers slightly to help press.
- Let the bars set at room temperature for about 30 minutes, or refrigerate for 15-20 minutes for quicker setting. The chocolate should firm up, and the bars should hold their shape when you gently press the surface. Avoid moving them too early to prevent smudges.
- Optional: Before the chocolate fully hardens, sprinkle a pinch of sea salt or chopped nuts on top for added flavor. Press lightly so they adhere as the chocolate cools.
- Once firm, lift the bars out of the pan using the parchment paper. Slice into squares with a sharp knife, wiping the blade clean between cuts for neat edges.
- Plate the bars on a pretty dish or store in an airtight container. Keep at room temperature for up to 3 days or in the fridge for up to a week. For best texture, serve slightly chilled but not cold—cocoa aroma will be richer, and the crunch just right.
Allow the bars to set at room temperature or chill in the fridge. Once firm, cut into squares, plate, and serve. Keep leftovers in an airtight container at room temp or fridge.
How to Know It’s Done
- Chocolate is glossy and fully melted, with no lumps.
- Rice cereal is evenly coated and sticks together when pressed.
- Bars hold shape when pressed and have a firm, shiny surface.
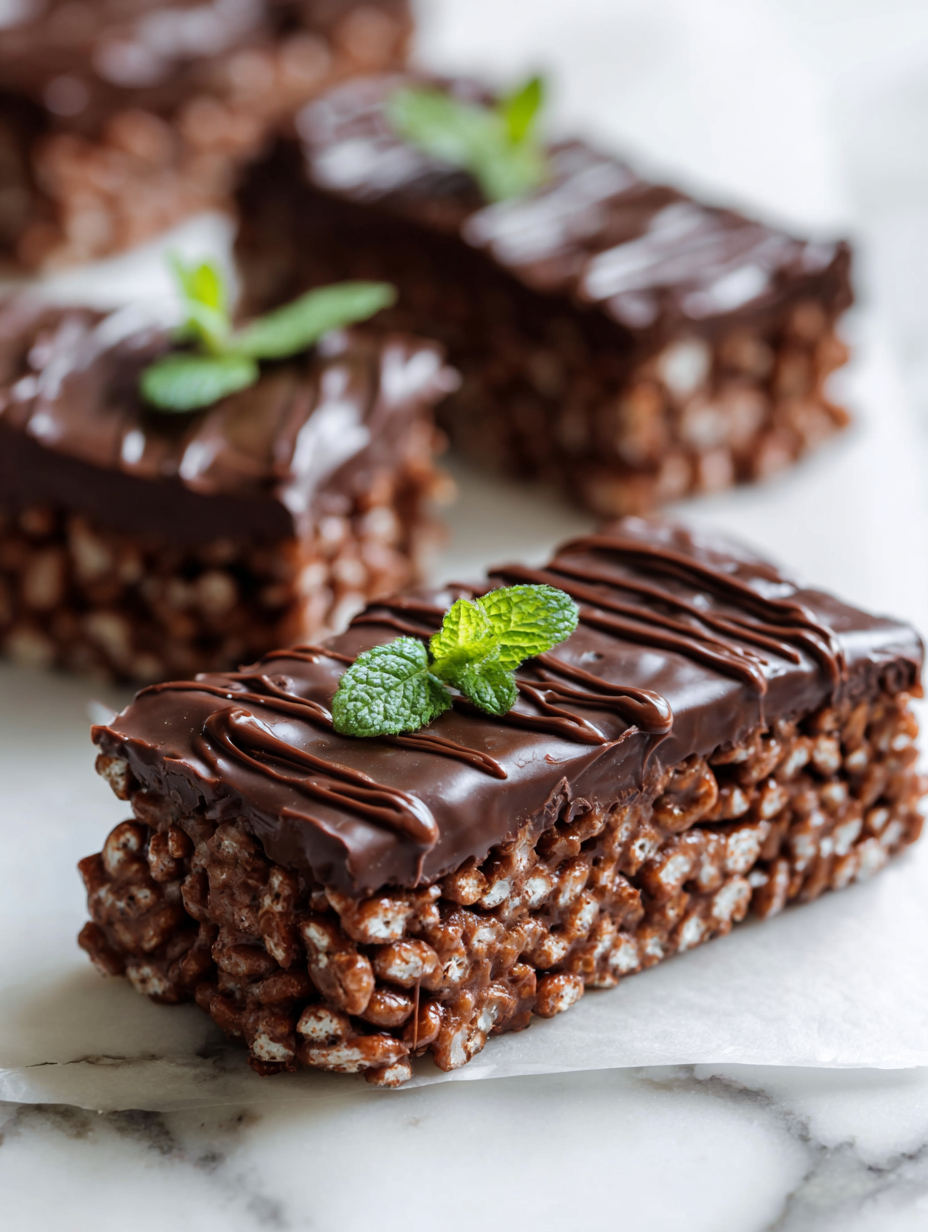
No Bake Chocolate Rice Bars
Ingredients
Equipment
Method
- Line your pan with parchment paper to prevent sticking and set it aside.
- In a heatproof bowl or saucepan, melt the chopped dark chocolate over low heat, stirring constantly until it’s smooth and glossy, releasing a rich cocoa aroma.
- Remove the melted chocolate from heat, then add the butter and stir until fully melted and integrated, creating a shiny, creamy mixture.
- Pour the melted chocolate mixture into a large bowl and gently fold in the rice cereal using a spatula, mixing until the cereal is evenly coated and the mixture is sticky and glossy.
- Transfer the mixture into your prepared pan, then press down firmly with the back of a spatula or your fingers to create an even, compact layer—press gently but confidently to ensure it sticks together.
- Optional: sprinkle a pinch of sea salt or chopped nuts on top for extra flavor and texture, pressing lightly so they stick as the chocolate cools.
- Let the bars set at room temperature for about 30 minutes, or chill in the fridge for 15-20 minutes until the chocolate is firm and the bars hold their shape when pressed.
- Once set, lift the entire block out of the pan using the parchment paper, then place on a cutting board and slice into squares with a sharp knife, wiping the blade clean between cuts for neat edges.
- Arrange the bars on a plate and enjoy immediately, or store in an airtight container at room temperature for up to 3 days or in the fridge for about a week.
Notes
Pro tips for perfect bars
- Use high-quality chocolate for a glossy, rich finish that melts smoothly and coats the cereal evenly.
- Gently fold the cereal into the melted chocolate; avoid stirring too vigorously to keep the crunch intact.
- Press the mixture firmly into the pan; a gentle but consistent pressure ensures even setting and clean slices.
- Chill the bars in the fridge for at least 15 minutes; this quick set helps achieve a firm, crackly top.
- If the chocolate starts to seize or thicken, warm it slightly over low heat or add a tiny splash of cream to loosen.
- For extra shine, briefly warm the chocolate before pouring; it creates a smooth, mirror-like surface.
- Use a sharp knife to cut the bars, wiping the blade clean between cuts for neat edges.
Common mistakes and how to fix them
- FORGOT to level the mixture? Press firmly and evenly for a clean cut.
- DUMPED too much salt on top? Use a light sprinkle to avoid overpowering the chocolate flavor.
- OVER-TORCHED the chocolate? Remove from heat immediately to prevent bitterness.
- MISSED the chilling step? Ensure the bars are fully set for clean slices and proper texture.
Quick fixes for common issues
- If chocolate seizes, splash in a teaspoon of hot water to loosen it.
- When mixture is too sticky, dust your hands with cocoa powder to press evenly.
- DUMPED too much salt? Use a damp cloth to gently wipe excess before setting.
- When bars crack while slicing, chill longer or warm the knife blade briefly.
- Splash a little milk if bars are too dry or crumbly after setting.
Prep, store, and reheat tips
- Prepare the mixture ahead of time by melting the chocolate and mixing in the cereal; it firms up faster when chilled, saving you time later. The aroma of rich cocoa and toasty cereal will fill your kitchen.
- Store the bars in an airtight container at room temperature for up to three days, or in the fridge for a week. Keep an eye on texture—chilling makes them firmer and slightly crunchier.
- For longer storage, freeze the bars wrapped tightly in plastic wrap and then in foil; they’ll keep for up to a month. Thaw at room temperature for a few minutes before serving, and watch the chocolate regain that glossy shine.
- Reheat slightly in the microwave at 10-second bursts if you want a softer, gooey texture. The chocolate should shimmer and smell intensely cocoa-rich, inviting another bite.
Top questions about no bake chocolate rice bars
1. Can I use different types of chocolate?
Yes, you can swap dark chocolate for semi-sweet or milk chocolate, but the flavor and richness will change. Semi-sweet keeps a good balance of bitter and sweet, while milk chocolate adds creaminess and a sweeter taste.
2. My bars won’t hold together—what do I do?
If your mixture isn’t sticking together, try pressing it more firmly into the pan or slightly warming the chocolate again. Too dry? Add a teaspoon of butter or a splash of milk to loosen it.
3. Can I customize the ingredients?
Yes, you can add nuts, dried fruit, or even mini marshmallows. Just toss them in after mixing the cereal with chocolate to keep some crunch and texture.
4. How long do I need to chill the bars?
Refrigerate the bars for at least 15-20 minutes to set quickly, or leave at room temperature for about 30 minutes if you prefer a softer, chewier texture.
5. How should I store these bars?
Store the bars in an airtight container at room temp for up to 3 days or in the fridge for about a week. For longer storage, freeze them wrapped tightly for up to a month.
6. My chocolate is seizing—what now?
If the chocolate melts or becomes too sticky during melting, add a small splash of cream or warm it gently over low heat. Keep stirring until smooth and shiny.
7. How do I get clean slices?
Use a sharp knife and wipe it clean between cuts to get neat, even slices. Chilling the bars beforehand helps prevent cracking.
8. Can I make these in advance?
Yes, you can make these ahead. Prepare and melt the chocolate, then refrigerate the mixture in the pan. They set faster and stay fresh longer with minimal fuss.
9. Bars are crumbly—how fix that?
If the bars are too dry or crumbly, briefly warm them in the microwave for about 10 seconds or add a tiny bit of melted butter to improve texture.
10. Mixture is too sticky—what helps?
When mixture is too sticky, dust your hands with cocoa powder or lightly dampen them to press the mixture evenly into the pan.
These no bake chocolate rice bars are more than just a quick treat; they bring a rush of childhood memories with every crunchy, gooey bite. In times when I need something sweet but don’t want to fuss, they remind me that simplicity can be satisfying in the best ways. That rich cocoa aroma, the crisp texture—sometimes, no fuss is the best fuss.
And honestly, they’re a little messy, a little imperfect, just like life should be. But that’s what makes them so comforting—no oven, no complicated steps, just honest ingredients coming together for a moment of pure, homemade joy.