
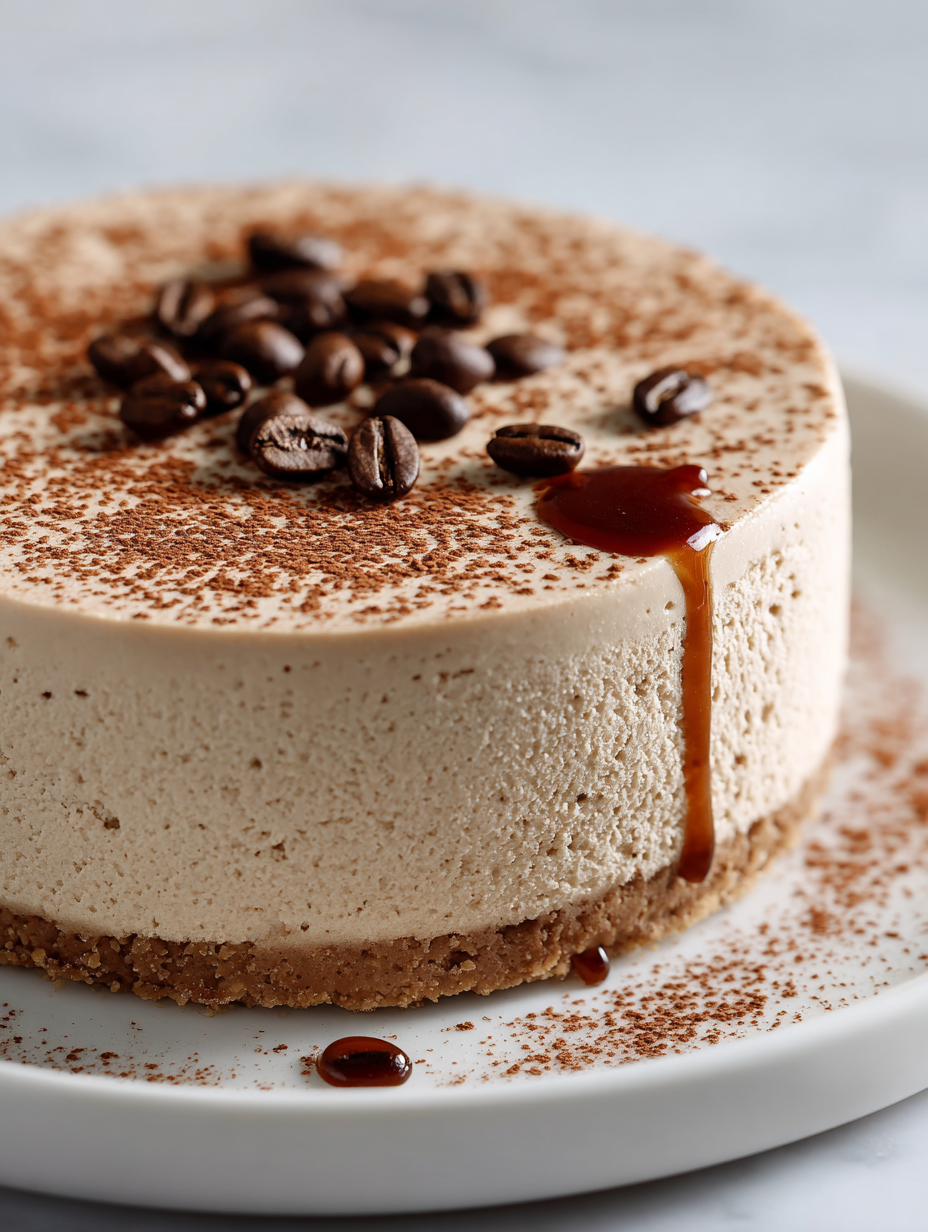
This no-bake coffee cheesecake is my go-to when I’m caught off guard by sudden guests or late-night cravings. It’s honest, quick, and doesn’t demand turning on the oven, which is a relief when the heat’s high and patience is low. The rich aroma of coffee as it sets in the fridge somehow makes everything feel a little more special, even if I just whipped it together in a rush.
What I love most is how it feels like a small victory—something you can make without the usual fuss, yet it tastes indulgent enough to impress. The layers come together in a way that’s satisfying and familiar, but with that extra kick of coffee that wakes up your senses. It’s a reminder that sometimes, the best desserts are the ones you don’t overthink.
This recipe is about embracing the chaos of last-minute cravings. No bake, no fuss, just a rich, coffee-infused treat that comes together in a flash when time slips away.
Chaos Meets Comfort
- I love how this recipe turned a messy afternoon into a moment of calm—just coffee, cream, and a little patience.
- There’s a strange joy in how simple ingredients can come together into something so rich and satisfying, no oven needed.
- Every time I make it, I’m reminded that the best desserts are ones you can throw together without overthinking.
- This cheesecake feels like a small rebellion against complicated baking—fast, honest, and totally indulgent.
- Sharing this with friends feels special, especially knowing I whipped it up in under 20 minutes with no fuss.
Chaos Meets Comfort
- This cheesecake was born out of a late-night fridge raid after a long day. I needed something quick, strong on coffee, and satisfying without turning on the oven. The idea of a no-bake dessert that still carried that deep coffee flavor felt like a small victory on busy evenings.
- One evening, I mixed up a batch while half-watching a favorite show. The aroma of coffee and cream filling the kitchen made me pause—this simple combo was exactly what I’d been craving. It’s become my go-to when I want something decadent but effortless, especially when time’s tight and energy’s low.
- heading: “The story behind this recipe”
Historical & Personal Trivia
- This recipe has roots in my college days, when I needed a quick caffeine fix after late study sessions.
- Coffee cheesecakes originated in small European cafes, where the blend of creamy richness and bitter espresso was a popular combination.
- The no-bake version became popular during the 20th century as a fuss-free way to enjoy cheesecake without an oven, especially in warm climates.
- I adapted this recipe from an old handwritten note from a friend who loved coffee and desserts that came together in minutes.
Key Ingredients Breakdown
- Cream cheese: I like it soft and slightly warm; it mixes smoothly and creates a lush, velvety texture. For easier blending, let it sit out 15 minutes before mixing.
- Strong brewed coffee: I use a fresh, bold espresso shot; its smoky, slightly bitter aroma really wakes up the dessert. If you prefer milder coffee, dilute with a splash of hot water.
- Sweetened condensed milk: I love its richness and sweetness—keeps the cheesecake creamy and balanced. If you want a lighter version, try coconut milk with a bit of honey, but expect a different flavor profile.
- Graham cracker crust: I crush my crackers finely and add a touch of butter; it’s sturdy yet tender, with that familiar buttery crunch. For a gluten-free version, swap in digestive biscuits or gluten-free graham crackers.
- Gelatin (optional): I sometimes add a pinch for firmness; it gives a slight jiggle and holds shape longer. If you skip it, the texture is softer, more like a mousse—delicious either way.
- Vanilla extract: I use a splash for depth, but a little almond or coffee liqueur can add a fun twist. Use pure extract for the cleanest flavor, or skip if you want pure coffee focus.
- Chocolate shavings (optional): I sprinkle some on top for a visual pop and slight richness. Dark or milk chocolate works equally well—shave it finely so it melts slightly into the surface.
Spotlight on Key Ingredients
Cream cheese:
- I like it soft and slightly warm; it mixes smoothly and creates a lush, velvety texture. For easier blending, let it sit out 15 minutes before mixing.
- Strong brewed coffee: I use a fresh, bold espresso shot; its smoky, slightly bitter aroma really wakes up the dessert. If you prefer milder coffee, dilute with a splash of hot water.
Chocolate shavings:
- Sweetened condensed milk: I love its richness and sweetness—keeps the cheesecake creamy and balanced. If you want a lighter version, try coconut milk with a bit of honey, but expect a different flavor profile.
- Chocolate shavings (optional): I sprinkle some on top for a visual pop and slight richness. Dark or milk chocolate works equally well—shave it finely so it melts slightly into the surface.
Notes for ingredient swaps
- Dairy-Free: Swap cream cheese for a cashew-based cream cheese or coconut cream. Expect a slightly sweeter, more tropical flavor.
- Sugar Alternatives: Use honey or maple syrup instead of sweetened condensed milk. The texture may be a touch less creamy, with a richer, more complex sweetness.
- Coffee Substitutes: Decaffeinated coffee or espresso powder can replace brewed coffee to suit your caffeine needs or taste preferences.
- Crust Options: Replace graham crackers with digestive biscuits or gluten-free cookies for a different crunch and flavor profile.
- Vegan Version: Use coconut milk and vegan cream cheese. The flavor will be slightly different, with a more pronounced coconut aroma.
- Chocolate Twist: Add cocoa powder to the filling or top with melted chocolate for a more decadent, mocha-inspired flavor.
- Nutty Crunch: Incorporate chopped toasted nuts into the crust or topping for extra texture and flavor contrast.
Equipment & Tools
- Springform pan: To assemble and easily remove the cheesecake.
- Mixing bowl: To blend the filling ingredients smoothly.
- Whisk: To beat the cream cheese and mix ingredients thoroughly.
- Spatula: To spread the filling evenly and smooth the top.
- Food processor or bag and rolling pin: To crush the crackers finely.
Step-by-step guide to no bake coffee cheesecake
- Gather your equipment: a 20cm (8-inch) springform pan, a mixing bowl, a whisk, and a spatula. Have your ingredients measured and ready.
- Crush the graham crackers finely—use a food processor or place in a sealed bag and crush with a rolling pin. Mix with melted butter until evenly coated.
- Press the crumb mixture into the bottom of the springform pan. Use the back of a spoon or a flat-bottomed glass to press it down firmly. Chill in the fridge for 10 minutes to set.
- In a mixing bowl, soften the cream cheese by letting it sit out for 15 minutes. Beat it with a whisk until smooth and creamy, about 2-3 minutes.
- Brew a strong shot of espresso or prepare a small batch of strong coffee. Let it cool slightly, about 2 minutes, then stir into the cream cheese mixture. Add vanilla extract and sweetened condensed milk; whisk until smooth.
- If using gelatin for extra firmness, sprinkle 1 tsp of gelatin powder into 2 tbsp cold water and let bloom for 5 minutes. Gently heat until dissolved, then mix into the filling.
- Pour the coffee mixture over the chilled crust. Use a spatula to spread evenly. Tap the pan gently on the counter to level and remove air bubbles.
- Cover the pan with plastic wrap and refrigerate for at least 4 hours, preferably overnight. The cheesecake should be firm but still silky to the touch.
- Once set, run a knife around the edges of the pan to loosen. Carefully remove the springform side. Decorate with chocolate shavings or a dusting of cocoa if desired.
- Slice with a clean, warm knife. Serve chilled, with a coffee or a glass of milk. The texture should be creamy and the flavor intensely coffee-forward.
Chill the cheesecake uncovered in the fridge for at least 4 hours or overnight. Serve directly from the fridge for the best texture. Decorate with chocolate shavings or dust with cocoa powder before slicing.
How to Know It’s Done
- Crust is firm and holds shape when pressed.
- Filling is smooth, without lumps, and has a slight jiggle in the center when moved.
- Top is set and slightly shiny, with no liquid pooling.
No-Bake Coffee Cheesecake
Ingredients
Equipment
Method
- Crush the graham crackers into fine crumbs using a food processor or by sealing them in a bag and crushing with a rolling pin. Mix the crumbs with melted butter until evenly coated.
- Press the crumb mixture into the bottom of a springform pan, using the back of a spoon or a flat-bottomed glass to create an even, firm layer. Chill in the fridge for 10 minutes to set.
- While the crust chills, soften the cream cheese by letting it sit at room temperature for 15 minutes. Whisk it in a bowl until smooth and creamy, with no lumps.
- Prepare a strong brewed coffee shot and let it cool slightly. Stir the cooled coffee into the cream cheese until well combined, releasing a rich coffee aroma.
- Add the sweetened condensed milk and vanilla extract to the coffee-cream cheese mixture. Whisk until fully integrated and smooth.
- If using gelatin, sprinkle it over a tablespoon of cold water and let bloom for 5 minutes. Gently heat until dissolved, then stir into the filling mixture for extra firmness.
- Pour the coffee-flavored filling over the chilled crust. Use a spatula to spread evenly and tap the pan gently on the counter to remove air bubbles.
- Cover the pan with plastic wrap and refrigerate for at least 4 hours or overnight until the filling is set, firm, and glossy on top.
- Run a warm knife around the edges of the cheesecake to loosen it from the pan. Carefully remove the sides of the springform pan, revealing the smooth, creamy surface.
- Decorate with chocolate shavings on top for a visual pop and a touch of richness. Slice with a warm knife and serve chilled to enjoy the silky, coffee-infused layers.
Pro Tips for Perfect Cheesecake
- Bold crust: Use a flat-bottomed glass to press the crumb mixture evenly into the pan for a sturdy base.
- Cool coffee: Let brewed coffee sit for a couple of minutes before mixing to prevent melting the cream cheese.
- Smooth filling: Warm the cream cheese slightly before mixing to avoid lumps and achieve a velvety texture.
- Chill thoroughly: Refrigerate the assembled cheesecake for at least 4 hours, or better overnight, until firm and set.
- Use warm knife: Dip your knife in hot water before slicing for clean, smooth cuts without cracking the surface.
- Decorate last: Sprinkle chocolate shavings or cocoa powder just before serving to keep toppings fresh and visually appealing.
- Avoid over-mixing: Mix just until ingredients are combined to keep the filling light and prevent air bubbles.
Common mistakes and how to fix them
- FORGOT to chill crust before adding filling → Chill crust for 10 minutes to prevent sogginess.
- DUMPED too much gelatin → Use only 1 tsp gelatin; excess can make texture rubbery.
- OVER-TORCHED the crust edges → Bake at 175°C (350°F) for 8-10 minutes, then cool.
- MISSED to level the filling evenly → Use a spatula to smooth surface for clean slices.
Quick Fixes and Pantry Swaps
- When mixture is too runny → Chill for 15 minutes to firm up.
- If crust crumbles → Press more firmly and chill before filling.
- Splash hot water on knife before slicing → Cuts cleanly through chilled cheesecake.
- Patch cracks with a tiny dab of frosting or whipped cream → Conceals imperfections.
- Shield edges if browning too fast → Cover with foil or lower oven temperature slightly.
Prep, store, and reheat tips
- Prepare the crust and press it into the pan a day ahead; it firms up better and makes assembly easier.
- The cheesecake can be made up to 24 hours in advance; keep it covered tightly in the fridge to maintain freshness.
- For optimal flavor, let the cheesecake sit at room temperature for 15-20 minutes before serving to enhance the coffee aroma.
- Store leftovers in an airtight container in the fridge for up to 3 days; the texture remains creamy and the coffee flavor intensifies slightly.
- Reheat slices gently in the microwave on medium power (about 20 seconds) until just warmed through—watch for melting or cracking.
Top questions about no bake coffee cheesecake
1. Can I make this with decaf coffee?
Yes, using decaf coffee will give you that rich, coffee flavor without the caffeine kick. It’s perfect if you want the taste but not the alertness boost.
2. Can I use decaf coffee?
Absolutely. Just brew a strong cup of decaf espresso or coffee and follow the same steps. It’s just as aromatic and satisfying.
3. Can I substitute the cream cheese?
Yes, you can swap in Greek yogurt or mascarpone for cream cheese for a tangier, creamier twist. Expect a slightly different texture and flavor.
4. Can I skip the gelatin?
You can omit the gelatin if you prefer a softer, mousse-like texture. The cheesecake will be more delicate but still delicious.
5. Can I use a different crust?
Using a pre-made graham cracker crust makes assembly easier, but you can also crush digestive biscuits or gluten-free cookies for a different crunch.
6. Can I freeze leftovers?
Yes, you can freeze slices for up to a month. Let them thaw in the fridge for a few hours before serving to regain that creamy texture.
7. Can I add alcohol or toppings?
Adding a splash of coffee liqueur or a dusting of cocoa powder on top can enhance the coffee flavor and add a decorative touch.
8. Is this recipe vegan?
Yes, using vegan cream cheese and coconut milk makes this recipe plant-based. Expect a slightly sweeter, coconut-rich flavor with a softer set.
9. What if the filling is too runny?
If the filling is too runny, chill it for 15 minutes to firm up before pouring into the crust. Cold ingredients set better.
10. How do I fix cracks on top?
If you notice cracks on top, smoothing with a warm spatula or adding a thin layer of whipped cream can hide imperfections.
This no-bake coffee cheesecake is a little reminder that sometimes, the simplest desserts carry the most comfort. It’s honest, quick, and has that deep coffee aroma that lingers long after the first slice. When time is tight but flavor still matters, it’s the kind of treat I keep coming back to.
Sharing a piece of this creamy, caffeinated delight feels like a small act of rebellion—no fuss, just flavor. It’s perfect for those moments when you want dessert without the hassle, yet crave something memorable and satisfying.

 Hello, I’m Emily Richardson, the heart and soul behind Playing with Flavors. Cooking isn’t just a hobby for me – it’s a passion that I’ve cultivated for years, and it’s become the driving force of my life.
From the kitchen of my cozy café to the pages of this blog, every dish I create is a reflection of my love for food and the joy it brings to people.
Hello, I’m Emily Richardson, the heart and soul behind Playing with Flavors. Cooking isn’t just a hobby for me – it’s a passion that I’ve cultivated for years, and it’s become the driving force of my life.
From the kitchen of my cozy café to the pages of this blog, every dish I create is a reflection of my love for food and the joy it brings to people.


