
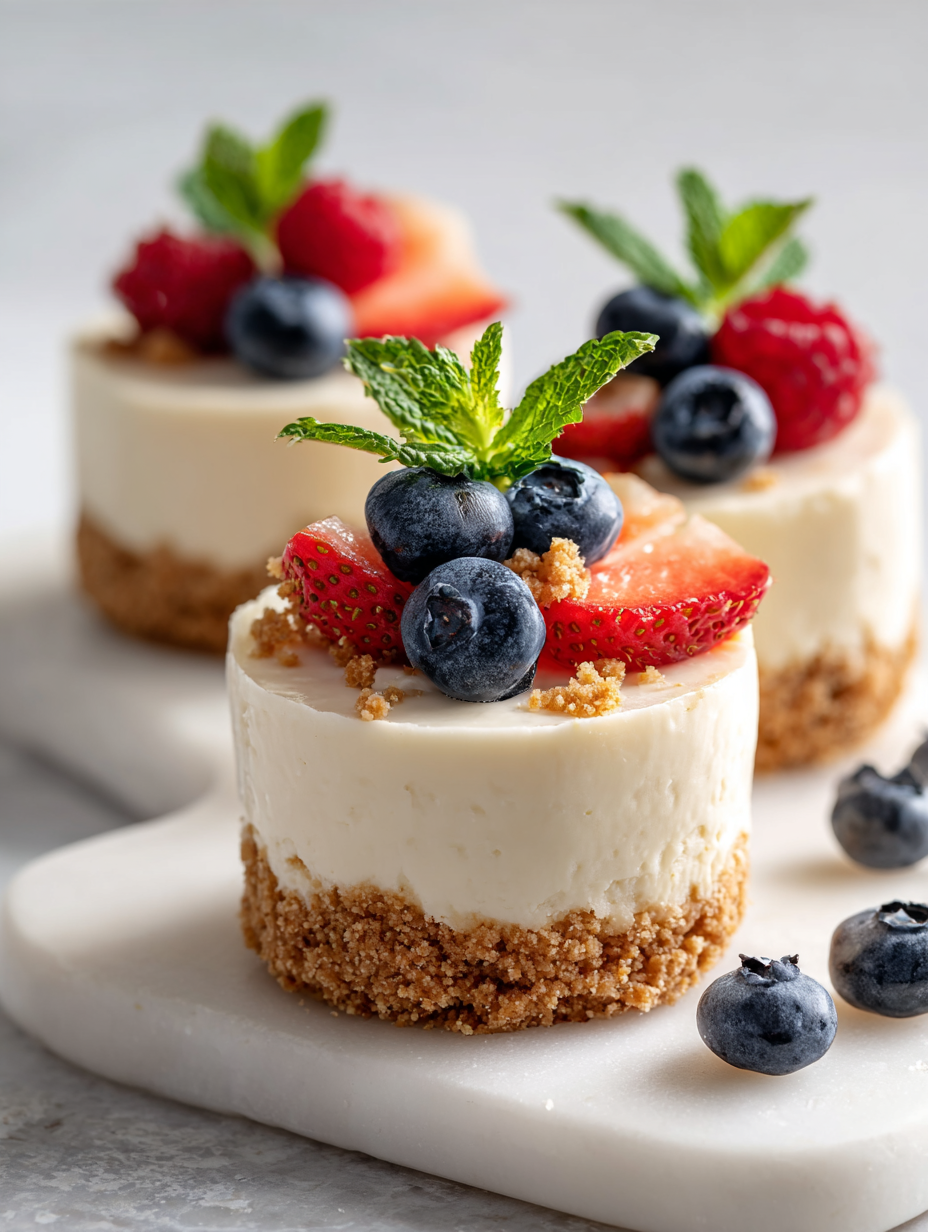
There’s something oddly calming about assembling these mini cheesecakes. It’s like a tiny, slow ritual in the middle of a hectic week, a moment where the world slows down just enough to focus on a few simple steps. The act of pressing crust, smoothing out the filling, and topping each one feels almost meditative, turning a quick dessert into a mindful practice.
I’ve always loved how these little treats make me pause, even if only for a few minutes. No bake, no fuss, just a handful of ingredients coming together into something that feels special without the stress. It’s a reminder that sometimes, the simplest things—like a chilled, creamy bite—bring the most unexpected comfort.
Focusing on the surprisingly soothing act of assembling these cheesecakes, turning a quick dessert into a mindful, almost meditative ritual amidst a busy week.
The calming ritual of assembling
- I love how these cheesecakes turn a busy afternoon into a moment of quiet satisfaction.
- There’s a strange joy in pressing that graham cracker crust—like laying a tiny foundation of comfort.
- Sometimes I get a bit impatient waiting for them to chill, but the first creamy bite always makes it worth it.
- Making these with no oven means I can whip them up even on the hottest days without breaking a sweat.
- Sharing these mini treats feels almost like a small celebration, even if it’s just a weekday dessert.
The calming ritual of assembling
I first stumbled upon these mini cheesecakes at a summer potluck, where I watched a friend effortlessly assemble them while chatting. That simple act of layering and pressing crusts stuck with me—how something so easy could feel like a little celebration. Ever since, I’ve kept coming back to this recipe whenever I want a quick, no-fuss dessert that still feels special. It’s become my go-to for those moments when I crave something creamy and cool without turning on the oven.
Trivia and origins of mini cheesecakes
- Mini cheesecakes gained popularity in the early 2000s as a convenient, portion-controlled dessert option for parties.
- The no-bake version likely emerged out of necessity during times when kitchen appliances or ingredients were scarce, offering a quick fix.
- This recipe’s simplicity makes it a modern twist on classic cheesecakes, emphasizing minimal ingredients and no oven required.
- In some cultures, similar chilled desserts have been enjoyed for centuries, but the individual mini format is a recent culinary trend.
Key ingredients and tips
- Cream cheese: I like how softened, it’s silky and easy to blend—aim for room temp so it whips up smooth. Swap with Greek yogurt for tang, but expect a lighter texture.
- Graham cracker crumbs: I crush these until they’re fine, like sandy soil—perfect for a crisp crust. For a gluten-free version, try digestive biscuits, which add a buttery crunch.
- Butter: Melted butter binds the crust, giving it that rich, nutty aroma when baked. If you want a lighter crust, use coconut oil—just melt and mix in.
- Sugar: I prefer superfine for smooth mixing, but regular granulated works fine. For less sweetness, cut back slightly—these are meant to be subtly sweet.
- Lemon juice: Brightens the filling—freshly squeezed is best, with a zesty pop that cuts through the creamy richness. You could substitute lime for a more tropical vibe.
- Whipped cream: I fold it in gently for fluffiness—use heavy cream, and whip until soft peaks form. For dairy-free, coconut cream adds a rich, tropical note with a hint of shimmer.
- Vanilla extract: I add a splash for warmth and depth, but almond or lemon extract can tweak the flavor for a different twist—just a few drops.
Spotlight on key ingredients
Cream cheese:
- I like how softened, it’s silky and easy to blend—aim for room temp so it whips up smooth. Swap with Greek yogurt for tang, but expect a lighter texture.
- Graham cracker crumbs: I crush these until they’re fine, like sandy soil—perfect for a crisp crust. For a gluten-free version, try digestive biscuits, which add a buttery crunch.
- Butter: Melted butter binds the crust, giving it that rich, nutty aroma when baked. If you want a lighter crust, use coconut oil—just melt and mix in.
Lemon juice and whipped cream:
- Lemon juice: Brightens the filling—freshly squeezed is best, with a zesty pop that cuts through the creamy richness. You could substitute lime for a more tropical vibe.
- Whipped cream: I fold it in gently for fluffiness—use heavy cream, and whip until soft peaks form. For dairy-free, coconut cream adds a rich, tropical note with a hint of shimmer.
- Vanilla extract: I add a splash for warmth and depth, but almond or lemon extract can tweak the flavor for a different twist—just a few drops.
Notes for ingredient swaps
- Dairy-Free: Swap cream cheese for a plant-based cream cheese alternative. It might be a touch softer and less tangy, but still creamy.
- Gluten-Free: Use crushed gluten-free cookies or digestive biscuits instead of graham crackers for the crust. Expect a slightly different, nuttier flavor.
- Sweetener: Replace granulated sugar with honey or maple syrup. These will add a subtle caramel note and a bit of moisture.
- Citrus: Lemon juice can be swapped for lime or orange juice for different bright, fruity accents. Use fresh for the best zing.
- Whipped Topping: If you don’t have heavy cream, coconut whipped cream works beautifully, adding a coconut aroma and creaminess.
- Crust: For a more decadent crunch, try crushed cookies mixed with a little melted butter and a pinch of sea salt—rich and a little salty.
- Flavor Boost: Add a splash of flavored liqueur like Chambord or Grand Marnier to the filling for an adult twist.
Equipment & Tools
- Mini silicone molds or paper cups: To shape and hold individual cheesecakes
- Mixing bowls: To prepare crust and filling
- Hand mixer or whisk: To beat cream cheese and whip cream
- Spatula or small offset spatula: To smooth the filling and finish the tops
- Measuring spoons and cups: To measure ingredients accurately
- Refrigerator: To set and chill the cheesecakes
Step-by-step guide to no bake cheesecakes
- Gather all equipment and ingredients. Let the cream cheese soften at room temperature for about 30 minutes to ensure smooth mixing.
- Prepare the crust: crush graham crackers until fine, then mix with melted butter. Press about 1 tablespoon into the bottom of each mini silicone mold or paper cup, using the back of a teaspoon to compact. Chill in the fridge for 10 minutes to set.
- Make the filling: in a mixing bowl, beat softened cream cheese with sugar until smooth and fluffy, about 2 minutes at medium speed. Add lemon juice and vanilla, mix until combined. Gently fold in whipped cream until just incorporated, avoiding deflation.
- Spoon or pipe the filling over the chilled crusts, filling nearly to the top. Smooth the surface with the back of a spoon or a small spatula. Cover loosely with plastic wrap.
- Refrigerate the cheesecakes for at least 4 hours, preferably overnight, until the filling is firm and set. This allows flavors to meld and texture to stabilize.
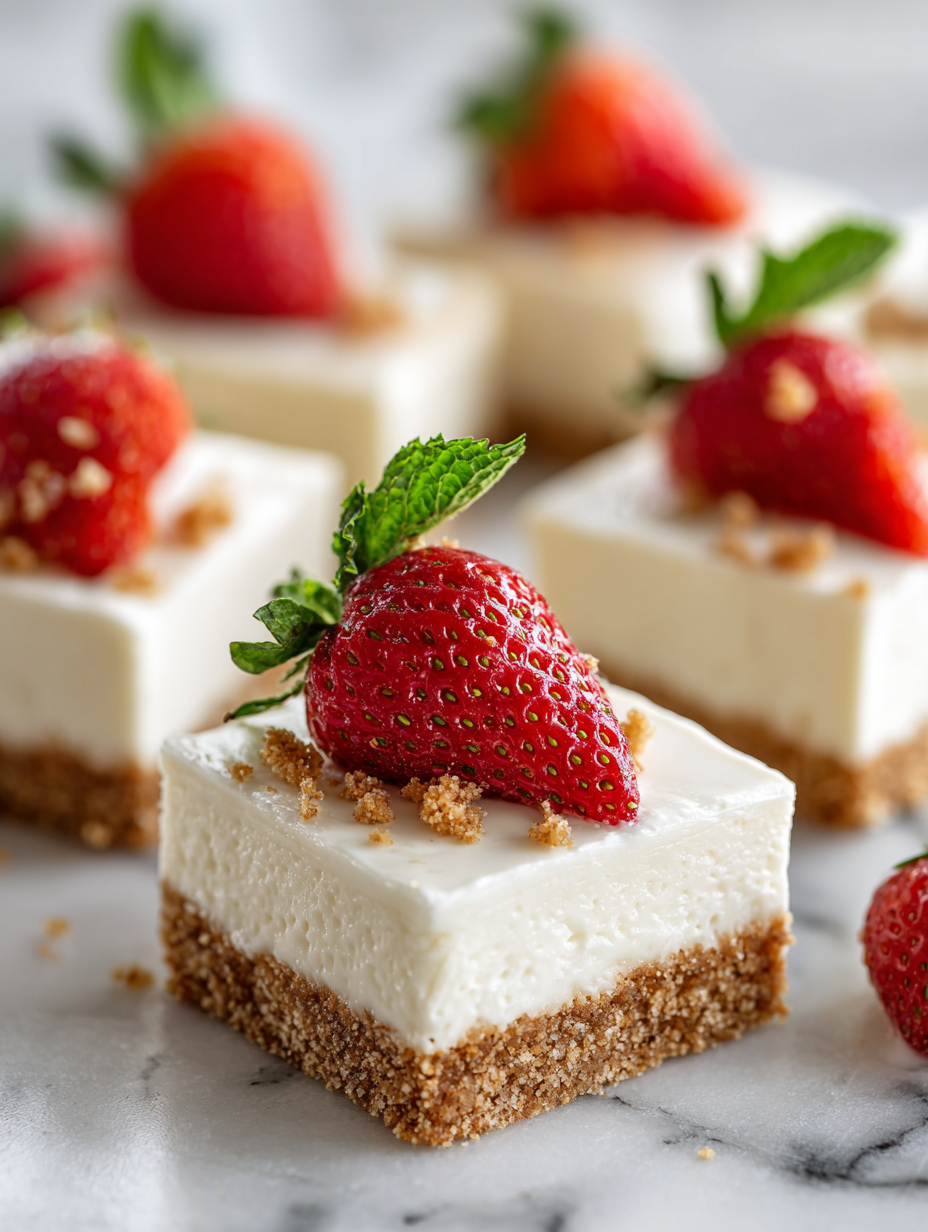
- Before serving, optionally top with fresh berries, fruit compote, or a drizzle of chocolate. Carefully remove from molds if using silicone, or peel off paper cups. Serve chilled.
Chill the assembled cheesecakes in the fridge for at least 4 hours or overnight. Before serving, add toppings and carefully remove from molds or cups. Keep refrigerated until ready to eat, and serve cold for best texture.
How to Know It’s Done
- Filling is firm and not jiggle when gently shaken.
- Crust is crisp and holds shape when pressed.
- Cheesecake has a smooth, creamy appearance without cracks.
No-Bake Mini Cheesecakes
Ingredients
Equipment
Method
- Measure out the graham cracker crumbs and melt the butter, then combine them in a bowl until the mixture resembles wet sand. Press about 1 tablespoon of this crust mixture into the bottom of each mini mold or paper cup, pressing firmly to create an even layer. Chill in the refrigerator for 10 minutes to set.
- While the crust chills, beat the softened cream cheese with the granulated sugar using a hand mixer or whisk until smooth, fluffy, and free of lumps, about 2 minutes. Add the freshly squeezed lemon juice and vanilla extract, then mix until well combined and fragrant.
- In a separate bowl, whip the cold heavy cream until soft peaks form, listening for the gentle swoosh and watching the cream thicken to a velvety consistency. Gently fold the whipped cream into the cream cheese mixture using a spatula, folding carefully to maintain the airy texture.
- Once the crusts are chilled, spoon or pipe the creamy filling over each crust, filling nearly to the top and smoothing the surface with a small spatula or the back of a spoon. Cover the mini cheesecakes loosely with plastic wrap and refrigerate for at least 4 hours or overnight to allow the filling to set and flavors to meld.
- When ready to serve, gently remove the mini cheesecakes from their molds or peel away paper cups. Optionally, top with fresh berries or a drizzle of fruit compote for added color and flavor. Serve chilled and enjoy the smooth, creamy texture with a crisp, graham cracker base.
Pro tips for perfect mini cheesecakes
- Use room temperature cream cheese for silky, lump-free filling.
- Crush graham crackers until sandy for a crisp, even crust.
- Chill crusts for at least 10 minutes before adding filling to prevent sogginess.
- Gently fold whipped cream into the filling to keep it light and airy.
- Check for a slight jiggle in the center when refrigerated—it’s perfectly set.
- Use fresh lemon juice for a bright, zingy flavor that cuts through the richness.
- For a smoother crust, pulse crackers in a food processor—less mess, more uniformity.
Common mistakes and how to fix them
- FORGOT to chill crust? Fix by pressing and refrigerating for 10 minutes before filling.
- DUMPED filling into hot crust? Wait until crust is firm before adding filling to prevent sogginess.
- OVER-TORCHED the crust? Cover with foil and lower oven temp or start over with fresh crumbs.
- MISSED to fully set? Extend refrigeration time or add a touch more gelatin for firmness.
Quick fixes and pantry swaps
- When filling seems too runny, refrigerate for 15 minutes to thicken.
- Splash a little lemon juice if flavors lack brightness.
- Patch a soggy crust with extra crushed cookies pressed firmly.
- Shield crust from over-browning by covering with foil halfway through baking.
- When crust cracks, gently press filling into cracks with a spoon for a smooth finish.
Prep, store, and reheat tips
- Prepare the crust and make the filling up to a day in advance; keep covered in the fridge to prevent absorption of other odors, and note that the crust may soften slightly over time.
- These mini cheesecakes can be stored in an airtight container in the fridge for up to 3 days; the texture stays creamy, but toppings should be added just before serving to keep them fresh.
- For longer storage, freeze the assembled cheesecakes for up to 1 month; let thaw in the fridge for a few hours, and expect a slightly softer filling but still deliciously chilled.
- Reheating isn’t necessary; serving straight from the fridge ensures the best firm yet creamy texture, with the chilled flavor highlighting the tangy brightness of the lemon and the richness of the cream cheese.
Top Questions About No Bake Mini Cheesecakes
1. Can I use cold cream cheese?
Use softened cream cheese for a silky, lump-free filling. If you forget, beat it longer or soften further in the microwave for a few seconds.
2. What if I don’t have graham crackers?
Graham cracker crumbs should be fine and sandy, pressing easily into the bottom of molds. Swap with digestive biscuits for a richer, buttery crust.
3. How do I keep the crust from getting soggy?
Chill the crust for at least 10 minutes before adding filling to prevent sogginess. If the crust gets soft, refrigerate for a bit longer.
4. How long do I need to chill them?
Refrigerate the assembled cheesecakes for at least 4 hours, preferably overnight. They should be firm, with a slight jiggle in the center when ready.
5. Can I freeze the mini cheesecakes?
You can freeze these cheesecakes for up to a month. Thaw in the fridge for a few hours before serving, expecting slightly softer but still delicious texture.
6. Can I substitute the lemon juice?
Replace lemon juice with lime or orange juice for different bright, fruity flavors. Use fresh for the best zing and aroma.
7. What dairy-free options work?
Use coconut whipped cream instead of dairy for a light, tropical flavor. Fold it gently into the filling for fluffiness and a subtle coconut aroma.
8. How do I keep the filling fluffy?
Gently fold whipped cream into the filling to keep it light and airy. Overmixing can deflate the texture, so be gentle.
9. When should I add toppings?
Add toppings like berries or fruit compote just before serving to keep them fresh and vibrant. Keep the cheesecakes chilled until ready to eat.
10. What if the filling is too runny?
If the filling is runny, refrigerate it for 15 minutes to thicken. If the crust cracks, press filling into cracks gently for a smooth finish.
These no bake mini cheesecakes are perfect for when you want something sweet without the fuss. There’s a quiet satisfaction in assembling each one, from pressing the crust to smoothing the filling. They’re a small, creamy escape that’s easy to pull together even on busy days.
In this season of quick gatherings and last-minute cravings, they remind me how simple ingredients can create moments of genuine comfort. Keeping a few in the fridge means I always have a little treat ready to go—cool, tangy, and just a bit indulgent.
 Hello, I’m Emily Richardson, the heart and soul behind Playing with Flavors. Cooking isn’t just a hobby for me – it’s a passion that I’ve cultivated for years, and it’s become the driving force of my life.
From the kitchen of my cozy café to the pages of this blog, every dish I create is a reflection of my love for food and the joy it brings to people.
Hello, I’m Emily Richardson, the heart and soul behind Playing with Flavors. Cooking isn’t just a hobby for me – it’s a passion that I’ve cultivated for years, and it’s become the driving force of my life.
From the kitchen of my cozy café to the pages of this blog, every dish I create is a reflection of my love for food and the joy it brings to people.


