
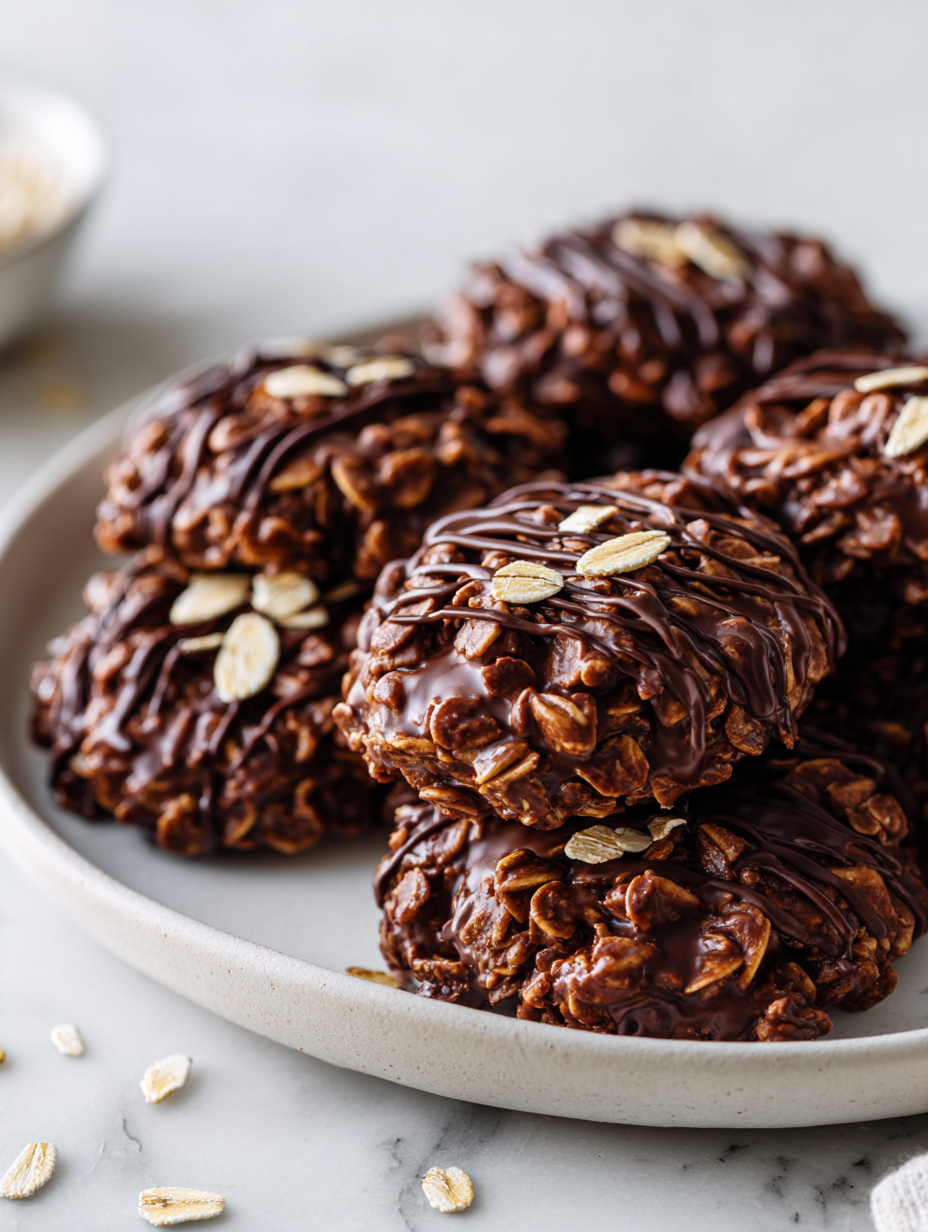
This no bake oatmeal cookie recipe is a small rebellion against the usual baking routine. When you’re pressed for time or just don’t want to turn on the oven, these cookies come together with a few simple ingredients and a lot of honest flavor. They’re sticky, chewy, and packed with chocolatey goodness—perfect for when you need a quick fix of comfort without the fuss.
I’ve always loved how these cookies seem to embody childhood in every bite, but I’ve tweaked them over the years to fit into busy mornings and lazy weekends alike. No matter the season or mood, they’re a dependable treat that pulls together fast and tastes just right—no baking sheet required. That simplicity keeps me coming back, especially when I crave something sweet, but don’t want to spend forever in the kitchen.
This recipe is about reclaiming the joy of baking without the fuss, perfect for busy mornings or when the oven’s off-limits. It’s a nostalgic throwback, but tailored for modern chaos—simple, quick, and still deeply satisfying. I love how these cookies turn out sticky and chewy, with just enough chocolate and nuttiness to keep your hand reaching back for more.
A Shortcut for Sweet Comfort
- Making these cookies takes me back to childhood afternoons spent in my grandma’s kitchen, smelling of cocoa and warm sugar.
- There’s a weird satisfaction in pressing these cookies into a tray, knowing they’ll set without any oven heat, just patience.
- When I need a quick sweet fix, these are my go-to—no fuss, no mess, just simple ingredients and honest flavor.
- Sharing these cookies with friends always sparks nostalgia and a few stories of simpler times, even on busy days.
- The best part? The chewy texture and rich chocolate flavor that makes me forget they’re basically just a shortcut to happiness.
A Shortcut for Sweet Comfort
This recipe was born out of a chaotic afternoon in my tiny kitchen, where I needed something sweet and quick—no oven, no fuss. I remembered my grandma’s no bake cookies from childhood, but with a little twist to make them richer and more satisfying. It’s funny how a simple batch of these can turn a hectic day around, giving me that nostalgic rush and a moment of calm, all in one chewy, chocolatey bite.
Historical & Cultural Trivia
- These cookies gained popularity during the Great Depression when oven space and ingredients were scarce, making no-bake options a practical treat.
- Originally called ‘No Bake Cookies,’ their roots trace back to resourceful home cooks needing quick desserts with minimal fuss.
- The combination of oats and chocolate became a symbol of comfort and simplicity in mid-20th-century American kitchens.
- Variations of this recipe appeared in community cookbooks across the U.S., each adding personal twists like peanut butter or coconut.
- Today, these cookies are often a nostalgic staple, reminding many of childhood and family gatherings with their rich, chewy bite.
Ingredient breakdown: key components
- Old-fashioned oats: I love the chewy texture they bring, but you can swap in quick oats if you’re in a rush—just expect a slightly finer crumb.
- Unsweetened cocoa powder: Brightens the cookies with a deep chocolate flavor; if you prefer a milder taste, reduce the amount a bit.
- Butter: Adds richness and helps the mixture set; try coconut oil for a dairy-free version that still melts in your mouth.
- Honey or maple syrup: Sweetens naturally and helps bind everything together; agave can be a good alternative if you want a neutral sweetness.
- Vanilla extract: It’s the secret to making the chocolate pop; skip it if you want a more straightforward cocoa punch.
- Chocolate chips: I love the melty bits, but chopped nuts or dried fruit work great for texture and contrast—add them after mixing.
- Salt: Just a pinch enhances all the flavors and keeps the sweetness from feeling cloying; don’t skip it, even if you’re hesitant.
Spotlight on key ingredients
Oats:
- Old-fashioned oats: I love their chewy, hearty bite, but quick oats can be used in a pinch—just expect a finer texture.
- Chocolate chips: Melty and sweet, they create gooey pockets. Chopped nuts or dried fruit can replace or add contrast—stir in after mixing.
- Butter: It melts smoothly, giving richness and helping the cookies set. Coconut oil offers a dairy-free alternative with a slightly different aroma.
Cocoa powder:
- Unsweetened cocoa powder: Deepens the chocolate flavor with a smoky, rich aroma; using less makes the taste milder, more milk-chocolate-like.
- Honey or maple syrup: Natural sweeteners that add a bright, sticky sweetness, along with a subtle aroma—try agave for a neutral alternative.
- Vanilla extract: Enhances the chocolate’s depth, making flavors pop; skip for a more straightforward cocoa punch.
Notes for ingredient swaps
- Dairy-Free: Swap butter for coconut oil or vegan margarine—expect a slightly lighter, less rich cookie.
- Sweetener Variations: Use agave syrup or brown rice syrup instead of honey or maple—these add a different depth of sweetness.
- Oats: Substitute quick oats for old-fashioned oats—quicker to prepare but slightly finer in texture.
- Chocolate: Dark chocolate chips can be replaced with white chocolate or carob chips for a different flavor profile.
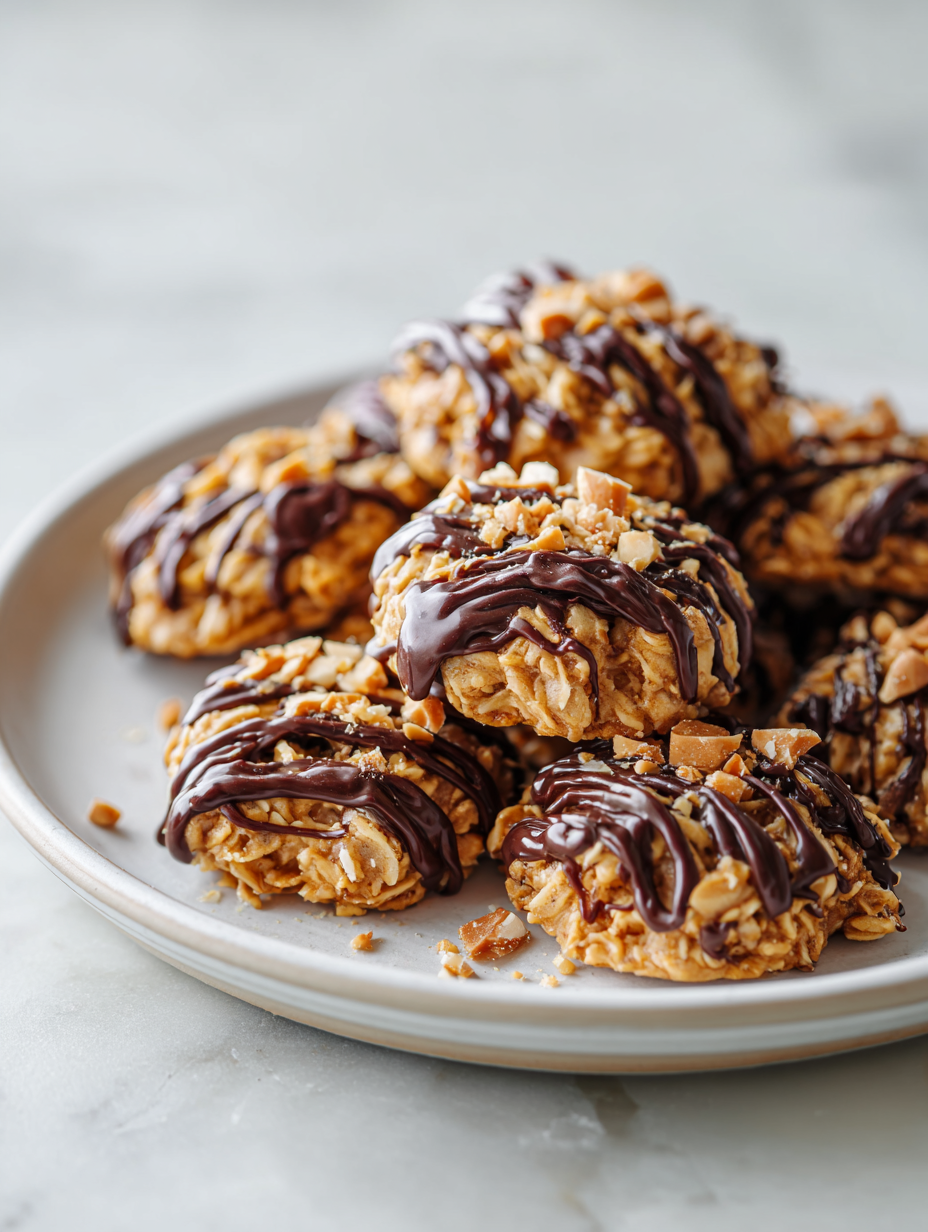
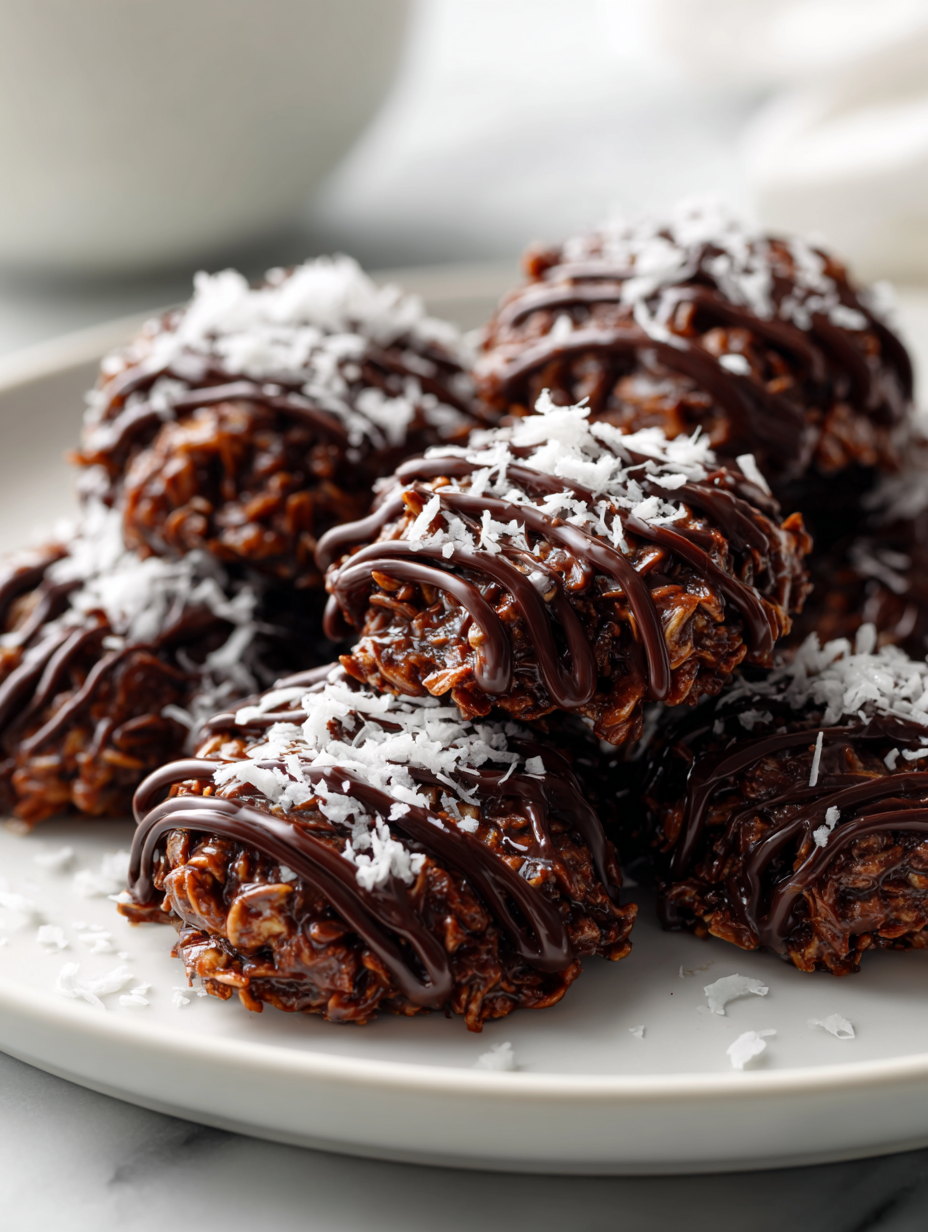
- Add-ins: Nuts, dried fruit, or coconut flakes can be mixed in after the oats—use what you love for texture and flavor.
- Flavor Boost: A pinch of cinnamon or espresso powder can deepen the chocolate flavor—add sparingly to taste.
- Binder: For extra chewiness, a tablespoon of nut butter can be stirred in—richens the overall bite.
Equipment & Tools
- Large saucepan: For melting ingredients and boiling the mixture.
- Mixing spoon: Stir ingredients continuously to prevent burning.
- Parchment-lined tray: To hold cookies as they cool and set.
- Spatula: To drop and flatten cookies onto the tray.
Step-by-step guide to no-bake cookies
- Gather all equipment: a large saucepan, mixing spoon, parchment-lined tray, and a spatula. The saucepan is for melting, the tray for setting.
- Combine sugar, cocoa powder, butter, and milk in the saucepan. Turn on medium heat, around 150°C (300°F).
- Bring to a rolling boil, stirring constantly. Once boiling, set timer for 1 minute. The mixture should crackle and smell sweet and chocolaty.
- Remove from heat. Quickly stir in oats, vanilla, and a pinch of salt. Mix until everything is evenly coated and glossy.
- Drop spoonfuls onto prepared tray. Use a spatula or the back of a spoon to flatten if you like. They should be roughly uniform in size.
- Let the cookies sit at room temperature for about 20-30 minutes. They will firm up as the mixture cools and sets.
- Check for doneness: cookies should be chewy and hold shape, with a shiny, crackled surface. They shouldn’t be sticky or overly soft.
- If cookies are too soft, refrigerate for 10-15 minutes. If too crumbly, add a touch more milk to the mixture before dropping.
- Once set, store in an airtight container at room temp for up to 5 days, or freeze for longer storage.
Allow cookies to cool and set at room temperature for 20-30 minutes. Once firm, transfer to an airtight container for storage. Serve with a glass of milk or enjoy on their own.
How to Know It’s Done
- Mixture reaches a rolling boil for exactly 1 minute without overflowing.
- Cookies set within 30 minutes at room temperature, firm but chewy.
- Surface of cookies is shiny and crackled, not dull or sticky.
No Bake Chocolate Oatmeal Cookies
Ingredients
Equipment
Method
- Gather all your equipment: a large saucepan, a mixing spoon, a parchment-lined tray, and a spatula. This keeps everything handy as you work.
- Add the butter, honey (or maple syrup), cocoa powder, and a pinch of salt to the saucepan. Turn the heat to medium and stir continuously until the butter melts and the mixture begins to bubble gently, releasing a rich, chocolaty aroma.
- Bring the mixture to a rolling boil and let it boil for exactly 1 minute while stirring constantly. You'll hear a gentle bubbling sound, and the mixture will thicken slightly, turning glossy and smooth.
- Remove the saucepan from heat and stir in the vanilla extract until well combined. Then add the oats and stir vigorously until all the oats are evenly coated with the chocolate mixture, and it becomes thick and sticky.
- Once the mixture is uniform and glossy, fold in the chocolate chips, distributing them evenly throughout the mixture.
- Using a spatula or a spoon, drop spoonfuls of the mixture onto the prepared parchment-lined tray. Gently press them down with the back of the spoon or spatula to flatten slightly, creating uniform cookies.
- Let the cookies sit at room temperature for about 20-30 minutes, allowing them to set and firm up as the mixture cools and the chocolate chips melt slightly into the oats.
- Once the cookies are firm and shiny on top, transfer them to an airtight container. They can be enjoyed immediately or stored at room temperature for up to 5 days for best chewy texture.
Tips & Tricks for Best Results
- Bolded mini-head: Use medium heat to prevent scorching—your mixture should crackle gently without burning.
- Bolded mini-head: Stir constantly during boiling—this keeps the mixture smooth and avoids lumps or sticking.
- Bolded mini-head: Chill your mixing utensils—cold tools help prevent the mixture from melting too quickly and losing shape.
- Bolded mini-head: Drop cookies onto parchment quickly—faster setting with less spreading, especially if the mixture cools slightly.
- Bolded mini-head: Add mix-ins at the right moment—wait until the mixture is just off the heat to stir in nuts or dried fruit for better distribution.
- Bolded mini-head: Don’t skip the resting time—allow cookies to cool at room temp to achieve the perfect chewy texture.
- Bolded mini-head: Use a spatula to flatten cookies—pressing them gently helps create uniform thickness and even set.
Common mistakes and how to fix them
- FORGOT to stir continuously → Stir constantly to prevent burning and ensure even heat.
- DUMPED mixture too quickly → Drop spoonfuls gently to avoid spreading too much.
- OVER-TORCHED mixture → Remove from heat immediately if bubbling turns dark or smoky aroma appears.
- MISSED setting time → Let cookies sit at room temp for full 20-30 minutes for proper firming.
Quick fixes and pantry swaps
- If mixture is too runny, splash in a bit more oats and stir well.
- When cookies spread too much, patch with a sprinkle of oats on top before setting.
- Splash a little extra chocolate if surface looks dull and lacks shine.
- Shield over cookies if they start to over-torch, to prevent burnt edges.
- When in doubt, pantry swap: use peanut butter instead of butter for a nuttier chew—smells incredible.
Prep, store, and reheat tips
- Prepare the mixture ahead of time by measuring and combining dry ingredients; the flavor develops even overnight, and it’s less hectic when you’re ready to assemble.
- Cookies can be stored in an airtight container at room temperature for up to 5 days, with the chocolate still glossy and chewy surface intact.
- For longer storage, freeze the cookies in a single layer on a tray, then transfer to a bag—best enjoyed within a month, with a firm texture and chilled bite.
- Refrigerate cookies if you prefer a cooler, firmer chew. Let them sit at room temp for 5 minutes to soften slightly before eating, for optimal texture and aroma.
- Reheating isn’t necessary, but if you want softer, slightly melty cookies, microwave a cookie for 10-15 seconds—smell the rich cocoa and melted chocolate as a cue.
Top questions about no bake cookies
1. Can I use a different sweetener?
Yes, you can swap honey for maple syrup or agave. It might slightly change the flavor but keeps it sweet and sticky.
2. Can I substitute quick oats?
Absolutely, using quick oats will make a finer, softer cookie, but old-fashioned oats give more chew and texture.
3. How long do these cookies last?
Refrigerate for up to a week in an airtight container. The cookies stay chewy and the chocolate remains glossy.
4. Can I reheat or soften these cookies?
To soften from the fridge or freezer, microwave for 10-15 seconds until warm and gooey, then enjoy immediately.
5. What equipment do I need?
Use a large saucepan to melt ingredients evenly. Stir constantly to prevent burning and achieve a smooth mixture.
6. What if my mixture isn’t boiling properly?
If the mixture isn’t boiling enough, increase the heat slightly but watch closely to avoid overboiling or burning.
7. How long should I let the cookies set?
Ensure to let the cookies cool for at least 20 minutes at room temperature for them to set properly.
8. Can I customize the add-ins?
Yes, you can add chopped nuts, dried fruit, or coconut flakes after mixing for extra texture.
9. What if my cookies are too soft?
If the cookies are too soft or sticky, refrigerate for 10 minutes to help them firm up without overhardening.
10. How should I store the cookies?
Store in a cool, dry place away from direct sunlight to keep them chewy and prevent melting or sticking.
These cookies are a reminder that sometimes the simplest treats are the most satisfying. In a busy world, they offer a moment of comfort that’s quick to make and deeply nostalgic.
Whenever I make these, I’m struck by how a handful of humble ingredients can come together to create something so flavorful and memorable. They’re a small, sweet rebellion against the chaos, and I always find myself reaching for another bite.
 Hello, I’m Emily Richardson, the heart and soul behind Playing with Flavors. Cooking isn’t just a hobby for me – it’s a passion that I’ve cultivated for years, and it’s become the driving force of my life.
From the kitchen of my cozy café to the pages of this blog, every dish I create is a reflection of my love for food and the joy it brings to people.
Hello, I’m Emily Richardson, the heart and soul behind Playing with Flavors. Cooking isn’t just a hobby for me – it’s a passion that I’ve cultivated for years, and it’s become the driving force of my life.
From the kitchen of my cozy café to the pages of this blog, every dish I create is a reflection of my love for food and the joy it brings to people.


