This no-bake Oreo cheesecake is my go-to when weekends get chaotic and I need something sweet but effortless. It’s shockingly simple, no oven required, and it always turns out with that perfect, creamy texture contrasted by crunchy Oreo bits. Honestly, it’s become my secret weapon for last-minute desserts that feel indulgent without the fuss.
What makes this recipe stand out is how adaptable it is. I’ve thrown in peanut butter, swapped out Oreos for double-stuffed versions, or even added a dash of lemon zest for brightness. It’s a comfort that doesn’t demand much time or skill, just a handful of ingredients and a little patience while it chills. Sometimes, I think I could make it in my sleep — and I’ve come to love that about it.
How this no-bake Oreo cheesecake became my unexpected comfort during hectic weekends when I needed something simple yet indulgent, with no oven fuss and all the nostalgic crunch.
A Nostalgic Shortcut to Dessert
- This cheesecake became my unexpected comfort during hectic weekends when I needed something simple yet indulgent, with no oven fuss and all the nostalgic crunch.
- I love how versatile it is—sometimes I toss in peanut butter or swap Oreos for double-stuffed versions, making it feel fresh even after multiple tries.
- There’s a strange joy in how easily it comes together—no baking, just chilling, and I can have it ready in under two hours.
- Every time I make this, I remember lazy afternoons from my childhood, the smell of cookies, and that creamy, crunchy bite that never gets old.
The story behind this recipe
- This no-bake Oreo cheesecake first appeared on my kitchen counter during a particularly hectic week. I needed something quick, satisfying, and that wouldn’t add to the chaos of oven preheats and baking times. It’s funny how a simple idea—crushed Oreos mixed with cream cheese—can turn into a little moment of calm amidst the storm.
- I remember the first time I made it for a friend’s birthday. I was nervous about the no-bake part, but it set perfectly and was gone in minutes. Since then, it’s become my go-to for last-minute gatherings, especially when I want a dessert that’s indulgent but effortless. It’s a little reminder that sometimes, less fuss makes the sweetest memories.
- heading: ‘The story behind this recipe’
Unusual Origins of the Cheesecake
- This no-bake Oreo cheesecake was born out of a need for a quick, satisfying dessert that could be assembled in minutes rather than hours, especially during busy weekends.
- The idea of crushing Oreos directly into the cream cheese mixture comes from a childhood memory of helping my grandma in the kitchen, where simple ingredients felt magical together.
- It gained popularity in early 2000s baking blogs as an easy, foolproof dessert that requires no oven, making it perfect for summer heat or impatient sweet tooths.
Ingredient breakdown: key components
- Oreo cookies: I love the crunch and sweet cream, but you can swap them for graham crackers if you want a more subdued chocolate flavor.
- Cream cheese: It’s the creamy backbone of this cheesecake, and I find full-fat makes it richer—lighten up with Greek yogurt if you prefer tang.
- Butter: Melts into the crushed Oreos, adding richness and helping the crust hold together—use melted unsalted butter for the best flavor.
- Heavy cream: Whips into a fluffy layer that balances the dense cheese—substitute with coconut cream for a dairy-free version with a subtle coconut aroma.
- Sugar: Just enough to enhance the creaminess—consider honey or maple syrup for a more complex sweetness, but reduce the amount slightly.
- Lemon zest (optional): Adds brightness and cuts through the richness—skip if you want a more straightforward, fudgy flavor.
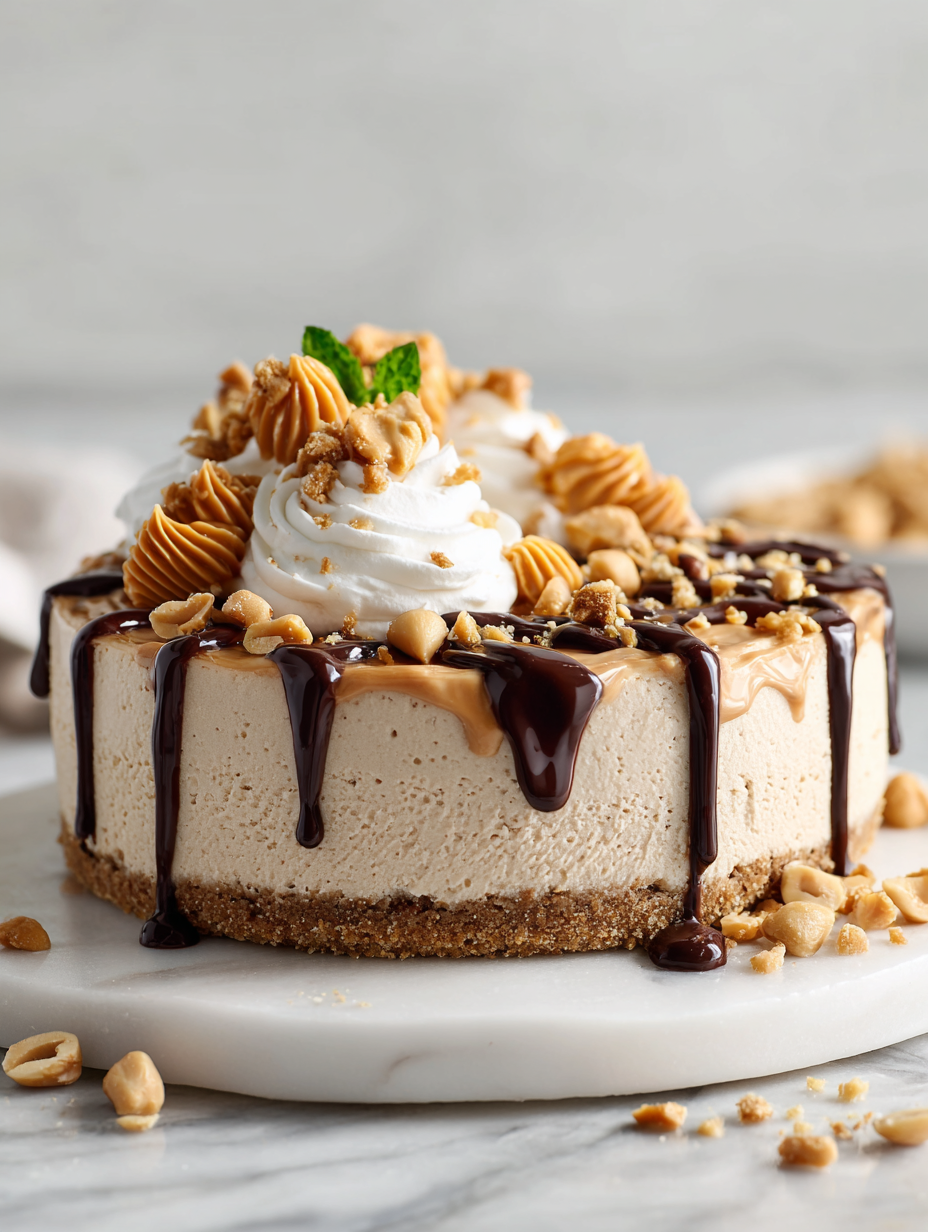
- Chocolate drizzle (optional): I like a quick bittersweet drizzle, but caramel or berry compote can add a different sweet-tart kick.
Spotlight on Oreo Cookies
Oreo cookies:
- I love their crunchy, chocolatey shell paired with a sweet, creamy center. When crushed, they become a fragrant, cocoa-dusted crumb that’s almost intoxicating.
- They soften slightly during mixing, releasing a rich chocolate aroma. Slightly oily from the filling, they add a subtle melt-in-your-mouth texture when incorporated into the crust or filling.
Cream cheese:
- It’s the dense, tangy heart of this cheesecake. When softened, it’s silky and smooth, blending effortlessly for a creamy, luxurious texture that’s slightly tangy on the palate.
- During mixing, it becomes glossy and smooth, with a subtle, inviting dairy sweetness. If overmixed, it can become too airy, so gentle folding is key.
Notes for ingredient swaps
- Dairy-Free: Swap cream cheese for cashew-based cream cheese or blended silken tofu. Expect a slightly less tangy, creamier texture.
- Gluten-Free: Use gluten-free cookies or graham crackers instead of Oreos. Keep in mind, the flavor might be a bit subtler.
- Vegan: Replace cream cheese with coconut cream-based vegan cheese, and heavy cream with coconut whipped cream. Coconut flavor will be more pronounced.
- Sugar Alternatives: Substitute with honey, maple syrup, or agave. The sweetness will be richer and slightly more complex.
- Butter: Use plant-based margarine or coconut oil. The crust might be a little softer and less buttery in flavor.
- Oreo Cookies: Swap with chocolate digestives or chocolate graham crackers for a different chocolate crunch.
- Optional Brightness: Add a splash of lemon juice or zest to the filling for a citrusy kick, especially good if skipping the Oreos’ richness.
Equipment & Tools
- 9-inch springform pan: To hold and shape the cheesecake
- Food processor or plastic bag + rolling pin: To crush Oreos into fine crumbs
- Spatula: To mix and smooth the crust and filling
- Electric mixer or whisk: To whip the heavy cream
- Measuring cups and spoons: To measure ingredients accurately
Step-by-step guide to no bake Oreo cheesecake
- Gather your equipment: a 9-inch springform pan, a mixing bowl, a spatula, and a food processor or plastic bag and rolling pin for crushing Oreos.
- Crush Oreos: Place about 25-30 Oreos in the food processor or seal in a plastic bag. Pulse or crush until finely ground, resembling wet sand. Set aside.
- Make the crust: Melt 4 tablespoons of butter (about 60g) in a small bowl. Pour over the crushed Oreos and mix until evenly coated. If using a fork or spatula, it’ll be easier to incorporate fully.
- Press the crust: Transfer the Oreo mixture to the springform pan. Use the back of a spoon or your fingers to press it firmly into the bottom and slightly up the sides. Chill in the fridge for 15 minutes to set.
- Prepare the filling: In a large bowl, beat 16 oz (450g) of softened cream cheese until smooth and fluffy, about 2 minutes on medium speed. Add 1/2 cup (100g) sugar and mix until combined.
- Add flavorings: Mix in 1 teaspoon vanilla extract and optional lemon zest for brightness. For an extra twist, fold in crushed Oreos or mini chocolate chips if desired.
- Whip the cream: In a separate bowl, whip 1 cup (240ml) heavy cream until stiff peaks form, about 3-4 minutes. Be careful not to overwhip and turn it into butter.
- Combine: Gently fold the whipped cream into the cream cheese mixture, using a spatula. Mix until smooth and no streaks remain. The texture should be creamy but fluffy.
- Assemble the cheesecake: Pour the filling over the chilled Oreo crust. Use a spatula to smooth the top evenly. Tap the pan lightly on the counter to release any air bubbles.
- Chill to set: Cover loosely with plastic wrap and refrigerate for at least 4 hours, preferably overnight. The filling should firm up and be fully chilled before serving.
- Finish with toppings: Before serving, optional drizzle melted chocolate or sprinkle more crushed Oreos on top for extra crunch and visual appeal.
Once chilled, carefully remove the sides of the springform pan. Slice with a warm knife for clean cuts. Serve directly or add extra toppings for presentation. Best enjoyed within 2-3 days for fresh flavor and texture.
How to Know It’s Done
- Crust is firm and holds shape when pressed.
- Filling is smooth, no lumps, and holds its shape when scooped.
- Cheesecake is fully chilled, with a slight jiggle in the center but no liquid.

No-Bake Oreo Cheesecake
Ingredients
Equipment
Method
- Place about 25-30 Oreos in your food processor or seal them in a plastic bag and crush with a rolling pin until finely ground, resembling wet sand. Set aside.
- Melt the butter and pour it over the crushed Oreos. Mix everything together with a spatula until the crumbs are evenly coated and look like wet sand.
- Press the Oreo mixture firmly into the bottom of a springform pan, using the back of a spoon or your fingers to create an even crust. Chill in the fridge for about 15 minutes to set.
- In a large bowl, beat the softened cream cheese until smooth and fluffy, about 2 minutes. Add sugar and vanilla, then mix until combined and creamy.
- In a separate bowl, whip the heavy cream until stiff peaks form, about 3-4 minutes. Be careful not to overwhip.
- Gently fold the whipped cream into the cream cheese mixture using a spatula, combining carefully until the mixture is light and creamy with no streaks.
- Pour the filling over the chilled crust, smoothing the top with a spatula for an even surface. Tap the pan lightly on the counter to release any air bubbles.
- Cover the cheesecake loosely with plastic wrap and refrigerate for at least 4 hours, ideally overnight, until the filling is set and firm.
- Before serving, optionally drizzle melted chocolate or sprinkle more crushed Oreos on top for added crunch and presentation.
- Carefully remove the sides of the springform pan, slice, and enjoy this creamy, crunchy, no-bake Oreo cheesecake chilled to perfection.
Tips for Perfect No Bake Cheesecake
- Bolded Mini-Head: Use room temperature cream cheese to ensure a smooth, lump-free filling that mixes easily.
- Bolded Mini-Head: Chill your crust thoroughly before adding the filling; a cold base prevents cracks during setting.
- Bolded Mini-Head: Gently fold whipped cream into the cheese mixture to keep the filling light and airy, avoiding deflation.
- Bolded Mini-Head: For a shiny, professional finish, briefly warm the chocolate drizzle and swirl it smoothly over the top.
- Bolded Mini-Head: Tap the filled pan on the counter to help release air bubbles and create an even, crack-free surface.
- Bolded Mini-Head: If the filling is too soft to slice, let the cheesecake sit in the fridge at least 2 hours longer for cleaner cuts.
- Bolded Mini-Head: For a more intense Oreo flavor, crush some extra cookies and sprinkle on top just before serving.
Common mistakes and how to fix them
- FORGOT to chill crust, causing crumbly base. FIX by refrigerating for 15 minutes before filling.
- DUMPED filling into hot crust, causing cracks. FIX by ensuring crust is cold and firm.
- OVER-TORCHED the chocolate drizzle, making it bitter. FIX by melting gently over low heat or in short bursts.
- MISSED folding whipped cream gently, deflating it. FIX by folding softly to keep airiness.
Quick fixes and pantry swaps
- When the filling is too soft, chill it for 30 minutes before spreading.
- If the crust crumbles, press it firmly again and refrigerate for 10 minutes.
- Splash a bit of hot water on the chocolate drizzle to smooth it out quickly.
- Patch cracks by melting a little extra chocolate and gently smoothing over imperfections.
- Shield the cheesecake from moisture by wrapping tightly if not serving immediately.
Prep, store, and reheat tips
- Prepare the crust: Crush Oreos and mix with melted butter, then press into the pan. Chill for 15 minutes to firm up before filling.
- Make the filling: Combine cream cheese, sugar, and flavorings. Whip the heavy cream separately, then fold together. Keep refrigerated and covered for up to 24 hours before serving.
- Assembly: Pour the filling over the chilled crust and smooth the surface. Cover loosely with plastic wrap and refrigerate for at least 4 hours or overnight to fully set and develop flavor.
- Reheating: This cheesecake is best served cold. If you prefer it slightly warmer, let it sit at room temperature for 10 minutes, then slice and serve. The texture remains firm and creamy, with a rich aroma.
Top questions about no bake Oreo cheesecake
1. Can I make this cheesecake gluten-free?
Yes, using gluten-free Oreos or cookies works fine, but it might change the flavor slightly, making it less chocolatey and more neutral.
2. Is this recipe dairy-free?
Absolutely. For dairy-free, substitute cream cheese with a vegan alternative and heavy cream with coconut whipped cream. Expect a coconut aroma and slightly different texture.
3. Can I omit the lemon zest?
Yes, you can skip the lemon zest or swap it with a splash of lemon juice to add a tang that cuts through the sweetness.
4. Why is my cheesecake runny?
Make sure the crust is pressed firmly and chilled before adding the filling. If the filling is runny, refrigerate the assembled cheesecake for at least 4 hours to set.
5. Can I use low-fat cream cheese?
Use room temperature cream cheese for smooth mixing. For a richer flavor, full-fat cream cheese is best; low-fat versions can make it less creamy.
6. Can I customize the filling?
Yes, you can add mini chocolate chips or crushed Oreos into the filling for extra texture and flavor. Just fold them in gently.
7. How long can I keep leftovers?
Store leftovers in an airtight container in the fridge for up to 3 days. Cover well to prevent it from absorbing fridge odors.
8. What if my cheesecake cracks?
If the cheesecake cracks, gently reheat a bit of chocolate and swirl it over the cracks to hide them or smooth over with a hot knife.
9. How do I know when the whipped cream is ready?
When whipping the cream, stop once stiff peaks form. Overwhipping can turn it grainy or butter-like, ruining the texture.
10. How long should I chill it?
If you want a firmer set, refrigerate the cheesecake overnight. For a softer bite, serve after 4 hours but note it might be slightly more fragile.
This no-bake Oreo cheesecake isn’t just a dessert; it’s a little act of rebellion against busy days. Its creamy texture with that crunch of Oreos makes it a nostalgic treat that’s easy to pull together, even when time’s tight. Sometimes, the simplest recipes carry the most comfort, especially when they taste like a little moment of indulgence.
Right now, with summer’s warmth or hectic weekends, it’s a reminder that good things don’t need to be complicated. A few ingredients, some chill time, and you’re set for a satisfying finish to any day. It’s the kind of dessert that stays in your back pocket — ready whenever you need a quick, creamy fix.