
These peanut butter balls come from a memory of sneaking into the kitchen late at night, fingers sticky with the sweet, salty mess. They’re a no-fuss way to reclaim that nostalgic rush without turning on the oven or making a big production out of snack time. Sometimes, the simplest treats are the ones that hit hardest when you’re craving comfort that’s quick and honest.
What I love about this recipe is how adaptable it is — no bake, no heat, just a few ingredients coming together in a messy, satisfying scoop. It’s the kind of thing you can make in ten minutes, with ingredients you probably already have—peanut butter, honey, oats—and still feel like you’re sneaking a little treat. Perfect for when life feels busy but you still want a moment of sweet, peanutty joy.
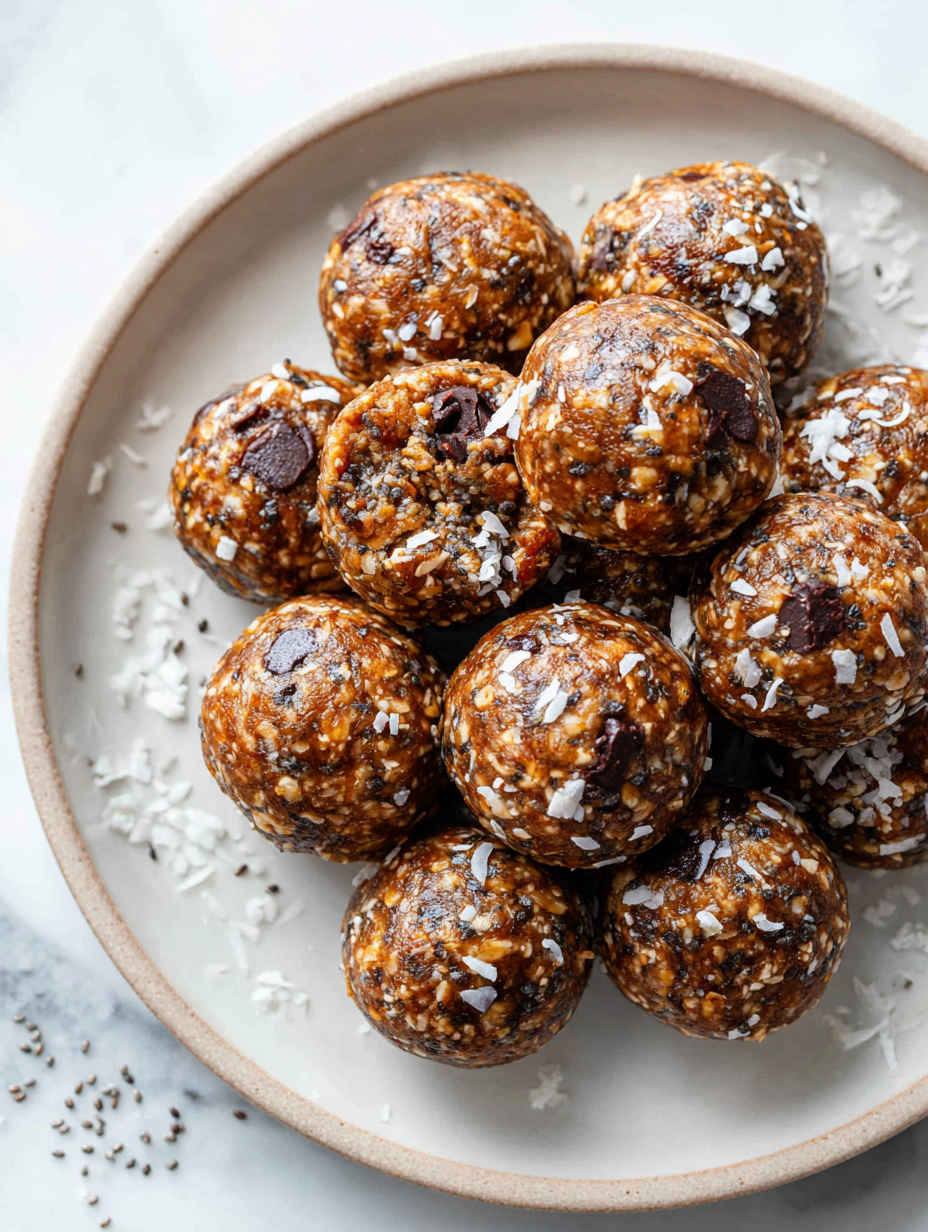
Focusing on the nostalgic comfort of childhood snacks, this recipe transforms a simple peanut butter treat into a no-bake, mess-free experience perfect for busy adults craving a quick, satisfying fix.
A Nostalgic Bite of Childhood
- Making these peanut butter balls reminds me of lazy weekend afternoons spent in the kitchen, feeling completely at ease.
- There’s something oddly satisfying about rolling that sticky mixture between my palms, like a small act of therapy.
- I still get a little rush of pride when I see how quickly these disappear at gatherings — they’re just so easy to love.
The story behind this recipe
I started making these peanut butter balls during a chaotic week when I needed something quick, honest, and satisfying. They remind me of childhood snacks, but I love how adaptable they are for grown-ups too—no oven, no fuss. Sometimes, the simplest recipes turn out to be the most comforting, especially when you’re short on time but craving something sweet and peanutty.
Historical & Cultural Snippets
- These peanut butter balls likely originated in mid-20th-century American kitchens as an easy, no-bake treat for busy families.
- They gained popularity during the 1970s when no-bake recipes became trendy for quick, fuss-free desserts.
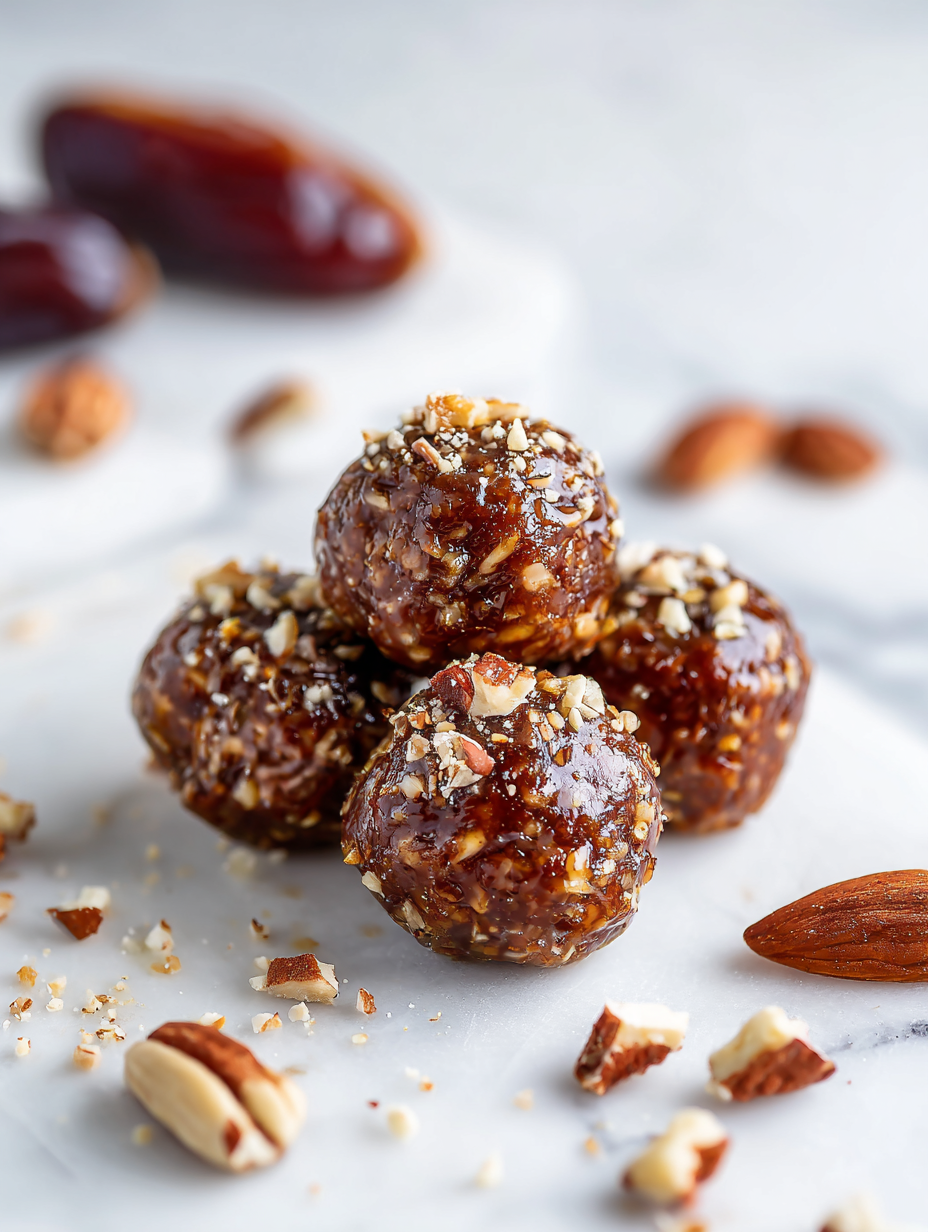
- Originally, variations used crushed graham crackers or cookie crumbs, making them adaptable to pantry staples.
- The combination of peanut butter and oats has roots in health-conscious recipes from the early 1900s, emphasizing quick energy bites.
- Today, these treats are a nostalgic staple, often made for school parties, holidays, or simple afternoon snacks.
Ingredient breakdown: key components
- Peanut Butter: I like creamy, natural peanut butter—the oozy texture makes rolling easier. If yours is too stiff, warm it slightly to loosen up.
- Honey: It binds everything together with a glossy sheen and a sweet, floral aroma. Swap with maple syrup for a different depth, but expect a slightly different stickiness.
- Oats: I use old-fashioned rolled oats—they give a chewy bite and hold the shape well. Steel-cut oats are too firm; skip them for this.
- Chocolate (optional): Melts into a rich, glossy coating that crackles when you bite in. Dark chocolate adds depth; milk chocolate makes it sweeter and creamier.
- Salt: Just a pinch enhances the peanut flavor and balances the sweetness. Too much can be overwhelming, so go easy unless you love a savory punch.
- Vanilla Extract: Adds warmth and aroma, making the peanut butter flavor pop. If you don’t have it, a splash of almond extract brightens the profile.
- Sprinkles or Crushed Nuts: For texture and visual appeal. Use what you have—crushed pretzels, coconut flakes, or chopped pecans all work.
Spotlight on key ingredients
Peanut Butter:
- I prefer creamy, natural types—oozy texture makes rolling easier. Warm slightly if it’s stiff.
- Honey: Adds shine and sweetness—its floral aroma is a giveaway. Swap with maple syrup for a different profile, but expect a tad less stickiness.
Oats & Chocolate:
- Oats: I use old-fashioned rolled oats—they give a chewy bite and hold shape well. Steel-cut oats are too firm; skip them here.
- Chocolate (optional): Melts into a crackling, rich coating that makes each bite special. Dark chocolate deepens flavor; milk adds sweetness and creaminess.
Notes for ingredient swaps
- Dairy-Free: Use coconut or almond butter instead of peanut butter. Expect a slightly different nutty flavor and less creaminess.
- Sweetener: Swap honey for maple syrup or agave nectar. Maple adds a smoky note, agave is more neutral.
- Oats: Replace with gluten-free oats if needed. Keep in mind, texture might be a tad softer or chewier.
- Chocolate: Use carob chips or omit altogether for a dairy-free, less sweet finish. Chocolate adds that glossy, crackly top.
- Salt: Skip or reduce if you prefer a milder, sweeter treat. A pinch really boosts peanut flavor, so don’t skip entirely unless necessary.
- Vanilla: Substitute with almond extract for a different aromatic touch. Use sparingly, as it’s quite potent.
- Add-ins: Crushed pretzels, shredded coconut, or chopped nuts can be swapped based on what’s in your pantry. They add crunch and visual appeal.
Equipment & Tools
- Large mixing bowl: For combining ingredients thoroughly.
- Spatula: To fold and mix ingredients smoothly.
- Cookie scoop or tablespoon: To portion out uniform balls easily.
- Parchment paper: To prevent sticking and for easy cleanup.
- Microwave-safe bowl: To melt chocolate if using.
Step-by-step guide to peanut butter balls
- Gather your equipment: a large mixing bowl, a spatula, a cookie scoop or tablespoon, and parchment paper. The bowl is for mixing, the scoop for uniform balls, and parchment for easy cleanup.
- In the bowl, combine 1 cup creamy peanut butter, 1/2 cup honey, and 1 teaspoon vanilla extract. Mix until smooth and well integrated, about 2 minutes. The mixture should be sticky but scoopable.
- Add 2 cups old-fashioned rolled oats gradually, folding them into the wet mixture. Stir until evenly coated and no dry oats remain. If it feels too loose, add a tablespoon more oats until it holds its shape.
- Using the cookie scoop or tablespoon, portion out the mixture. Roll each portion between your palms into about 1-inch balls. If the mixture sticks too much, lightly dampen your hands with water.
- Place the formed balls onto the parchment-lined tray. Chill in the fridge for at least 30 minutes to set. This helps them firm up and makes them easier to coat or serve.
- Optional: Melt 1/2 cup chocolate chips in a microwave-safe bowl in 20-second bursts, stirring in between, until smooth. Dip each ball into the melted chocolate or drizzle on top. Return to fridge to set, about 15 minutes.
- Once set, transfer the peanut butter balls to an airtight container. Store in the fridge for up to a week or freeze for longer storage. Let sit at room temperature for a few minutes before serving if chilled.
Chill the balls in the fridge for at least 30 minutes before serving. For a chocolate coating, dip or drizzle melted chocolate and refrigerate until set. Serve straight from the fridge for a firm, chewy texture.
How to Know It’s Done
- The mixture sticks together when pressed but isn’t too greasy.
- Balls hold their shape without cracking or crumbling during rolling.
- Chilled balls feel firm but not hard to bite through.

No-Bake Peanut Butter Balls
Ingredients
Equipment
Method
- Combine the peanut butter, honey, and vanilla extract in a large mixing bowl, stirring until smooth and fragrant, about 2 minutes. The mixture should be sticky but scoopable.
- Gradually fold in the rolled oats, stirring until fully coated and the mixture holds together when pressed. If it feels too loose, add a bit more oats until manageable.
- Use a cookie scoop or tablespoon to portion out the mixture, then roll each into about 1-inch balls between your palms. If the mixture is sticky, dampen your hands slightly to prevent sticking.
- Place the formed balls onto a parchment-lined tray and refrigerate for at least 30 minutes to help them set and become easier to coat or serve.
- Optional: Melt the chocolate chips in a microwave-safe bowl in short bursts, stirring in between until smooth. Dip each chilled ball into the melted chocolate or drizzle on top for a glossy coat. Return to the fridge for about 15 minutes to set.
- Once the chocolate has set, transfer the peanut butter balls to an airtight container. Keep refrigerated for up to a week, or freeze for longer storage. Serve straight from the fridge or at room temperature for a softer bite.
Tips for Perfect Peanut Butter Balls
- Bolded Mini-Head: Use slightly chilled mixture for easier rolling and less stickiness.
- Bolded Mini-Head: Incorporate a pinch of sea salt into the mixture to enhance nutty flavors.
- Bolded Mini-Head: When melting chocolate, do so in short bursts to prevent burning and ensure smoothness.
- Bolded Mini-Head: Dampen your hands lightly with water to prevent mixture from sticking during shaping.
- Bolded Mini-Head: For shiny chocolate coating, let it cool slightly before dipping to avoid melting the peanut butter layer.
- Bolded Mini-Head: Chill formed balls in the fridge for at least 30 minutes to help them set firmly before coating.
- Bolded Mini-Head: If mixture feels too loose, add more oats a tablespoon at a time until manageable.
Common mistakes and how to fix them
- TOO DRY: Dried out balls? Fix by adding a teaspoon of honey or peanut butter.
- TOO WET: Mixture too sticky? Mix in a few more oats to firm it up.
- POOR COATING: Chocolate not sticking? Chill balls before dipping or re-melt chocolate slightly.
- CRACKING: Balls crack while rolling? Slightly dampen hands or chill mixture before shaping.
Quick Fixes for Perfect Bites
- When mixture is too dry, splash in a little honey to moisten and bind.
- If balls crack while rolling, dampen hands or chill mixture further before shaping.
- Splash melted chocolate with a tiny bit of coconut oil for a glossy, crack-resistant coating.
- Patch a sticky batch by adding a tablespoon of oats at a time until manageable.
- Shield delicate balls with a light dusting of cocoa powder if chocolate coating cracks.
Prep, store, and reheat tips
- Prepare the mixture ahead of time and keep it covered in the fridge for up to 24 hours; it firms up nicely, making rolling easier.
- Store the finished peanut butter balls in an airtight container in the fridge for up to a week; the cool keeps them firm and fresh.
- Freeze the balls for longer storage—up to 3 months—wrapped tightly in plastic wrap and then in foil; let thaw slightly at room temp before serving.
- Refrigerated balls become chewier and more set; to reheat, let sit at room temperature for 5 minutes for softer texture and better aroma release.
Top questions about peanut butter balls
1. Can I use crunchy peanut butter?
Use natural or creamy peanut butter based on your texture preference. Natural is oozy, creamy is smooth and easy to roll.
2. Can I add mix-ins like chocolate chips or nuts?
Yes, but expect a crunchier texture. It adds a nice bite, but may make rolling a bit messier.
3. How do I prevent the mixture from being too sticky?
Absolutely. Just fold them into the mixture before shaping. They add crunch and extra flavor.
4. Why are my balls falling apart?
Chill the mixture for 30 minutes before rolling. Dampening your hands slightly also helps handle sticky dough.
5. Should I refrigerate or freeze the balls?
Make sure the mixture is well combined and chilled. Overly warm or loose mixture won’t hold shape.
6. How long can I store these?
Refrigerate for up to a week or freeze for 3 months. Keep in airtight containers to prevent freezer burn or fridge odor.
7. How should I serve them after chilling?
Chill in the fridge for firm, chewy texture. For softer bites, let sit at room temp for a few minutes before serving.
8. How do I get a smooth chocolate coating?
Melt chocolate gently in short bursts, stirring in between. Use a splash of coconut oil for a shiny finish.
9. What if the chocolate cracks or flakes?
If the chocolate cracks, let it cool slightly before dipping, or chill the coated balls to set.
10. Can I customize the ingredients?
Yes! Oats are versatile. You can swap with crushed graham crackers, rice cereal, or shredded coconut for variety.
These no-bake peanut butter balls are a reminder that simple ingredients can deliver big comfort. I often turn to them when I need something quick, satisfying, and nostalgic. Sometimes, the best treats are the ones you can whip up with your hands and a little patience.
They’re perfect for a quick snack or a casual get-together, and I find myself reaching for them more often than I’d admit. Despite their humble origins, they carry a warmth that feels just right, especially when the pantry is bare but the craving is real.
 Hello, I’m Emily Richardson, the heart and soul behind Playing with Flavors. Cooking isn’t just a hobby for me – it’s a passion that I’ve cultivated for years, and it’s become the driving force of my life.
From the kitchen of my cozy café to the pages of this blog, every dish I create is a reflection of my love for food and the joy it brings to people.
Hello, I’m Emily Richardson, the heart and soul behind Playing with Flavors. Cooking isn’t just a hobby for me – it’s a passion that I’ve cultivated for years, and it’s become the driving force of my life.
From the kitchen of my cozy café to the pages of this blog, every dish I create is a reflection of my love for food and the joy it brings to people.


