Blog

  • Hidden Gem: Ginger-Infused Butternut Squash Soup

    Hidden Gem: Ginger-Infused Butternut Squash Soup

    As autumn leaves crunch beneath my boots, I rediscover the delight of seasonal soups. This Butternut Squash Soup with Ginger isn; just another comforting bowl; it;s a culinary hug that awakens my senses. The subtle heat from fresh ginger adds a layer of warmth that feels like a secret handshake with fall.

    What makes this recipe stand out is its simplicity paired with a magic touch of spice. I love how a splash of coconut milk can turn it silky, almost velvety, making each spoonful feel indulgent. It’s perfect for cozy weekend mornings or a quick weekday supper when comfort calls.

    Butternut Squash Soup with Ginger

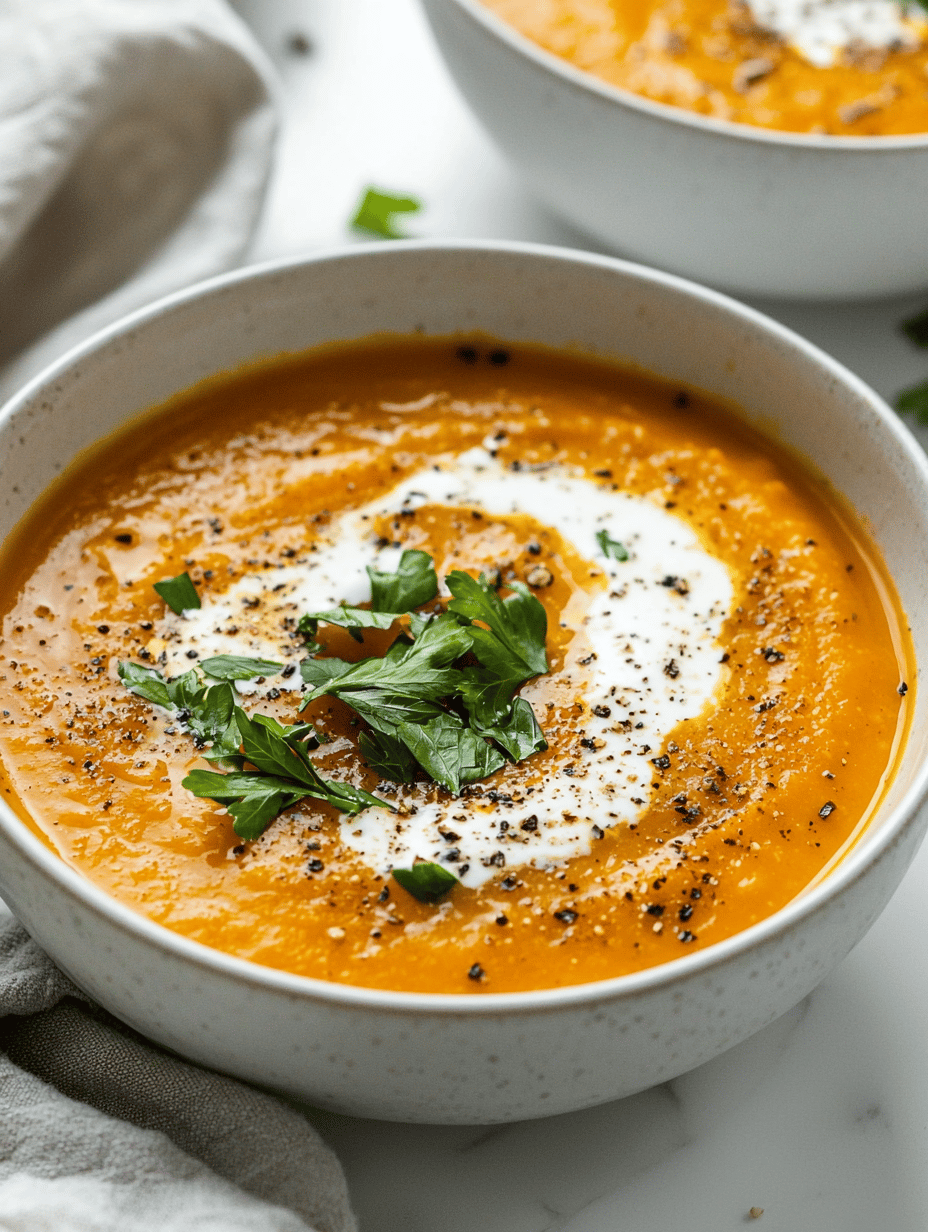
    This butternut squash soup is made by roasting or sautéing diced squash until tender, then blending it with aromatics and fresh ginger to create a smooth, velvety texture. The result is a warm, creamy soup with a hint of spice and the richness of coconut milk, showcasing a vibrant orange color and silky consistency.
    Prep Time 10 minutes
    Cook Time 30 minutes
    Total Time 40 minutes
    Servings: 4
    Course: Main Course
    Cuisine: Comfort Food, Fall
    Calories: 250

    Ingredients
      

    • 1 medium butternut squash peeled, seeded, and diced
    • 1 tablespoon olive oil
    • 1 inch fresh ginger peeled and minced
    • 1 small onion chopped
    • 2 cloves garlic minced
    • 4 cups vegetable broth
    • 1 can coconut milk full-fat for creaminess
    • to taste salt and pepper

    Equipment

    • Sharp Knife
    • Large Pot or Dutch Oven
    • Immersion blender or regular blender
    • Measuring cups and spoons
    • Cutting Board

    Method
     

    1. Heat the olive oil in a large pot over medium heat until shimmering and fragrant.
    2. Add the chopped onion and minced garlic to the pot. Cook, stirring occasionally, until the onion becomes translucent and fragrant, about 3-5 minutes.
    3. Stir in the minced ginger and cook for another minute, allowing the fresh spice to release its aroma.
    4. Add the diced butternut squash to the pot, stirring to coat with the aromatics.
    5. Pour in the vegetable broth, ensuring the squash is mostly submerged. Increase the heat and bring the mixture to a gentle boil.
    6. Reduce the heat to low, cover the pot, and let it simmer until the squash is tender when pierced with a fork, about 20 minutes.
    7. Use an immersion blender or transfer the soup in batches to a blender. Blend until smooth and velvety, with a bright orange hue.
    8. Return the blended soup to the pot if necessary, then stir in the coconut milk for richness and a silky texture.
    9. Heat the soup gently, tasting and seasoning with salt and pepper as needed, to balance the flavors.
    10. Once heated through and well-seasoned, ladle the soup into bowls and serve hot, with optional garnishes like a swirl of coconut milk or fresh herbs.

    Making this soup is like a little ritual that levels up my week. The aroma of roasted squash and ginger wafts through the kitchen, creating instant nostalgia. It’s a reminder that sometimes, the best moments are rooted in honest, uncomplicated flavors.

    As the season shifts, this soup remains a favorite—flexible, warm, and deeply satisfying. It’s proof that great meals don’t need to be complicated to bring comfort and joy at the same time.

  • Chill Out with an Unusual Kool Aid Slushie Twist

    Chill Out with an Unusual Kool Aid Slushie Twist

    Imagine curling up on a hot summer day, but instead of the usual glass of lemonade, you surprise yourself with a vibrant, icy Kool Aid slushie. This recipe isn’t just about chilling; it’s about relishing a childhood classic reimagined with a splash of chaos and nostalgia. The aroma of sweet, tangy fruit syrup swirling in icy crystals instantly transports you to lazy afternoons of yesteryear.

    What makes this drink so special is its versatility. You can experiment with intense flavors or stick to the tried-and-true recipes that remind you of simpler times. It’s easily customizable and perfect for spontaneous gatherings, making every sip a small celebration of summer’s playful spirit.

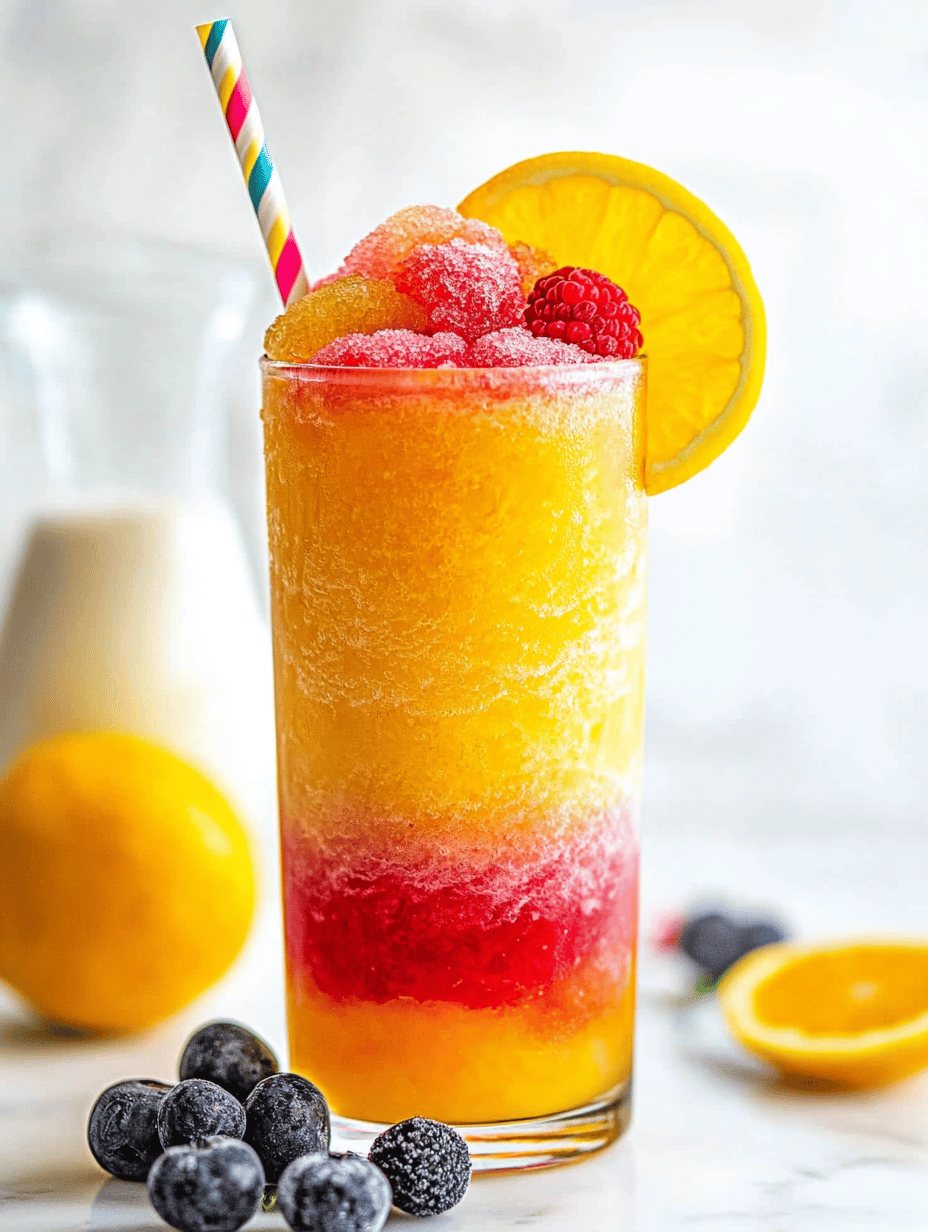
    Vibrant Kool Aid Slushie

    This Kool Aid slushie is a frozen beverage made by mixing sweet fruit syrup with crushed ice, then blending until smooth. The final texture is icy and refreshing, with a vivid, colorful appearance that captures the nostalgic charm of childhood drinks.
    Prep Time 5 minutes
    Total Time 5 minutes
    Servings: 2
    Course: Main Course
    Cuisine: American
    Calories: 80

    Ingredients
      

    • 1 cup crushed ice preferably finely crushed for better blending
    • 1/4 cup Kool Aid powder choose your favorite flavor
    • 2 tbsp sugar optional, adjust for sweetness
    • 1/2 cup cold water to dissolve the Kool Aid and sugar

    Equipment

    • Blender
    • Measuring cups and spoons
    • Ice crusher or plastic bag and mallet

    Method
     

    1. Measure out the Kool Aid powder, sugar, water, and crushed ice. Prepare your blender and have everything ready to go.
    2. In a small bowl, whisk together the Kool Aid powder, sugar, and water until the powder and sugar are fully dissolved. This creates a concentrated syrup.
    3. Add the crushed ice to the blender. Pour the prepared Kool Aid syrup over the ice.
    4. Secure the lid on the blender and blend on high until the mixture is slushy, smooth, and icy. This usually takes about 30 seconds to 1 minute.
    5. Stop the blender and check the texture; it should be thick, icy, and bright in color. If needed, blend a few more seconds for a finer slush.
    6. Pour the chilled Kool Aid slushie into glasses. Optional: garnish with a slice of fruit or a colorful straw for presentation.

    Notes

    For a smoother texture, you can pre-freeze some of the syrup or use pre-crushed ice. Feel free to experiment with different flavors by mixing multiple Kool Aid packs.

    This Kool Aid slushie isn’t just a beverage; it’s an invitation to relive carefree moments and create new memories. Whether served as a solo treat or shared with friends, it always sparks joy. Sometimes, the simplest pleasures truly offer the sweetest escapes.

    As we embrace seasonal heat and nostalgic cravings, this icy delight reminds us to keep things fresh and fun. No matter your age, it promises a burst of refreshment that’s hard to beat on a sunny day.

  • The Secret Art of Crafting an Iced Tea Slushie That Wow1

    The Secret Art of Crafting an Iced Tea Slushie That Wow1

    As a food blogger obsessed with unconventional summer treats, I stumbled upon a hidden gem: the iced tea slushie. What makes this recipe stand out is the way it transforms your favorite brewed tea into a crunchy, icy delight that cools and invigorates in every sip. It’s like a brisk walk in a garden on a hot day—refreshing and full of aromatic surprises.

    This recipe challenges the typical cold beverage routine. Instead of just pouring a glass of tea over ice, it melds tea, ice, and a hint of fruit juice into a frosty harmony. You get that satisfying crunch with every sip and a flavor burst that makes you crave another glass, even on the hottest days.

    Iced Tea Slushie

    This iced tea slushie transforms brewed tea into a crunchy, icy treat through blending and freezing. The mixture, combined with fruit juice, creates a frozen, granular texture with a vibrant flavor. The final appearance resembles a frosty, textured beverage perfect for hot days.
    Prep Time 10 minutes
    Total Time 10 minutes
    Servings: 2
    Course: Main Course
    Cuisine: International
    Calories: 80

    Ingredients
      

    • 2 cups brewed black tea cooled
    • 1 cup fruit juice (e.g., orange or apple)
    • 1 cup ice cubes preferably small or crushed

    Equipment

    • Teapot or kettle
    • Blender
    • Freezer-proof container
    • Measuring cups and spoons

    Method
     

    1. Brew the black tea and let it cool completely to room temperature or chill in the refrigerator for faster cooling.
    2. Pour the cooled tea into a blender, then add the fruit juice for a hint of sweetness and flavor.
    3. Sprinkle in the ice cubes and secure the lid on the blender.
    4. Blend the mixture on high speed until the ice is finely crushed and the mixture has a slushy, granular texture.
    5. Taste the slushie and add more fruit juice if a sweeter flavor is desired; briefly pulse to incorporate.
    6. Pour the frozen, granulated slushie into glasses, using a spoon or spatula to serve if needed.
    7. Enjoy immediately with a straw and a fun follow-up photo to showcase the crunchy, icy texture.

    This iced tea slushie feels like a quirky summer secret, one that turns an ordinary brew into a spectacular cold treat. It’s perfect when you want something different yet familiar, with a hint of playful chaos in every spoonful.

    As the season heats up, this recipe offers a cool escape—simple to make but surprisingly satisfying. Whether hosting a backyard gathering or just craving a moment of refreshment, this icy twist on tea is ready to delight and surprise at every turn.

  • Velvety Vegan Pumpkin Soup with a Twist of Ginger

    Velvety Vegan Pumpkin Soup with a Twist of Ginger

    As the leaves turn and the air crisps, I find myself craving a soup that is both comforting and invigorating. This vegan pumpkin soup is not your average blend—I’ve infused it with a splash of fresh ginger and a hint of lime to brighten every spoonful. It’s a warm hug that awakens your senses, perfect for that cozy fall afternoon.

    What sets this recipe apart is the unexpected twist of flavors. Often, pumpkin soups lean into sweetness and creaminess alone, but here, the zing of ginger and the citrusy pop of lime make each bite lively. Plus, it’s entirely plant-based, so even vegans and those exploring meatless meals can indulge guilt-free. It’s a bowl of seasonal paradise that manages to be both hearty and fresh.

    Vegan Pumpkin Soup with Ginger and Lime

    This vegan pumpkin soup combines roasted pumpkin with fresh ginger and lime juice, resulting in a smooth, velvety consistency with a bright, zesty flavor. The soup is prepared by roasting, blending, and simmering until creamy, creating a dish that is both hearty and invigorating, with a warm orange hue and a silky texture.
    Prep Time 15 minutes
    Cook Time 30 minutes
    Total Time 45 minutes
    Servings: 4
    Course: Main Course
    Cuisine: Vegan
    Calories: 180

    Ingredients
      

    • 1 kg butternut squash or pumpkin, peeled and cubed preferably roasted for deeper flavor
    • 2 tablespoons olive oil for roasting
    • 1 inch fresh ginger, grated adds zing and warmth
    • 3 cups vegetable broth for simmering and blending
    • 1 lime lime, juiced brightens the flavor
    • to taste salt and pepper season to preference

    Equipment

    • Baking Sheet
    • Large pot
    • Immersion blender or regular blender
    • Chef’s knife
    • Cutting Board

    Method
     

    1. Preheat your oven to 400°F (200°C). Spread the cubed pumpkin or butternut squash on a baking sheet, drizzle with olive oil, and toss to coat evenly.
    2. Roast the pumpkin in the oven for about 25-30 minutes, until the edges are golden and the flesh is tender when pierced with a fork.
    3. While the pumpkin roasts, chop or grate the fresh ginger to prepare it for adding to the soup.
    4. Transfer the roasted pumpkin into a large pot and add the vegetable broth. Bring to a gentle simmer over medium heat.
    5. Add the grated ginger to the simmering soup and cook for about 5 minutes to allow the flavors to meld.
    6. Use an immersion blender or transfer the soup in batches to a blender and purée until smooth and creamy, then return to the pot.
    7. Stir in the lime juice and season with salt and pepper to taste, adjusting according to your preference.
    8. Heat the soup gently for another minute just to warm through, then taste and adjust the seasoning if needed.
    9. Ladle the vibrant orange soup into bowls, garnishing with a splash of lime or freshly chopped herbs if desired.
    10. Serve the soup hot, enjoying the velvety texture and zesty flavors with your favorite crusty bread.

    Notes

    For an extra richness, add a splash of coconut milk before blending. Leftovers can be refrigerated for up to 3 days and reheated gently.
    This vegan pumpkin soup is a celebration of seasonal ingredients and inventive flavor pairing. It’s perfect for a quick weekday dinner or a leisurely weekend lunch. I love how the aroma alone sparks memories of open fires and falling leaves.

    And because it’s so adaptable, you can add your favorite toasted seeds or a swirl of coconut cream to make it uniquely yours. In a season where comfort food takes center stage, this vibrant soup adds a touch of spice and sunshine to any table. It’s a simple reminder that plant-based dishes can be both exciting and soul-satisfying.

  • Spooky Delights: Halloween Deviled Egg Eyeballs

    Spooky Delights: Halloween Deviled Egg Eyeballs

    As a food blogger obsessed with all things spooky, I love transforming classic snacks into creepy Halloween treats. These deviled egg eyeballs are a perfect example, blending familiar flavors with a touch of graphically horrifying fun. The moment I unveil them at parties, I hear delighted squeals and see wide-eyed reactions.

    Creating edible eyeballs was initially a joke my friends loved, but now it’s a seasonal tradition. The tactile experience of slicing into these egg-eyes, revealing their vividly colored centers, elevates any festive table. Plus, they’re surprisingly easy to whip up once you have the ingredients ready.

    Deviled Egg Eyeballs

    Deviled egg eyeballs are a spooky Halloween appetizer featuring halved boiled eggs filled with a savory, creamy yolk mixture. The finished dish resembles bloodshot eyeballs with vividly colored centers, combining smooth textures with a striking visual effect.
    Prep Time 15 minutes
    Cook Time 10 minutes
    Total Time 25 minutes
    Servings: 12
    Course: Main Course
    Cuisine: Halloween
    Calories: 70

    Ingredients
      

    • 6 large eggs for boiling
    • 2 tablespoons mayonnaise adds creaminess
    • 1 teaspoon yellow mustard for tangy flavor
    • 1/4 teaspoon paprika optional, for color
    • few drops red food coloring for bloodshot appearance
    • 1 small olive for the

    Equipment

    • Saucepan
    • Mixing bowl
    • Slotted spoon
    • Piping bag or plastic sandwich bag
    • Small spoon
    • Knife

    Method
     

    1. Place the eggs in a saucepan and cover with cold water. Bring to a boil over medium-high heat, then turn off the heat and cover. Let sit for 10 minutes to cook through, then transfer to ice water to cool completely.
    2. Peel the cooled eggs carefully, then slice each egg in half lengthwise. Gently remove the yolks and place them in a mixing bowl.
    3. Mash the yolks with mayonnaise, mustard, and a pinch of paprika until smooth and creamy. The mixture should be thick but spreadable.
    4. Add a few drops of red food coloring to the yolk mixture, stirring until the center appears vividly red, mimicking an eyeball “pupil.”
    5. Spoon the red-colored yolk mixture into a piping bag or plastic sandwich bag fitted with a small tip. Pipe or spoon the mixture back into the hollowed egg whites, filling them fully.
    6. Slice the olive into tiny rounds to create realistic pupils. Carefully place an olive slice in the center of each filled egg half.
    7. Using strips of red bell pepper, create bloodshot “veins” by placing small bits across the egg whites around the pupils for a bloodshot eye effect.
    8. Arrange the egg halves on a serving platter. Optionally, sprinkle with extra paprika for color or add more red accents for a more realistic bloodshot look.
    9. Chill the deviled egg eyeballs in the refrigerator for 10-15 minutes to set and serve chilled for a spooky, creepy presentation.

    Notes

    You can customize the bloodshot effect with more or fewer red accents or different colored centers for a variety of spooky looks.
    These creepy but delightful deviled egg eyeballs are more than just a festive dish; they tell a story of simple ingredients turned into a visual scare. Whether for a Halloween party or a themed dinner, they bring both joy and a little chaos.

    Making these was a reminder that food is best when it surprises and delights. They’re a conversation-starting centerpiece that’s as fun to eat as they are to craft. Who knew something so ghoulish could be so delicious?

  • Unconventional Vodka Slushies: The Secret Ingredient Twist

    Unconventional Vodka Slushies: The Secret Ingredient Twist

    Most people think of vodka slushies as simple summer treats—sweet, icy, and straightforward. But what if I told you there’s an unexpected ingredient that can transform this frozen classic into an adult palate adventure? Imagine infusing your slush with fresh herbs, spicy peppers, or even a splash of unexpected fruit juice to amp up the flavor.

    This approach not only elevates the drink but also makes it a conversation starter at parties. Plus, it’s surprisingly easy to customize based on what’s in your pantry or garden. Let’s explore how a little twist can make your vodka slushie unforgettable.

    Herb-Infused Vodka Slushie

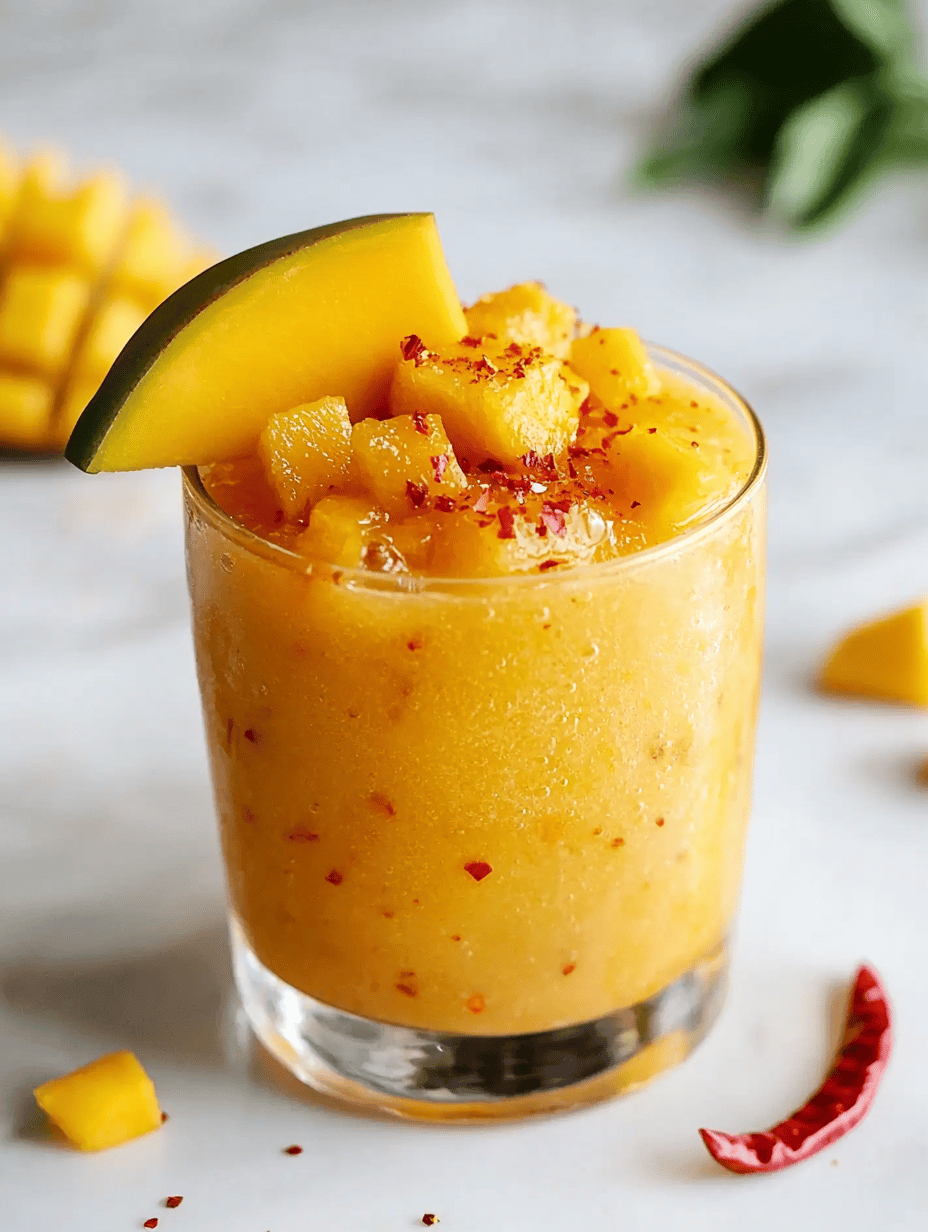
    This vodka slushie features the use of fresh herbs and fruit juices blended with ice to create a icy, flavorful frozen beverage. The mixture is pureed until smooth, resulting in a bright, slushy texture with vibrant appearance. Perfect as a refreshing adult treat for warm days or parties.
    Prep Time 10 minutes
    Total Time 10 minutes
    Servings: 4
    Course: Main Course
    Cuisine: American
    Calories: 150

    Ingredients
      

    • 2 cups ice cubes crushed or regular
    • 1/2 cup fresh herbs (such as mint or basil) packed
    • 1 cup fruit juice (e.g., pineapple, mango, or orange) preferably chilled
    • 1/2 cup vodka your choice of quality
    • 1 tablespoon honey or simple syrup optional, for sweetness

    Equipment

    • Blender
    • Measuring cups and spoons

    Method
     

    1. Place the ice cubes into the blender, filling it about halfway to ensure easy blending.
    2. Add the fresh herbs to the blender to infuse the mixture with vibrant, aromatic flavor.
    3. Pour in the chilled fruit juice and measure in the vodka, balancing the fruity and boozy elements.
    4. If desired, drizzle honey or simple syrup into the blender for added sweetness.
    5. Secure the lid on the blender and blend on high until the mixture is completely smooth and slushy, about 30-45 seconds. You should see the ice become finely crushed and the herbs well integrated.
    6. Pause briefly to check the consistency; if it’s too thick, add a splash of additional juice or vodka and blend again until creamy and scoopable.
    7. Pour the frozen herb-infused vodka slushie into chilled glasses, garnishing with extra herbs or a slice of fruit if desired for a beautiful presentation.

    Creating an extraordinary vodka slushie doesn’t require fancy equipment or exotic ingredients. Just a good-quality vodka, some creative additions, and a freezer can turn your ordinary siesta into an event. These drinks are perfect for warming up a summer evening or adding a cool surprise to your brunch table.

    As the seasons shift, so do your flavor ideas. Keep experimenting, enjoy the chaos, and let your taste buds lead the way. Sometimes, the most unexpected mix becomes the most cherished memory on a hot day.

  • A Secret Twist on Classic Tomato Sauce That Will Change Your Dinner

    A Secret Twist on Classic Tomato Sauce That Will Change Your Dinner

    This isn3;t just about making a sauce; it3;s about transforming a simple ingredient into a nostalgic memory or a new tradition. Whether you drizzle it over pasta, spoon it on grilled bread, or swirl it into a comforting casserole, this sauce adapts to your mood and your plate. Here3;s to cooking with intention, one flavorful drop at a time.

    Tomato Basil Marinara Sauce

    This marinara sauce is made by simmering ripe tomatoes with garlic, onions, and fresh basil to develop a rich, flavorful base. The sauce transforms from a chunky mixture into a smooth, vibrant red consistency with a fragrant aroma and thick texture, perfect for pairing with pasta or other dishes.
    Prep Time 10 minutes
    Cook Time 30 minutes
    Total Time 40 minutes
    Servings: 4
    Course: Main Course
    Cuisine: Italian
    Calories: 120

    Ingredients
      

    • 4 cups ripe tomatoes chopped
    • 3 cloves garlic minced
    • 1 medium onion finely chopped
    • 2 cups fresh basil leaves chopped
    • 2 tablespoons olive oil
    • 1 teaspoon salt
    • 0.5 teaspoon black pepper

    Equipment

    • Colonel
    • Saucepan

    Method
     

    1. Heat the olive oil in a saucepan over medium heat until shimmering.
    2. Add the chopped onion to the pan and sauté for 5 minutes, stirring occasionally until translucent and fragrant.
    3. Stir in the minced garlic and cook for another 30 seconds, just until fragrant and slightly golden.
    4. Add the chopped tomatoes to the pan, stirring to combine, and bring to a simmer.
    5. Reduce the heat to low and let the mixture simmer uncovered for about 20-25 minutes, stirring occasionally, until the tomatoes break down and the sauce thickens.
    6. Stir in the chopped basil, salt, and black pepper, then cook for an additional 5 minutes to let the flavors meld.
    7. Optional: use an immersion blender to puree the sauce until smooth, or leave it chunky based on preference.
    8. Once the sauce has reached your desired consistency and aroma, remove from heat and serve over your favorite pasta or dish.
    This tomato sauce isn3;t just a recipe; it3;s a homecoming of flavors that celebrates tradition with a twist. Each batch is a warm, fragrant reminder that good food is about experimenting and embracing imperfections.

    As the seasons change and our kitchens fill with familiar scents, this sauce becomes more than ingredients—it becomes part of the story you3;re telling with every meal.

  • Chill Out with an Oreo Slushie: A Cooler Than Cool Dessert

    Chill Out with an Oreo Slushie: A Cooler Than Cool Dessert

    Sometimes, the best desserts are the simplest but with a surprising twist that sparks childhood memories. Enter the Oreo slushie—a frozen, creamy treat that combines the nostalgia of Oreos with the refreshing punch of a cold drink. What makes this especially fun is how effortlessly you can transform everyday cookies into a frosty delight.

    This recipe isn’t just about coolness; it’s about embracing the chaos of blending, the aroma of chocolate cookies mingling with sweet milk, and the satisfying crunch in every sip. Perfect for hot afternoons or a spontaneous get-together, it promises a moment of joy with minimal ingredients and maximum flavor.

    Oreo Slushie

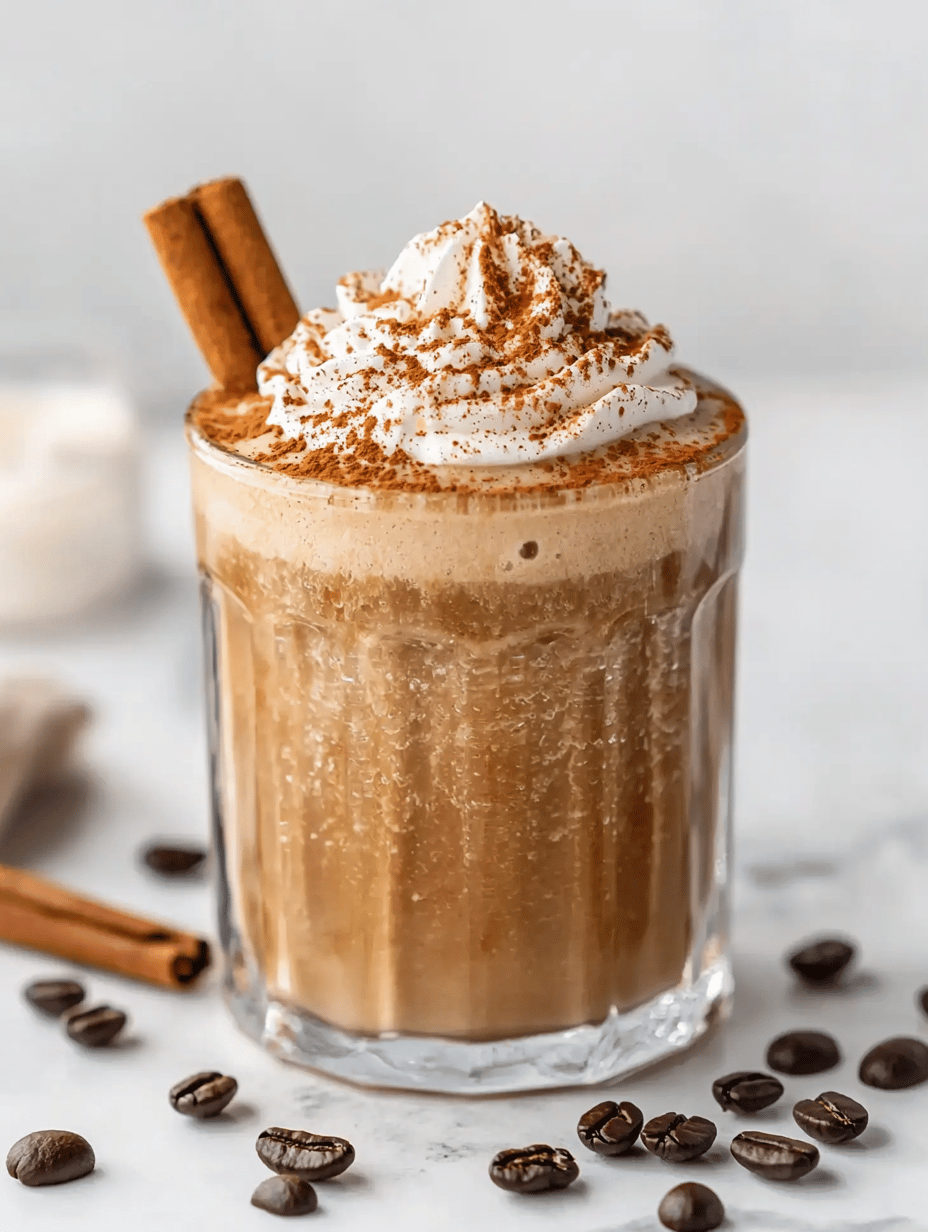
    The Oreo slushie is a frozen, creamy beverage made by blending crushed Oreo cookies with milk and sweetener until smooth. It has a thick, frosty texture with visible cookie chunks, resulting in a refreshing treat that combines chocolatey crunch with cold refreshment. Perfect for hot days or spontaneous indulgence, it’s a simple dessert in drink form.
    Prep Time 5 minutes
    Total Time 5 minutes
    Servings: 2
    Course: Main Course
    Cuisine: Dessert
    Calories: 290

    Ingredients
      

    • 8 cookies Oreo cookies preferably with filling
    • 1 cup milk cold, whole or 2% milk
    • 2 tablespoons granulated sugar optional, for sweetness

    Equipment

    • Blender
    • Measuring cups and spoons

    Method
     

    1. Place the Oreo cookies in a blender jar.
    2. Add the cold milk and granulated sugar to the blender.
    3. Secure the lid on the blender and blend on high until the mixture is smooth and creamy, with no large cookie pieces remaining.
    4. Stop the blender and check the consistency—if it’s too thick, add a splash more milk and blend briefly again.
    5. Pour the blended mixture into glasses, filling each about three-quarters full.
    6. Optionally, garnish with extra crushed Oreos or a dollop of whipped cream for presentation.
    7. Serve immediately with a straw or spoon for a thick, frosty treat.

    Notes

    For an extra chocolatey flavor, add a small spoonful of cocoa powder before blending.

    There’s something incredibly satisfying about biting into a crunchy Oreo or savoring the last icy sip of the slushie—like a trip down memory lane with a modern twist. Whether you’re seeking a quick dessert or a crowd-pleaser, this recipe scales easily, brightening any day.

    Enjoy the process and the delicious results. Sometimes, the simplest ideas turn out to be the most memorable. Keep your blender ready; this treat is worth the little mess it might make on your counter.

  • Spook-tacular Pumpkin Rice Krispie Treats with a Twist

    Spook-tacular Pumpkin Rice Krispie Treats with a Twist

    As October winds down, I look for ways to make Halloween parties unforgettable. This year, I decided to transform the classic rice Krispie treats into something festive and surprising—pumpkin-shaped treats that burst with seasonal flavor. The whole house smells like caramelized sugar and warm spices as I work on these little jack-o’-lanterns.

    What sets these treats apart is the playful way they blend childhood nostalgia with Halloween fun. Whether you’re tossing a spook-themed bash or just craving something sweet and cheesy, these pumpkin treats fit right into the fall mood. Plus, they’re surprisingly easy to make, even with a touch of creative chaos in the kitchen.

    Pumpkin-Shaped Rice Krispie Treats

    These pumpkin-shaped Rice Krispie treats are made by combining melted marshmallows with crispy rice cereal, then shaping the mixture into small pumpkins. The final treats have a soft, chewy texture with a festive appearance, often decorated with streaks of caramel or chocolate to resemble pumpkins. They are quick to prepare and fun to customize with Halloween-themed details.
    Prep Time 15 minutes
    Cook Time 10 minutes
    Total Time 25 minutes
    Servings: 12
    Course: Main Course
    Cuisine: Fall, Halloween
    Calories: 120

    Ingredients
      

    • 10 cups marshmallows large mini or regular marshmallows
    • 4 tablespoons unsalted butter
    • 6-7 cups rice cereal rice Krispies
    • orange food coloring orange food coloring for coloring the treats
    • optional chocolate or caramel for decorating pumpkin faces or streaks
    • to taste sprinkles or edible glitter for added decoration

    Equipment

    • Large saucepan
    • 16-inch silicone mold or hands for shaping

    Method
     

    1. Grease your silicone mold or prepare a clean, flat work surface for shaping the treats.
    2. Melt the butter in a large saucepan over low heat until it is just melted and begins to bubble lightly.
    3. Add the marshmallows to the melted butter, stirring constantly until completely melted and smooth, filling the air with a sweet vanilla aroma.
    4. Remove the saucepan from heat, then add a few drops of orange food coloring, stirring until the mixture is a vibrant pumpkin orange.
    5. Gradually fold in the rice cereal, stirring gently until evenly coated and the mixture is thick and slightly sticky.
    6. Once the mixture is combined, let it cool slightly so it’s easier to handle.
    7. Take a handful of the mixture and press it into a small, rounded pumpkin shape, about 2-3 inches in diameter, using your hands or a mold.
    8. Repeat with the remaining mixture, placing each shaped treat on a baking sheet lined with parchment paper.
    9. Use a toothpick or small piping bag to add decorative streaks of caramel or chocolate to mimic pumpkin ridges or faces for a spooky touch.
    10. Let the treats set at room temperature for about 15-20 minutes until firm to the touch.
    11. Optionally, add sprinkles or edible glitter on top for extra festive flair before serving.
    12. Enjoy these soft, chewy pumpkin treats that are perfect for Halloween parties or cozy fall gatherings.

    Notes

    Make sure to work quickly when shaping the treats before they set. For best appearance, decorate with contrasting colors and fun facial features.
    These Halloween Pumpkin Rice Krispie Treats are more than just a sweet snack—they’re a conversation starter. Watching friends and family marvel at your spooky creations makes all the extra effort worthwhile.

    This season, let these treats add a bit of fun to your festivities. Their cheerful orange hue and crispy texture are perfect for any autumn gathering. After all, sometimes the simplest recipes make the biggest memories.

  • The Surprising Nostalgia of a Sprite Slushie

    The Surprising Nostalgia of a Sprite Slushie

    Have you ever wondered how a simple soda can become a portal to childhood happiness? A Sprite slushie is more than just a cold drink; it’s a frozen trip back to summer afternoons and carefree laughter. The bright lemon-lime sparkle in each icy bite sparks a playful chaos, especially when you toss in fresh fruit and a splash of imagination.

    Whole families crave this refreshing treat when the heat hits its peak. It’s a no-fuss recipe that turns your kitchen into a mini frozen paradise. The secret lies not only in the ingredients but in the messy joy of making it yourself, tapping into a nostalgic rush that’s impossible to resist.

    Sprite Slushie

    A Sprite slushie is a frozen beverage made by combining lemon-lime soda with crushed ice, resulting in a bright, icy treat. The texture is crisp and chewy, with a vibrant, bubbly appearance topped with fresh fruit or colorful garnishes for added visual appeal. It’s a simple, fun recipe that captures the nostalgic feeling of summer fun in every icy bite.
    Prep Time 10 minutes
    Total Time 10 minutes
    Servings: 4
    Course: Main Course
    Cuisine: American
    Calories: 150

    Ingredients
      

    • 2 cups crushed ice preferably finely crushed or fresh ice
    • 1 bottle Sprite cold, about 12 oz
    • 1 cup fresh fruit strawberries, blueberries, or citrus segments for garnish

    Equipment

    • Blender
    • Measuring cups

    Method
     

    1. Place the crushed ice into a blender, filling it about halfway.
    2. Pour the cold Sprite over the ice in the blender, allowing it to mix with the crushed ice.
    3. Blend on high speed until the mixture is smooth, slushy, and slightly frothy with a vibrant lemon-lime color.
    4. Pour the slushie mixture into glasses, stopping once the desired volume is reached.
    5. Garnish each glass with fresh fruit or colorful slices to add visual appeal and extra flavor.
    6. Serve immediately with a straw or spoon to enjoy the icy, bubbly texture that is both refreshing and fun to eat.

    Notes

    For a more intense frozen texture, add a handful of ice cubes and blend longer. You can also mix in fresh fruit or a splash of fruit juice for variation.

    As the days get warmer, a Sprite slushie offers a quick escape from the ordinary. It’s perfect for spontaneous gatherings or solo refreshment when you need a burst of citrusy joy. This recipe reminds us that sometimes, simple things done right bring the biggest smiles.

    Let it remind you to embrace the chaos and celebrate the little, sweet moments of summer. Cheers to cold hands, sparkling smiles, and memories frozen in time—ready to be recaptured with each icy sip.

    }