
In the middle of a busy day, I often crave a little something sweet without the fuss of baking. These no-bake chocolate oat bites are my go-to because they come together quickly and feel like a small act of kindness. It’s surprising how a handful of simple ingredients can turn into a comforting treat that satisfies both the sweet tooth and the need for a moment of calm.
What I love most is how adaptable they are — you can tweak the nuts, add a dash of sea salt, or toss in dried fruit for a fresh twist. They’re perfect for when I want something wholesome but don’t want to turn on the oven or drag out too many utensils. Sometimes, I stash a few in the freezer for those days when I need a quick, satisfying pick-me-up.
This recipe is more than just a snack; it’s a little ritual of mindfulness. When life feels overwhelming, making these bites reminds me that simple, honest ingredients can create a moment of comfort. It’s a small, sweet reminder that sometimes, the best things are quick, honest, and just a bit messy.
This recipe is a testament to how simplicity can be a form of therapy. When life feels hectic, these no-bake bites offer a quiet moment of reward, a small act of kindness in the chaos.
A Cozy, No-Bake Comfort
- These bites remind me of childhood afternoons, when my mom would toss oats and chocolate into a bowl with a sprinkle of love.
- I feel a rush of pride every time I pull a batch from the fridge, knowing I put together something so simple and satisfying.
- There’s a quiet joy in the mess of mixing everything by hand, feeling the sticky chocolate warm my fingertips.
- Whenever I share these with friends, I see their smiles light up—simple, honest comfort in every bite.
A Cozy, No-Bake Comfort
This recipe came about during a particularly hectic week when I needed something quick, nourishing, and satisfying. I was craving chocolate but didn’t want to turn on the oven or deal with a lot of clean-up. One afternoon, I just grabbed whatever ingredients I had—oats, cocoa, nut butter—and mixed them up in a frenzy. The result was these bites, which quickly became my go-to for busy mornings and late-night cravings. They’re a reminder that sometimes, the simplest ingredients can create the most comforting treats, especially when you’re short on time but still want something homemade and honest.
History and Fun Facts
- This recipe has roots in resourcefulness—using pantry staples to craft a satisfying treat without heating up the kitchen.
- It likely evolved from traditional no-bake energy bites, adapted over time to focus on chocolate and oats for simplicity.
- During the early 20th century, similar recipes emerged as convenient snacks for busy households and outdoor adventures.
- The combination of oats and chocolate taps into a nostalgic comfort, recalling childhood snacks and quick homemade candies.
Key Ingredient Insights
- Rolled oats: I love their chewy texture and nutty flavor, but if you want a finer bite, pulse them briefly in a food processor before mixing. It makes the bites smoother.
- Dark chocolate: I prefer a good quality 70% bar, the deep, almost smoky notes really shine through. Swap with milk chocolate for a sweeter, creamier result—less intense but still delicious.
- Nut butter: Creamy peanut butter is my go-to, adding richness and a hint of saltiness. Almond or cashew butter works well too; just pick one that’s runny enough to stir in easily.
- Honey or maple syrup: I use honey for its floral sweetness and stickiness, but maple syrup gives a more caramel depth. Adjust the amount to keep the mixture sticky but not runny.
- Add-ins (nuts, dried fruit, seeds): I toss in chopped almonds or dried cranberries for texture and bursts of flavor. Toasted nuts add even more crunch—don’t skip the toasting if you have time.
- Salt: A pinch of sea salt brightens everything up, making the chocolate pop. Skip it if you prefer a more subdued sweetness or are watching your sodium.
- Vanilla extract: Just a splash to round out the flavors. If you don’t have any, a tiny bit of almond extract can add a different zing—experiment to find what you love.
Spotlight on key ingredients
Dark chocolate:
- Rolled oats: I love their chewy texture and nutty flavor, but if you want a finer bite, pulse them briefly in a food processor before mixing. It makes the bites smoother.
- I prefer a good quality 70% bar, the deep, almost smoky notes really shine through. Swap with milk chocolate for a sweeter, creamier result—less intense but still delicious.
- Nut butter: Creamy peanut butter is my go-to, adding richness and a hint of saltiness. Almond or cashew butter works well too; just pick one that’s runny enough to stir in easily.
Sweetener and add-ins:
- Honey or maple syrup: I use honey for its floral sweetness and stickiness, but maple syrup gives a more caramel depth. Adjust the amount to keep the mixture sticky but not runny.
- Add-ins (nuts, dried fruit, seeds): I toss in chopped almonds or dried cranberries for texture and bursts of flavor. Toasted nuts add even more crunch—don’t skip the toasting if you have time.
- Salt: A pinch of sea salt brightens everything up, making the chocolate pop. Skip it if you prefer a more subdued sweetness or are watching your sodium.
Notes for ingredient swaps
- Dairy-Free: Use coconut oil or vegan chocolate instead of butter or dairy chocolate. Expect a slightly different richness and melting point.
- Sweetener Swap: Maple syrup or agave nectar can replace honey for a vegan option. They might make the bites a tad softer and less chewy.
- Nut Butter: Swap peanut butter for almond or sunflower seed butter. The flavor shifts slightly, and the texture might be a bit thinner.
- Oats: Use gluten-free rolled oats if needed. The texture stays chewy, but ensure they’re labeled gluten-free if necessary.
- Add-ins: Dried fruits or seeds can be swapped based on what you have—dried cherries instead of cranberries, pumpkin seeds instead of chopped nuts. Expect varied bursts of flavor and texture.
- Cocoa Powder: Unsweetened cacao powder can be used for a more intense chocolate flavor. It’s a bit more bitter, so you might want to tweak the sweetener.
- Salt: Sea salt flakes can be replaced with fine table salt, but use sparingly to avoid oversalting. The salt really enhances the chocolate’s depth.
Equipment & Tools
- Mixing bowl: Combine ingredients thoroughly
- Spatula: Fold and mix ingredients evenly
- Baking sheet: Hold the bites while chilling
- Parchment paper: Prevent sticking and easy cleanup
Step-by-step guide to no bake bites
- Gather your equipment: a mixing bowl, a spatula, a baking sheet, and parchment paper. The bowl is for mixing, spatula for folding, sheet for chilling, and parchment to prevent sticking.
- In the mixing bowl, combine 1 1/2 cups rolled oats and 1/2 cup cocoa powder. Stir well until evenly distributed. This sets the base texture and flavor.
- Add 1/2 cup nut butter (peanut or almond), 1/4 cup honey or maple syrup, and 1 teaspoon vanilla extract to the dry mix. Mix thoroughly until everything feels cohesive and sticky.
- If your mixture feels too dry, splash in a little more honey or nut butter. If too wet, sprinkle in extra oats a tablespoon at a time. It should be sticky but firm enough to roll.
- Using your hands or a small scoop, form the mixture into bite-sized balls—about 1 inch diameter. Place each on the parchment-lined baking sheet. Work quickly before the mixture softens too much.
- Once all bites are formed, refrigerate for at least 30 minutes. This helps them set and firm up, making them easier to handle and less crumbly.
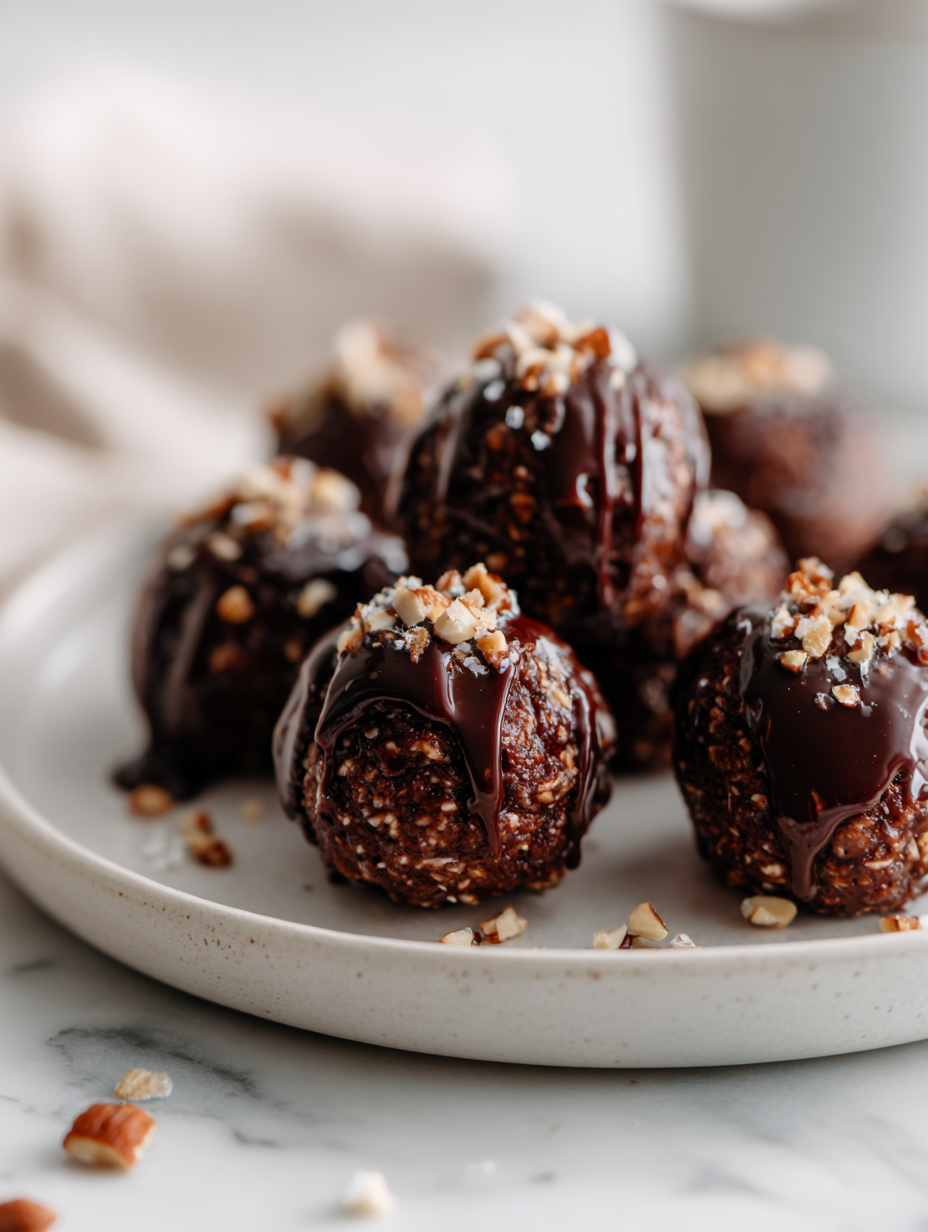
- After chilling, if desired, roll each bite in crushed nuts, shredded coconut, or cocoa powder for extra texture and visual appeal. Return to fridge for 10 minutes to set toppings.
- Serve straight from the fridge or at room temperature. Store leftovers in an airtight container in the fridge for up to a week, or freeze for longer storage.
Chill the bites in the fridge for at least 30 minutes until firm. Serve directly from fridge or at room temp. Keep leftovers refrigerated in an airtight container for up to a week.
How to Know It’s Done
- Bites feel firm and hold shape when pressed.
- Chocolate is set and slightly matte, not shiny or sticky.
- Texture is chewy with a slight snap when bitten.
No-Bake Chocolate Oat Bites
Ingredients
Equipment
Method
- Begin by measuring out the oats and cocoa powder into a large mixing bowl, then stir them together until evenly combined. This creates the flavorful dry base with a chewy texture.
- Add the nut butter, honey (or maple syrup), and vanilla extract to the dry mixture. Use a spatula to thoroughly stir everything together, pressing and folding until the mixture becomes sticky and cohesive. It should feel slightly tacky but hold together when pressed.
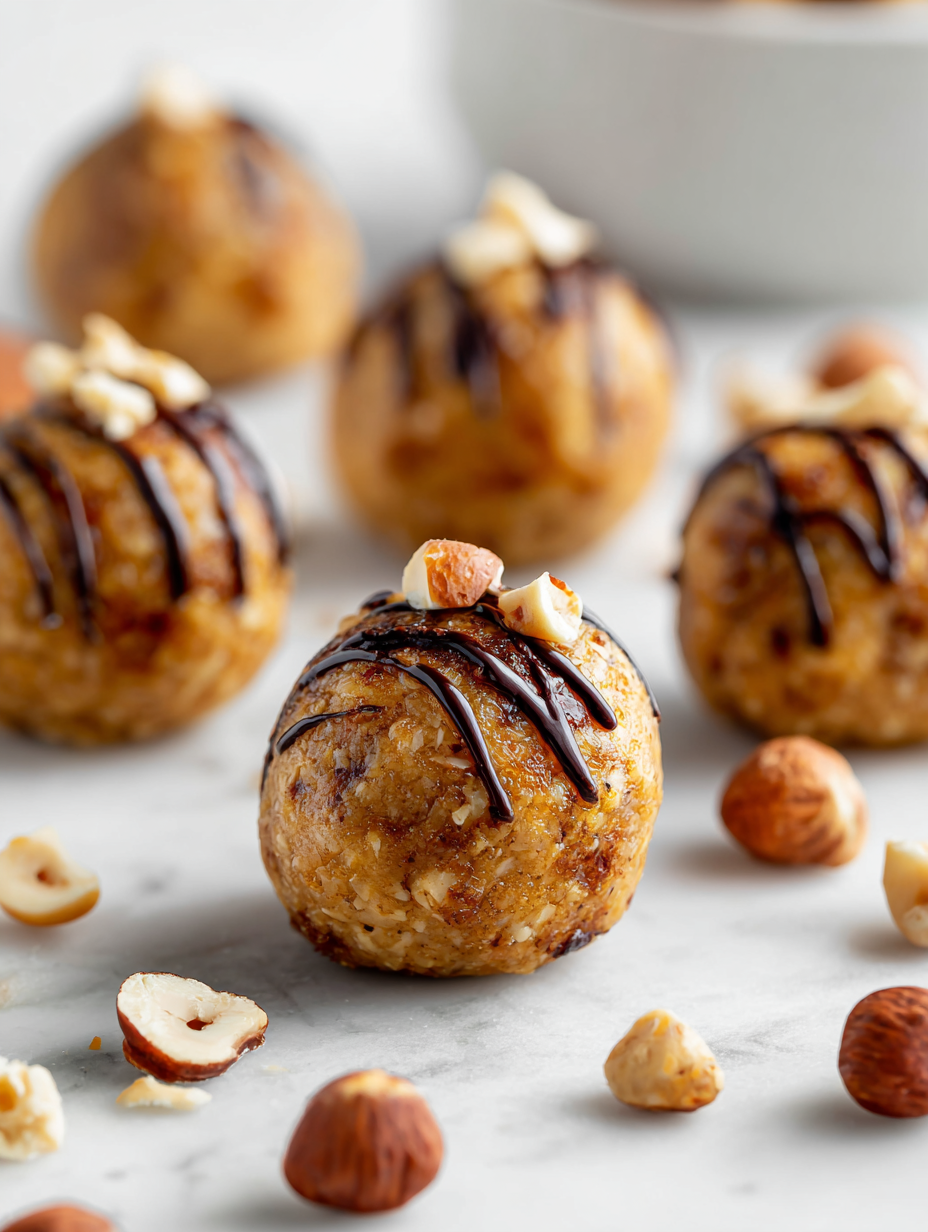
- If desired, fold in chopped nuts or dried fruit for added texture and flavor bursts. This step is optional but recommended for extra crunch or sweetness.
- Use your hands or a small scoop to portion out about 1-inch-sized amounts of the mixture. Roll each into a ball between your palms, pressing firmly to ensure they hold their shape. Place each ball onto a parchment-lined baking sheet.
- Once all the bites are shaped, sprinkle a tiny pinch of sea salt on top of each for a subtle savory contrast. Then, refrigerate the tray for at least 30 minutes until the bites are firm and set.
- After chilling, the bites should feel firm and slightly chewy when pressed. Serve directly from the fridge or at room temperature. Store any leftovers in an airtight container in the fridge for up to a week, or freeze for longer storage. Enjoy this simple, comforting treat whenever you need a quick chocolate fix!
Pro tips for perfect bites
- Bolded mini-head: Use a gentle heat when melting chocolate to avoid burning and preserve silky texture.
- Bolded mini-head: Chill your mixture briefly before rolling to prevent sticking and make handling easier.
- Bolded mini-head: Add a splash of vanilla or sea salt to enhance depth and contrast in flavor.
- Bolded mini-head: Incorporate nuts or dried fruit last, folding in gently for even distribution without breaking bits.
- Bolded mini-head: Press bites firmly on the tray to help them set better and maintain shape.
- Bolded mini-head: Store in airtight containers to keep bites fresh and prevent drying out, especially in humid weather.
- Bolded mini-head: For a smoother texture, pulse oats in a food processor before mixing—this softens the bite.
Common mistakes and how to fix them
- FORGOT to chill: Bites may be too soft; fix by refrigerating longer or adding a touch more oats.
- DUMPED too much liquid: Mixture is runny; add more oats or cocoa powder to thicken.
- OVER-TORCHED chocolate: It becomes bitter; melt on low heat or in short bursts, stirring constantly.
- SKIPPED cooling step: Bites won’t set properly; always refrigerate at least 30 minutes before serving.
Quick Fixes for Common Issues
- When mixture is too dry, splash in a bit more honey or nut butter.
- If bites are too soft, refrigerate longer or add more oats to firm up.
- Splash melted chocolate with a tiny bit of oil if it seizes or becomes grainy.
- Patch cracks by pressing mixture back together with damp fingers before chilling.
- Shield delicate toppings with a light dusting of cocoa powder or chopped nuts to hide imperfections.
Prep, store, and reheat tips
- You can prepare the mixture a day in advance; keep it covered in the fridge to let the flavors meld and the texture firm up.
- Store the assembled bites in an airtight container in the fridge for up to a week; they stay chewy and chocolatey, just a bit more melded.
- For longer storage, freeze the bites on a baking sheet until solid, then transfer to a freezer bag; they’ll keep for up to a month and can be eaten straight from frozen, with a slight chill and crunch.
- Refrigerated bites should be served cold or at room temperature for the best texture—allow them to sit out for 10 minutes if chilled too long.
- To reheat slightly, briefly warm in a low oven (around 150°C/300°F) for a few minutes until just softening—watch for melting chocolate or over-softening.
Top questions about no bake bites
1. Can I make these vegan?
Yes, you can make them vegan by using plant-based chocolate and swapping honey for maple syrup or agave. The texture remains chewy, but the flavor might be slightly different, more earthy and less rich.
2. Are these dairy-free options possible?
Absolutely. Use dairy-free chocolate and a nut or seed butter that’s vegan-friendly. They might be a little less creamy but still satisfy that chocolate craving.
3. What if the mixture is too dry or too sticky?
If your mixture feels too dry and crumbly, add a bit more nut butter or honey, one teaspoon at a time. For too sticky, sprinkle in extra oats or cocoa powder to balance it out.
4. Can I refrigerate or freeze them?
Yes, refrigerating for an hour or freezing for 15 minutes helps the bites firm up. They become easier to handle and hold their shape better.
5. How long do they keep?
You can store these bites in an airtight container in the fridge for up to a week. For longer, freeze them and enjoy within a month. Thaw in the fridge or at room temperature for about 10 minutes before eating.
6. Can I customize the add-ins?
Yes, you can add dried fruits, chopped nuts, or seeds. They add texture and flavor bursts. Just fold them in gently so they don’t break apart during mixing.
7. What if my melted chocolate seizes?
If the chocolate seizes or becomes grainy, add a teaspoon of oil or warm it gently on low heat, stirring constantly until smooth again.
8. How do I shape the bites?
Use a small scoop or your hands to form the bites. Press firmly to ensure they hold together, especially if the mixture is soft.
9. They crack when I handle them—what now?
If your bites are cracking or breaking when you handle them, chill them longer to help set the structure. A quick fridge session often helps fix this.
10. How can I boost flavor?
For a richer flavor, add a pinch of sea salt or vanilla extract. These small tweaks enhance the chocolate and make the bites taste more complex.
These no-bake chocolate oat bites are more than just a quick treat; they’re a reminder that simple ingredients can create comfort with minimal fuss. When the day’s chaos settles, they offer a quiet moment of satisfaction, a little reward for keeping things together.
In the end, it’s about embracing the mess and the small victories—like pulling a tray of glossy, chewy bites from the fridge. They’re honest, imperfect, and always there when you need a sweet, homemade moment that doesn’t demand much time or effort.

 Hello, I’m Emily Richardson, the heart and soul behind Playing with Flavors. Cooking isn’t just a hobby for me – it’s a passion that I’ve cultivated for years, and it’s become the driving force of my life.
From the kitchen of my cozy café to the pages of this blog, every dish I create is a reflection of my love for food and the joy it brings to people.
Hello, I’m Emily Richardson, the heart and soul behind Playing with Flavors. Cooking isn’t just a hobby for me – it’s a passion that I’ve cultivated for years, and it’s become the driving force of my life.
From the kitchen of my cozy café to the pages of this blog, every dish I create is a reflection of my love for food and the joy it brings to people.


