
This no-bake chocolate peanut clusters recipe is a little rebellion against the usual fuss of baking. It’s about reclaiming that childhood joy of popping sweet, salty bites into your mouth without waiting around for the oven to heat up. But here’s the twist—using good quality chocolate and fresh peanuts makes this treat feel indulgent, not just simple.
I like to think of this as a kind of edible nostalgia, where crunch meets melt-in-your-mouth richness. It’s perfect for when you want something sweet and satisfying but don’t want to mess with a mixer or oven. Plus, it’s quick enough to whip up on a whim, which is a relief when the craving hits hard and you need a fix fast.
This recipe is about reclaiming the joy of childhood treats, but with a grown-up twist—using premium ingredients and modern techniques to elevate simple comfort snacks into something truly memorable.
Nostalgic Sweet-Salty Bites
- This recipe takes me back to childhood, but with a grown-up twist I never saw coming.
- I love how quickly these come together, especially when the sweet tooth demands instant satisfaction.
- There’s a quiet pride in making something so simple yet utterly addictive without turning on the oven.
- Whenever I share these, they disappear faster than I can say ‘peanut butter,’ and that’s the best compliment.
- These clusters remind me that sometimes, the easiest treats are the most memorable.
Inspiration Behind the Clusters
This recipe sprouted from a lazy afternoon when I needed a quick, satisfying treat that didn’t require any fuss. I remembered how my grandma used to toss together nuts and chocolate during her busy mornings, and I wanted to capture that simple, cozy feeling. Over time, I tweaked her method with better ingredients and a little more precision, but the essence remains the same—a no-fail way to indulge without turning on the oven. Now, whenever I make these clusters, I think of those quiet afternoons and the joy of effortless comfort food.
Trivia and Historical Tidbits
- These clusters likely originated as a practical treat during wartime shortages, where simple ingredients combined to create something satisfying.
- The concept of combining chocolate and nuts in bite-sized pieces dates back to early 20th-century candy innovations in America.
- No-bake confections gained popularity during the Great Depression, as they required minimal ingredients and no oven time.
- Peanut clusters became a favorite in Southern U.S. households, thanks to the region’s abundant peanut farming and resourcefulness.
Ingredient breakdown
- Dark chocolate: I prefer a good quality bar for that rich, deep cocoa flavor. Swap with milk chocolate if you want it sweeter and creamier, but you’ll lose some intensity.
- Peanuts: Roasted, salted peanuts give the best crunch and flavor. Unsalted or raw peanuts work—but toast them lightly first to boost their aroma and add a smoky note.
- Honey or maple syrup: I use honey for a sticky sweetness that binds everything together. Maple syrup adds a caramel undertone—adjust quantity to avoid overly sticky clusters.
- Butter: A little butter helps melt everything smoothly and adds richness. If you’re dairy-free, coconut oil works, but it’ll give a subtler coconut scent.
- Vanilla extract: Just a splash enhances the chocolate and peanut flavor combo. Skip if you want a more straightforward, no-frills bite.
- Sea salt: A pinch on top heightens sweetness and adds a pleasant contrast. Use flaky sea salt for a delicate crunch or regular fine salt in a pinch.
- Optional add-ins: Dried cranberries or shredded coconut can add texture and flavor—toss them in after melting for extra layers.
Spotlight on key ingredients
Dark chocolate:
- I prefer a good quality bar for that rich, deep cocoa flavor. Swap with milk chocolate if you want it sweeter and creamier, but you’ll lose some intensity.
- Peanuts: Roasted, salted peanuts give the best crunch and flavor. Unsalted or raw peanuts work—but toast them lightly first to boost their aroma and add a smoky note.
Sweeteners and salt:
- Honey or maple syrup: I use honey for a sticky sweetness that binds everything together. Maple syrup adds a caramel undertone—adjust quantity to avoid overly sticky clusters.
- Sea salt: A pinch on top heightens sweetness and adds a pleasant contrast. Use flaky sea salt for a delicate crunch or regular fine salt in a pinch.
Notes for ingredient swaps
- Dairy-Free: Use coconut butter or vegan chocolate. Expect slightly different melt and flavor, but still rich.
- Nut-Free: Swap peanuts for roasted pumpkin seeds or sunflower seeds. Keep an eye on texture and oil content.
- Sweetener Swap: Replace honey with agave syrup or brown rice syrup. Adjust quantity for desired stickiness.
- Chocolate Type: Milk chocolate for a creamier, sweeter bite. Dark chocolate for depth and less sweetness.
- Salt: Use flaky sea salt for a delicate crunch. Regular fine salt works, but less fancy.
- Add-ins: Dried cranberries or shredded coconut can be mixed in after melting, adding chew or texture.
- Peanuts: Raw or unsalted peanuts can be toasted lightly first for more flavor, but they’ll be less crunchy initially.
Equipment & Tools
- Medium glass bowl: For melting the chocolate evenly without overheating.
- Silicone spatula: To stir and fold ingredients smoothly.
- Parchment paper: To prevent sticking and for easy removal after setting.
- Baking sheet: To hold clusters as they set and cool.
- Microwave: For quick, controlled melting of chocolate.
Step-by-step guide to clusters
- Gather your equipment: a medium glass bowl, a silicone spatula, parchment paper, and a baking sheet. The bowl is for melting, spatula for mixing, and parchment for easy release.
- Chop the chocolate: Break or chop your chocolate into small, uniform pieces. About 1 cup (175g). This helps it melt evenly and quickly.
- Melt the chocolate: Place the chopped chocolate in the microwave-safe bowl. Microwave in 30-second bursts, stirring after each, until smooth and glossy. Usually takes about 1-1.5 minutes total.
- Add peanuts and sweetener: Once melted, fold in 1 cup (150g) roasted peanuts and 1-2 tablespoons honey or maple syrup. Mix well until evenly coated and sticky.
- Scoop clusters: Using a teaspoon or small cookie scoop, drop spoonfuls onto the prepared parchment-lined sheet. Space them about 2 inches apart.
- Set the clusters: Let them sit at room temperature for about 30 minutes. For quicker setting, refrigerate for 15-20 minutes until firm and shiny.
- Check for doneness: The clusters should be hard to the touch, shiny, and slightly crack when gently pressed. The chocolate should be set and peanuts embedded.
- Finish and store: Once cooled, transfer to an airtight container. Store at room temperature for up to a week, or keep in the fridge for longer freshness.
- Optional: For a fancy touch, sprinkle a tiny pinch of sea salt on top just before they set for contrast and extra flavor.
Allow clusters to rest at room temperature or refrigerate until firm. Once set, gently lift off the parchment and store in an airtight container. Serve straight from the fridge or at room temperature for best texture and flavor.
How to Know It’s Done
- Chocolate is fully melted and smooth, with no lumps or grains.
- Clusters are firm, shiny, and hold shape without spreading apart.
- Peanuts are evenly coated and embedded in the chocolate, with no sticky residue.
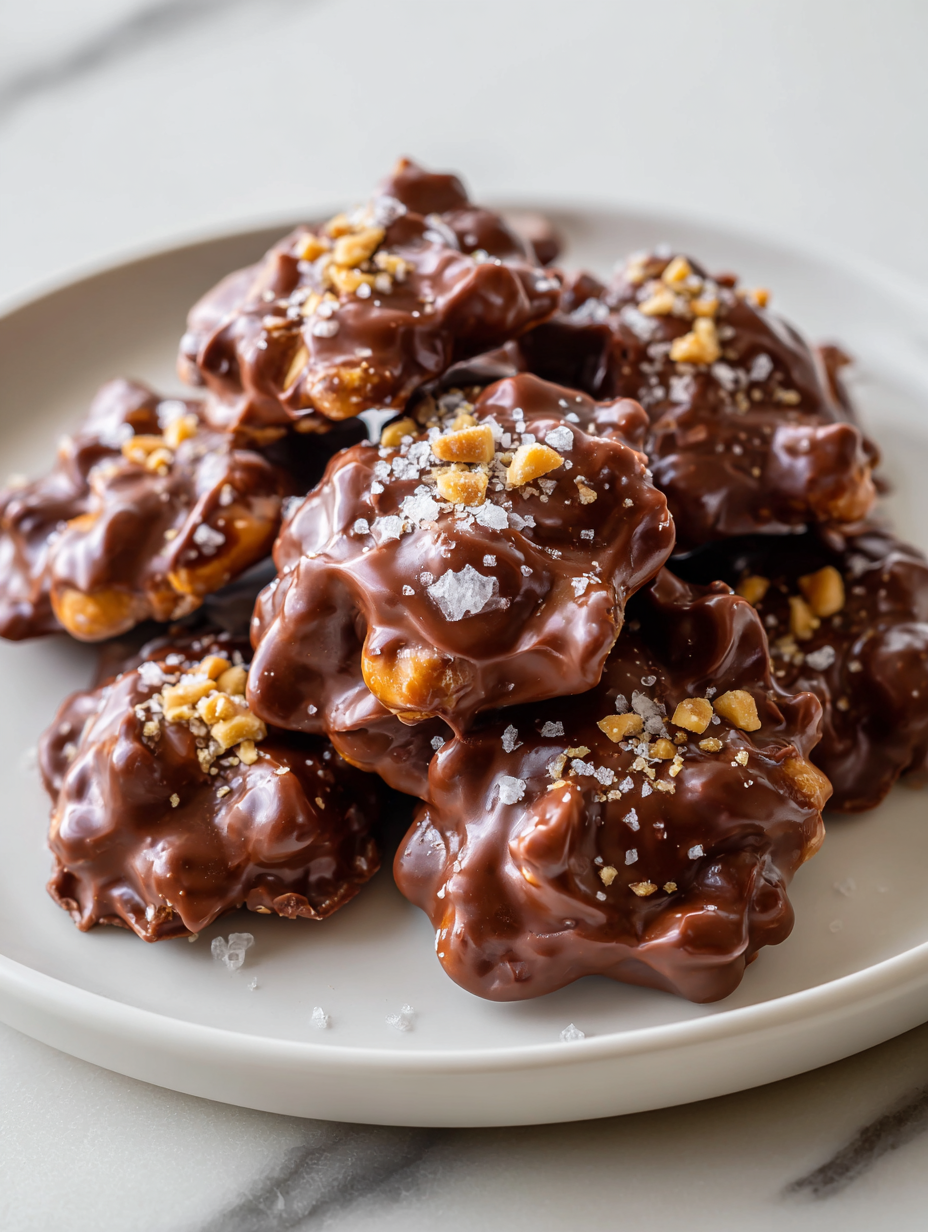
Nostalgic Chocolate Peanut Clusters
Ingredients
Equipment
Method
- Place the chopped dark chocolate in a medium glass bowl.
- Microwave the chocolate in 30-second bursts, stirring well after each, until the chocolate is smooth and glossy.
- Stir in the butter and vanilla extract into the melted chocolate until fully combined and shiny.
- Fold in the roasted peanuts and honey or maple syrup, mixing until everything is evenly coated and sticky.
- Using a teaspoon or small cookie scoop, drop spoonfuls of the mixture onto a parchment-lined baking sheet, spacing them about 2 inches apart.
- Sprinkle a tiny pinch of sea salt on top of each cluster for added flavor contrast.
- Let the clusters sit at room temperature for about 30 minutes to set, or refrigerate for 15-20 minutes for quicker firmness.
- Once firm, gently lift the clusters off the parchment paper and enjoy immediately, or store in an airtight container at room temperature for up to a week.
Notes
Pro Tips for Perfect Clusters
- Bolded mini-head: Use high-quality chocolate for a glossy, smooth finish that melts evenly.
- Bolded mini-head: Toss peanuts in a little oil before roasting to boost flavor and add crunch.
- Bolded mini-head: Microwave in short bursts and stir frequently to prevent burning and ensure silky melting.
- Bolded mini-head: Add a pinch of sea salt on top right before the clusters set for a flavor pop.
- Bolded mini-head: Chill clusters in the fridge for 15 minutes for a faster, crunchier finish.
- Bolded mini-head: Use a small cookie scoop for uniform clusters that look professional.
- Bolded mini-head: For extra shine, gently warm the chocolate slightly before coating the nuts.
Common mistakes and how to fix them
- FORGOT to temper chocolate → use low heat and stir constantly to prevent seizing.
- DUMPED too much salt on top → sprinkle sparingly for balanced flavor, not overpowering.
- OVER-TORCHED the chocolate → remove from heat immediately when smooth; residual heat will finish melting.
- MISSED the cooling step → let clusters set completely at room temperature or in the fridge to firm up properly.
Quick Fixes and Pantry Swaps
- When chocolate seizes, splash in a teaspoon of vegetable oil to loosen it up.
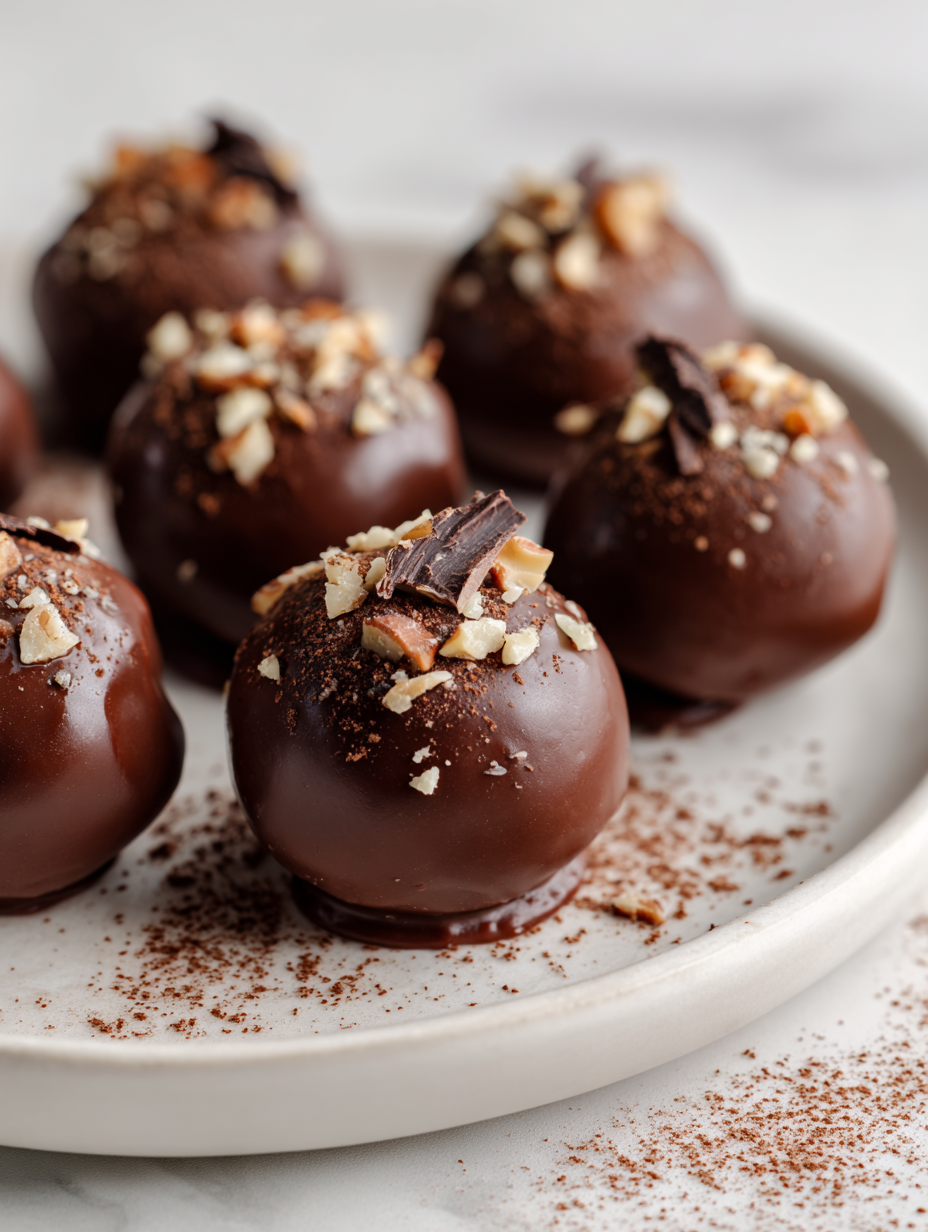
- If clusters are too sticky, patch with a quick sprinkle of cocoa powder before shaping.
- Splash a few drops of water on overheated chocolate to stop it from burning and become grainy.
- DUMPED too much salt on top? Shield with a tiny pinch next time for balanced flavor.
- Rescue dull flavor by adding a splash of vanilla or a pinch of flaky sea salt for contrast.
Prep, store, and reheat tips
- Prep the clusters by melting the chocolate and coating the peanuts; these can be made a day in advance for convenience.
- Store the finished clusters in an airtight container at room temperature for up to a week, preserving their glossy shine and crunch.
- For longer storage, refrigerate for up to two weeks; the cold keeps them firm but may dull the shine slightly.
- Reheat briefly in the microwave at 10-15 second intervals just until slightly softened—watch for melting edges and a warm aroma.
Top questions about peanut clusters
1. Can I use any chocolate?
Use good quality chocolate for a rich, smooth melt. Cheap chocolate can seize or be grainy.
2. Can I substitute the honey?
Yes, you can swap honey for maple syrup or agave. Expect a slightly different sticky texture.
3. Can I use raw peanuts?
Roasted, salted peanuts give the best crunch and flavor. Raw peanuts will need to be toasted first.
4. How long do these last?
Refrigerate the clusters for up to two weeks. Bring to room temp for the best texture before serving.
5. How do I melt the chocolate properly?
Microwave in short bursts, stirring often, until smooth. Overheating can cause the chocolate to seize.
6. Should I add salt?
Adding a pinch of sea salt on top before they set enhances flavor and creates a delightful contrast.
7. My clusters are too soft, what now?
If the clusters are too sticky, chill them in the fridge for 15 minutes to firm up.
8. How do I get shiny clusters?
For a shiny finish, gently warm the melted chocolate before coating the peanuts. Don’t overheat.
9. Can I make the clusters uniform?
Use a small cookie scoop to ensure uniform size and shape for each cluster.
10. My melted chocolate is grainy, how can I fix it?
If chocolate seizes, splash in a teaspoon of vegetable oil and stir until smooth again.
Making these no-bake chocolate peanut clusters reconnects me to simpler times, when quick treats meant joy and comfort. The rich chocolate, toasted peanuts, and touch of sea salt create a balance that’s both nostalgic and indulgent. It’s a small, satisfying moment you can whip up anytime—no fuss, no oven needed.
Whenever I stash a batch in the fridge, I feel a little bit of that childhood thrill again, knowing I can reach for something sweet and crunchy in just minutes. These clusters aren’t just a treat—they’re a reminder that sometimes, the best things are the easiest to make, and the most memorable are the simplest.
 Hello, I’m Emily Richardson, the heart and soul behind Playing with Flavors. Cooking isn’t just a hobby for me – it’s a passion that I’ve cultivated for years, and it’s become the driving force of my life.
From the kitchen of my cozy café to the pages of this blog, every dish I create is a reflection of my love for food and the joy it brings to people.
Hello, I’m Emily Richardson, the heart and soul behind Playing with Flavors. Cooking isn’t just a hobby for me – it’s a passion that I’ve cultivated for years, and it’s become the driving force of my life.
From the kitchen of my cozy café to the pages of this blog, every dish I create is a reflection of my love for food and the joy it brings to people.


