
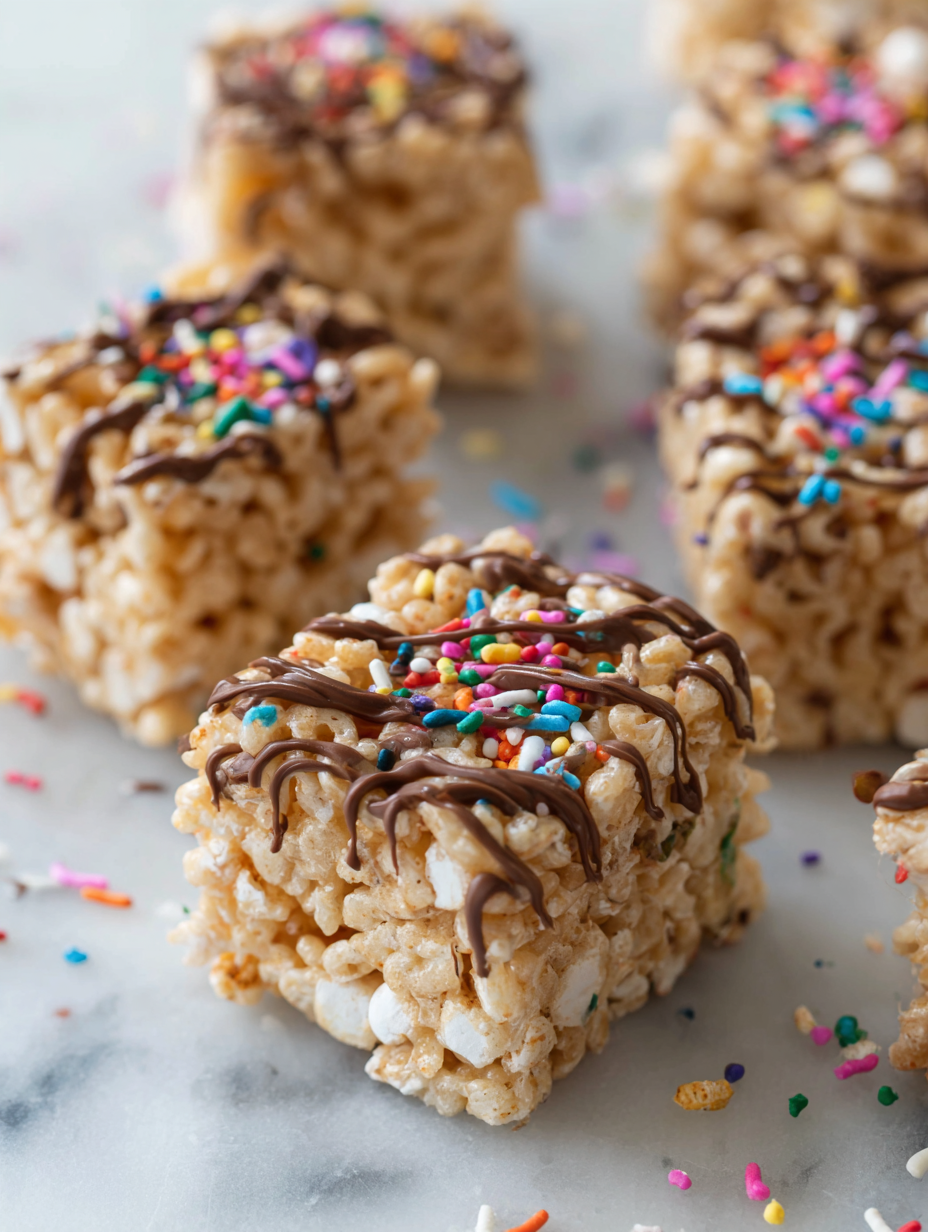
This no-bake Rice Krispie bites recipe is my answer to those afternoons when I crave something sweet but want to avoid turning on the stove. It’s a quick fix, a little nostalgic, and surprisingly flexible—perfect for last-minute cravings or when I need a break from more involved baking projects.
I love how these bites remind me of childhood, yet they’re simple enough for grown-ups to enjoy with a cup of tea or coffee. They come together in minutes, with just a handful of ingredients, and you can tweak them to suit all kinds of dietary needs without losing that familiar crunch and sweet chewiness.
Sometimes, I find myself making a batch just to keep in the fridge—those little bites are oddly comforting, like a tiny piece of the past, packed into something that’s almost too easy to make.
This recipe is about reclaiming childhood comfort food in a way that’s quick, no-fuss, and adaptable to any dietary need, with a focus on how simple ingredients can turn into a nostalgic treat without turning on the stove.
Rediscovering Childhood Comfort
- Making these bites takes me back to lazy Sunday afternoons in my childhood kitchen.
- I love how a handful of ingredients can turn into something so satisfyingly crunchy and sweet, no oven needed.
- These bites became my go-to when I needed a quick, no-mess treat that still feels like a little indulgence.
- Every time I make them, I’m reminded how simple ingredients can create comfort—I keep coming back to this recipe.
The story behind this recipe
- This recipe came together on a particularly chaotic afternoon when I needed a quick, satisfying snack that wouldn’t require turning on the stove. I remembered how my grandmother used to toss together rice cereal and marshmallows during frantic holiday mornings, and I decided to tweak that for a simpler, no-bake version. It’s one of those recipes that feels like a little secret—easy, forgiving, and endlessly adaptable.
- The moment I pressed the mixture into the pan and saw it set so quickly, I felt a little spark of relief—no fuss, no heat, just pure, crunchy comfort in every bite. It’s become my go-to when I want something sweet but don’t want to mess around with oven timing or complicated ingredients. Plus, it’s a recipe I can hand over to my kids or friends, and they always seem surprised how something so simple can turn out so good.
- heading: The story behind this recipe
Historical & Cultural Tidbits
- This recipe harks back to the early 20th century when Rice Krispies first hit the shelves, becoming a staple for quick, fun treats.
- Marshmallow and cereal combinations like this gained popularity during wartime when ingredients were limited but creativity was high.
- The no-bake aspect made it a favorite in school cafeterias and busy households, offering instant gratification without heat.
- Over the years, variations have popped up worldwide, each adding local flavors or ingredients, but the classic remains a nostalgic icon.
Key Ingredients Breakdown
- Marshmallows: I love how gooey and sweet they get when melted—use fresh, soft marshmallows for the best stretch. Skip the old ones; they’ll be tough to melt evenly.
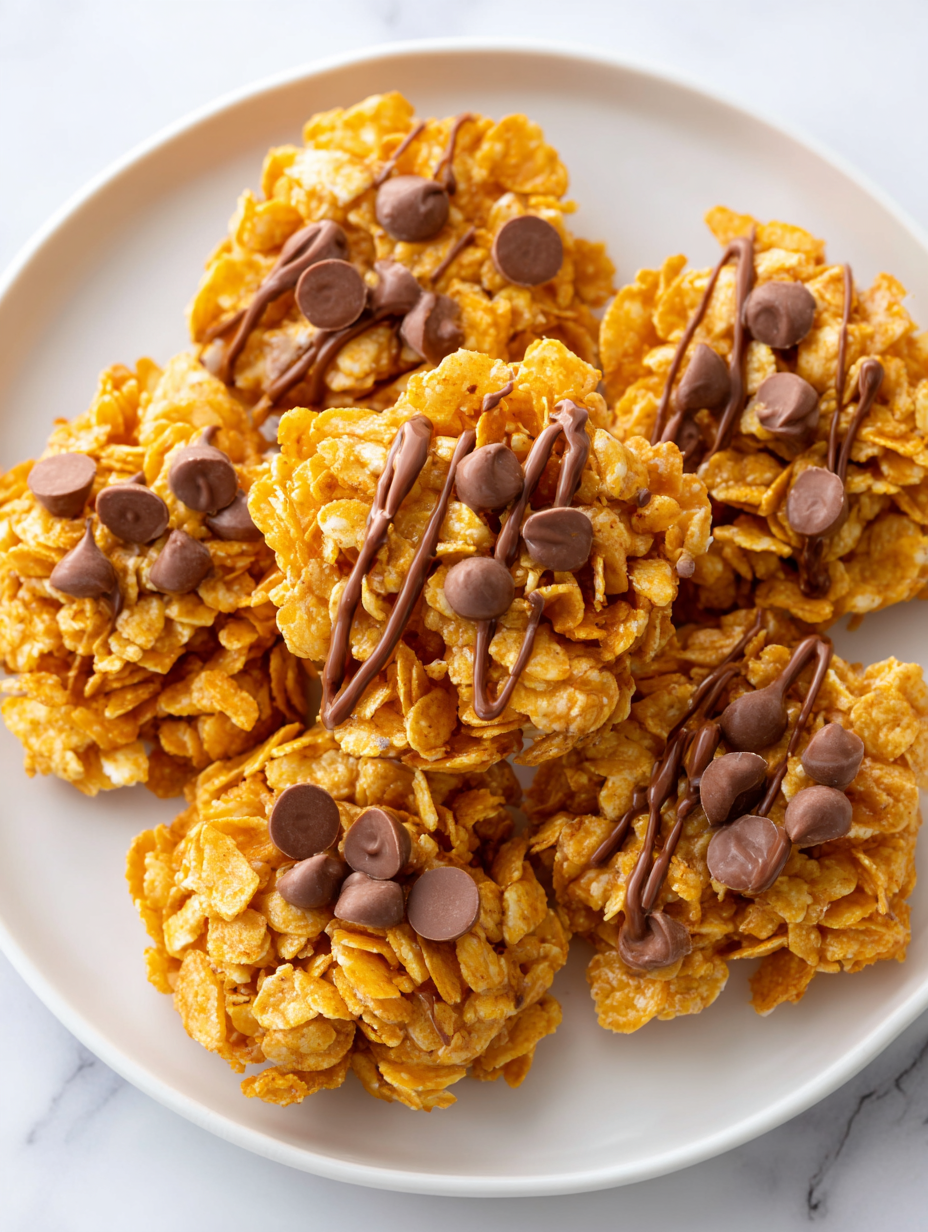
- Rice Krispies: They provide that signature crunch I crave. For a different texture, try adding a handful of toasted coconut or chopped nuts—just fold them in at the end.
- Butter: It gives richness and helps everything bind. If you want a dairy-free version, coconut oil works but will add a subtle tropical note.
- Vanilla extract: A splash brightens the sweetness and adds depth. Skip it if you prefer a more neutral flavor, or try almond extract for a twist.
- Optional add-ins: Chocolate chips or dried fruit can elevate these bites. Mix in melted dark chocolate for a richer flavor or dried cranberries for a tart kick—think about how you want to balance the sweetness.
- Salt: Just a pinch enhances all the flavors. A tiny sprinkle before pressing helps bring out the marshmallow’s oozy, smoky aroma.
Spotlight on key ingredients
Marshmallows:
- I love how gooey and sweet they get when melted—use fresh, soft marshmallows for the best stretch. Skip the old ones; they’ll be tough to melt evenly.
- Rice Krispies: They provide that signature crunch I crave. For a different texture, try adding a handful of toasted coconut or chopped nuts—just fold them in at the end.
- Butter: It gives richness and helps everything bind. If you want a dairy-free version, coconut oil works but will add a subtle tropical note.
Rice Krispies:
- The cereal’s snap and crunch are what make these bites addictive. Toasted slightly, they develop a richer aroma and a sturdier crunch.
- Cereal Variations: Adding dried fruits or seeds can add flavor layers and texture contrast—think tart cranberries or crunchy sunflower seeds.
Notes for ingredient swaps
- Dairy-Free: Coconut oil replaces butter for richness, but expect a slightly tropical aroma and softer texture.
- Vegan Marshmallows: Use vegan marshmallows or melted coconut cream with a touch of agave—still gooey, just different flavor notes.
- Gluten-Free: Ensure your cereal is labeled gluten-free; most rice cereals are naturally gluten-free, but check packaging for cross-contamination.
- Sweetener Swap: Honey or agave syrup can replace marshmallows for a different sweetness and slightly different chewiness.
- Flavor Boost: A teaspoon of cinnamon or a splash of vanilla extract adds warmth or brightness—try it if you want a twist.
- Crunch Variations: Toasted coconut flakes, chopped nuts, or dried fruit stirred in after melting add texture and flavor diversity.
Equipment & Tools
- Large mixing bowl: To hold and mix dry ingredients or toppings.
- Saucepan: To melt butter and marshmallows gently.
- Spatula: To stir and fold ingredients without breaking the cereal.
- 20×20 cm (8×8 inch) square pan: To shape and set the mixture into bites.
- Parchment paper: To prevent sticking and for easy removal of the set mixture.
- Sharp knife: To cut the set mixture into bites cleanly.
Step-by-step guide to rice krispie bites
- Gather your equipment: a large mixing bowl, a saucepan, a spatula, a 20×20 cm (8×8 inch) square pan, and parchment paper. Line the pan with parchment, leaving overhang for easy removal.
- In the saucepan, melt 3 tablespoons (45g) of butter over low heat. Keep the heat gentle to prevent burning and stir until fully melted, about 2 minutes. Add 10 oz (280g) of marshmallows and stir until completely melted and glossy, about 3 minutes. Smell the sweet, smoky aroma filling your kitchen.
- Remove from heat. Quickly add 4 cups (120g) of Rice Krispies cereal to the marshmallow mixture. Gently fold with a spatula until evenly coated. Watch for the cereal to turn shiny and coated, indicating readiness.
- Transfer the mixture into your prepared pan. Using the spatula or your fingers (dampened slightly to prevent sticking), press the mixture into an even layer. Be firm but gentle; you want it compact but not crushed. The mixture should crackle slightly as you press. If it feels loose, add a few more marshmallows or press harder.
- Let it sit at room temperature for about 30 minutes to set. If you’re in a hurry, pop it in the fridge for 15 minutes—just watch for condensation that can make the surface sticky.
- Once set, lift the block out of the pan using the parchment overhang. Place on a cutting board and cut into bite-sized squares or rectangles with a sharp knife. The edges should be clean and firm, with a slight shine from the marshmallow coating. If sticky, dust the knife with a little cornstarch or spray with non-stick spray.
- Serve immediately or store in an airtight container. These are best enjoyed within 2 days for maximum crunch and chewiness. For storage, keep at room temperature or in the fridge if you live in a hot climate. Reheat briefly in the microwave if you want the marshmallow to soften again—watch for steam and sweet aroma.
Let the bites rest at room temperature for 30 minutes to set, then cut into squares. Store in an airtight container at room temperature or in the fridge. Serve directly from the fridge for a firmer bite or at room temp for chewiness.
How to Know It’s Done
- Marshmallow mixture is smooth, shiny, and fully melted before removing from heat.
- Cereal is evenly coated and mixture holds together when pressed into pan.
- Edges are clean-cut and surface is glossy but firm after setting.
No-Bake Rice Krispie Bites
Ingredients
Equipment
Method
- Line your square pan with parchment paper, leaving overhang on the sides for easy removal.
- In a saucepan over low heat, melt the butter gently, stirring occasionally until it’s fully melted and starts to smell buttery and fragrant, about 2 minutes.
- Add the marshmallows to the melted butter, stirring continuously until they’re completely melted and glossy, about 3 minutes. The mixture will bubble softly and turn smooth and shiny.
- Remove the saucepan from heat and immediately add the Rice Krispies cereal. Gently fold with a spatula until the cereal is evenly coated with the melted marshmallow mixture, creating a shiny, sticky mass.
- Transfer the mixture into your prepared pan. Use the spatula or dampened fingers to press the mixture firmly into an even layer, making sure it’s compact and smooth on top.
- Let the mixture sit at room temperature for about 30 minutes to set, or place in the fridge for 15 minutes for quicker setting. It should feel firm and slightly sticky but hold together when pressed.
- Once set, lift the block out of the pan using the parchment overhang. Place it on a cutting board and cut into bite-sized squares with a sharp knife, pressing lightly and wiping the knife clean between cuts for sharp edges.
- Arrange the bites on a plate and enjoy immediately or store in an airtight container at room temperature for up to 2 days for maximum crunch. For longer storage, freeze wrapped bites for up to a month and thaw briefly before serving.
Notes
Pro tips for perfect Rice Krispie bites
- Use low heat: Melt marshmallows gently to prevent burning and ensure a smooth, oozy texture.
- Fold, don’t stir: Gently fold cereal into melted marshmallows to keep some crunch and avoid crushing the cereal.
- Press firmly: When shaping, press mixture into the pan with the back of a spatula or damp hands for an even, compact layer.
- Chill for setting: Let the bites rest at room temp or in the fridge to firm up fully; don’t skip this step.
- Cut with a sharp knife: For clean edges, slightly warm the knife or dust with cornstarch before slicing.
- Avoid moisture: Keep ingredients dry and store bites in an airtight container to maintain crunch and prevent sogginess.
- Add-ins last: Fold in extras like nuts or dried fruit after melting to prevent soggy bites and keep texture intact.
Common mistakes and how to fix them
- FORGOT to evenly coat marshmallows → Use low heat and stir constantly for smooth melting.
- DUMPED cereal into hot mixture → Fold gently to maintain crunch and avoid crushing cereal.
- OVER-TORCHED marshmallow mix → Remove from heat immediately once melted to prevent burning.
- MISSED setting time → Let the bites rest fully to firm up and avoid crumbling when cut.
Quick fixes and pantry swaps
- When marshmallows seem stuck, splash a tiny bit of water to loosen them.
- If mixture is too sticky, patch with a sprinkle of cornstarch on your hands.
- Splash some hot water on the knife if cutting feels sticky and uneven.
- Shield from humidity by sealing bites airtight; humidity makes them lose crunch.
- When in doubt, swap cereal for toasted oats for a nuttier crunch.
Prep, store, and reheat tips
- You can prepare the mixture up to a day in advance. Keep it covered in the fridge to prevent it from drying out, and let it soften slightly at room temperature before pressing into the pan.
- Stored in an airtight container at room temperature, these bites stay crunchy for about 2 days. After that, they tend to soften and lose their snap.
- For longer storage, freeze the bites for up to 1 month. Wrap tightly in plastic wrap and then place in a freezer bag. Thaw at room temperature for about 15 minutes before serving.
- Reheating isn’t typically necessary, but if you prefer softer bites, microwave for 10-15 seconds until slightly warm and gooey. Watch for steam and a sweet, toasted aroma.
Top questions about Rice Krispie Bites
1. How do I get the marshmallows to melt evenly?
Use fresh marshmallows for the best melt and stretch, avoiding old, stale ones that won’t melt smoothly.
2. What’s the best way to melt marshmallows without burning them?
Stir constantly over low heat to prevent burning and ensure a smooth, glossy mixture.
3. How do I make sure the bites stick together?
Press the mixture firmly into the pan using a spatula or damp hands for an even layer that holds together.
4. How long should I wait before cutting the bites?
Let the bites rest at room temperature for at least 30 minutes to fully set before cutting.
5. How should I store the Rice Krispie bites?
Store in an airtight container at room temperature for up to 2 days for maximum crunch and freshness.
6. Can I freeze these bites?
You can freeze them for up to 1 month. Wrap tightly, then thaw briefly at room temperature before serving.
7. What if the bites are sticky when I cut them?
If they feel too sticky when cutting, warm the knife slightly or dust it with cornstarch to get clean slices.
8. Can I make these dairy-free?
For a dairy-free version, replace butter with coconut oil, but expect a softer, slightly tropical-flavored bite.
9. How can I add extra flavor or texture?
Adding chopped nuts or dried fruit after melting keeps the texture crunchy and prevents sogginess.
10. What if my marshmallows won’t melt properly?
If marshmallows are too sticky or not melting well, add a splash of water or low heat, then stir gently.
Making these no-bake Rice Krispie bites reconnects me with simple, honest childhood pleasures. There’s something grounding about the crunch, the sweetness, and the quick assembly that makes them perfect for whenever I need a little comfort or a quick sweet fix.
They’re not flashy, but they’re honest and adaptable—an everyday treat that feels like a small victory in the kitchen. Sometimes, that’s exactly what I need to get through a busy day or a nostalgic afternoon.

 Hello, I’m Emily Richardson, the heart and soul behind Playing with Flavors. Cooking isn’t just a hobby for me – it’s a passion that I’ve cultivated for years, and it’s become the driving force of my life.
From the kitchen of my cozy café to the pages of this blog, every dish I create is a reflection of my love for food and the joy it brings to people.
Hello, I’m Emily Richardson, the heart and soul behind Playing with Flavors. Cooking isn’t just a hobby for me – it’s a passion that I’ve cultivated for years, and it’s become the driving force of my life.
From the kitchen of my cozy café to the pages of this blog, every dish I create is a reflection of my love for food and the joy it brings to people.


